Use this guide to create a project, define its identity and structure, configure project-specific tools and integrations, add project participants, export records, and hide completed work. Shared catalogs and defaults belong in Organization Settings.
Start here
- Create a project: Create and identify the project.
- Reuse a job as a starting point: Use a project as a template.
- Organize drawings and work: Configure Drawing Areas and Sub Projects.
- Add locations and the team: Configure locations and people.
- Set project-specific tools: Configure project tools and integrations.
- Finish or archive setup: Export records or hide the project.
- Remove a project created by mistake: Delete a project.
- A control is missing: Troubleshoot project setup.
Create and identify
Create and identify the project
- Open All Projects.
- On web, select New Project. To start a template instead, open New Project Options next to that button and select New Template Project. On mobile or native, open the actions menu and select Add Project or Add Template Project.
- Enter the required Project Name and optional Project Number.
- When you're creating a regular project and the organization already has at least one template, optionally choose a Template. The placeholder is None. Creating a template project hides that picker — templates don't copy from other templates.
- If an accounting integration is connected, choose whether to Exclude from [integration name] Sync.
- Save. Constructable opens the new project automatically.
- Open Project Settings → General → General Project Settings → Edit.
- Confirm Name, Project Number, and Project Cover Image, then select Save Project Settings.
- On Project Info, edit the address card and add Stage, Address 1, Address 2, City, State, and Postal Code as needed. Stage picks from Organization Settings → Project Stages. If your role has Update organization-level settings, you can add a stage from that picker and it lands in the organization catalog.
- Edit the date cards separately — Start, Completion, and Warranty — and save each with Save Project Info.
- Start: Estimated Start Date, Actual Start Date
- Completion: Estimated Completion, Actual Completion, Substantial Completion
- Warranty: Warranty Start, Warranty End
Only Project Name is required. The name-and-number combination must be unique in the organization. The cover image accepts JPEG or PNG and recommends 1920 × 1080 pixels.
On All Projects table view, those dates can appear as optional columns under Project Status: Start Date, Actual Completion Date, Substantial Completion Date, Warranty Start Date, and Warranty End Date. They start hidden; turn them on from the column picker.
A new project starts with default project Cost Codes enabled and no selected Budget Type, unless you copied those choices from a template. Financial setup is a separate task after that.
Card view on All Projects groups work into Recent, Active, Templates, and Hidden. Each card shows the cover photo, the project's stage when one is set, the name with your unread notification count, the project number, and the city and state — or No address set. A template card carries a Template badge. When your organization has project management tools, the bottom of the card counts Open RFIs and Open submittals so you can see which job needs attention before you open it. Recent on this page skips templates; if you just visited one, look under Templates.
Use a project as a template
A template is a real project you keep around so the next job doesn't start empty. Mark one when the cost codes, folders, lists, meetings, and approval paths are the shape you want every similar job to inherit — then create new projects from it instead of rebuilding that setup by hand.
To turn an existing project into a template:
- Open Project Settings → General → General Project Settings.
- Enable This is a template project. The toast reads This project is now a template.
- The project moves to the Templates section on All Projects.
Turn the toggle off when it should be a live job again. The toast reads This project is no longer a template.
To start a live job from a template, create a regular project and pick that template in Template. The new project is not itself a template, and it keeps Budget Type at none even when the source had a budget.
What copies into the new project:
- Enabled project cost codes
- Bid packages and scopes, reset to open, without bids
- Meeting structure, without finished-meeting notes
- Inspection structure, without inspection results
- Lists (the list itself, not the items), plus any custom field layouts on those lists
- Incident types, which record types are on, and the form layouts on those types — not the incident records
- Active work plan types and their custom field layouts — not the work plans themselves
- Folders and documents you can access, following the same sharing rules as importing folders
- Current Project Team memberships, people settings, locations, and drawing tags
- Financial settings, invoice approval workflow, RFI settings, Daily Log settings, and Submittal settings including approval templates
What does not copy: list items, bids, inaccessible or private folders, archived or deleted source rows, and budget line amounts.
Creating either kind of project still needs Create new projects with Level of project access → All Projects. Marking a project as a template needs Update existing projects, hide projects.
You now have a reusable starting point, and the next project inherits the structure instead of a blank setup.
Choose Organization or Project Settings
Use Project Settings for the open project's cover image, address, Sub Projects, locations, people, Cost Codes, financial choices, integration inclusion, exports, and visibility. The left nav groups the pages:
- General: General Project Settings, Project Info, People, Locations, Drawing Tags, RFI Settings, Daily Log Settings, Submittal Settings, Closeouts
- Financial: Financial Settings, Subcontractor Invoice Approvals, Cost Codes, Revenue Code Mappings
- Advanced: Integrations, Visibility, Delete Project
You only see the pages your role can open; if none are available the nav reads You do not have access to any project settings.
RFI Settings appears when the project-management package is on and your role has Update existing projects, hide projects. Submittal Settings needs Create new submittals, make changes to existing submittals, distribute and redistribute. Daily Log Settings needs View daily logs — that's the project's Default distribution recipients, not the organization-wide section toggles. Organization Daily Log Settings still lives under Organization Settings → Field.
The same RFI and Submittal pages remain reachable from RFIs Menu → RFI Settings and Submittals Menu → Submittals Settings; those links open the Project Settings leaf when you can get there.
Use Organization Settings for shared Cost Codes, Cost Types, Equipment, Trades, Bid Tags, Project Stages, Financial Settings, Document Signing Settings, email sign-off, dashboard presentation, API Access, and organization integrations.
Shared catalogs are not the same as project selection. Adding an organization Cost Code does not necessarily make the project use it; configure the project's Cost Codes separately.
Build the project structure
Configure Drawing Areas and Sub Projects
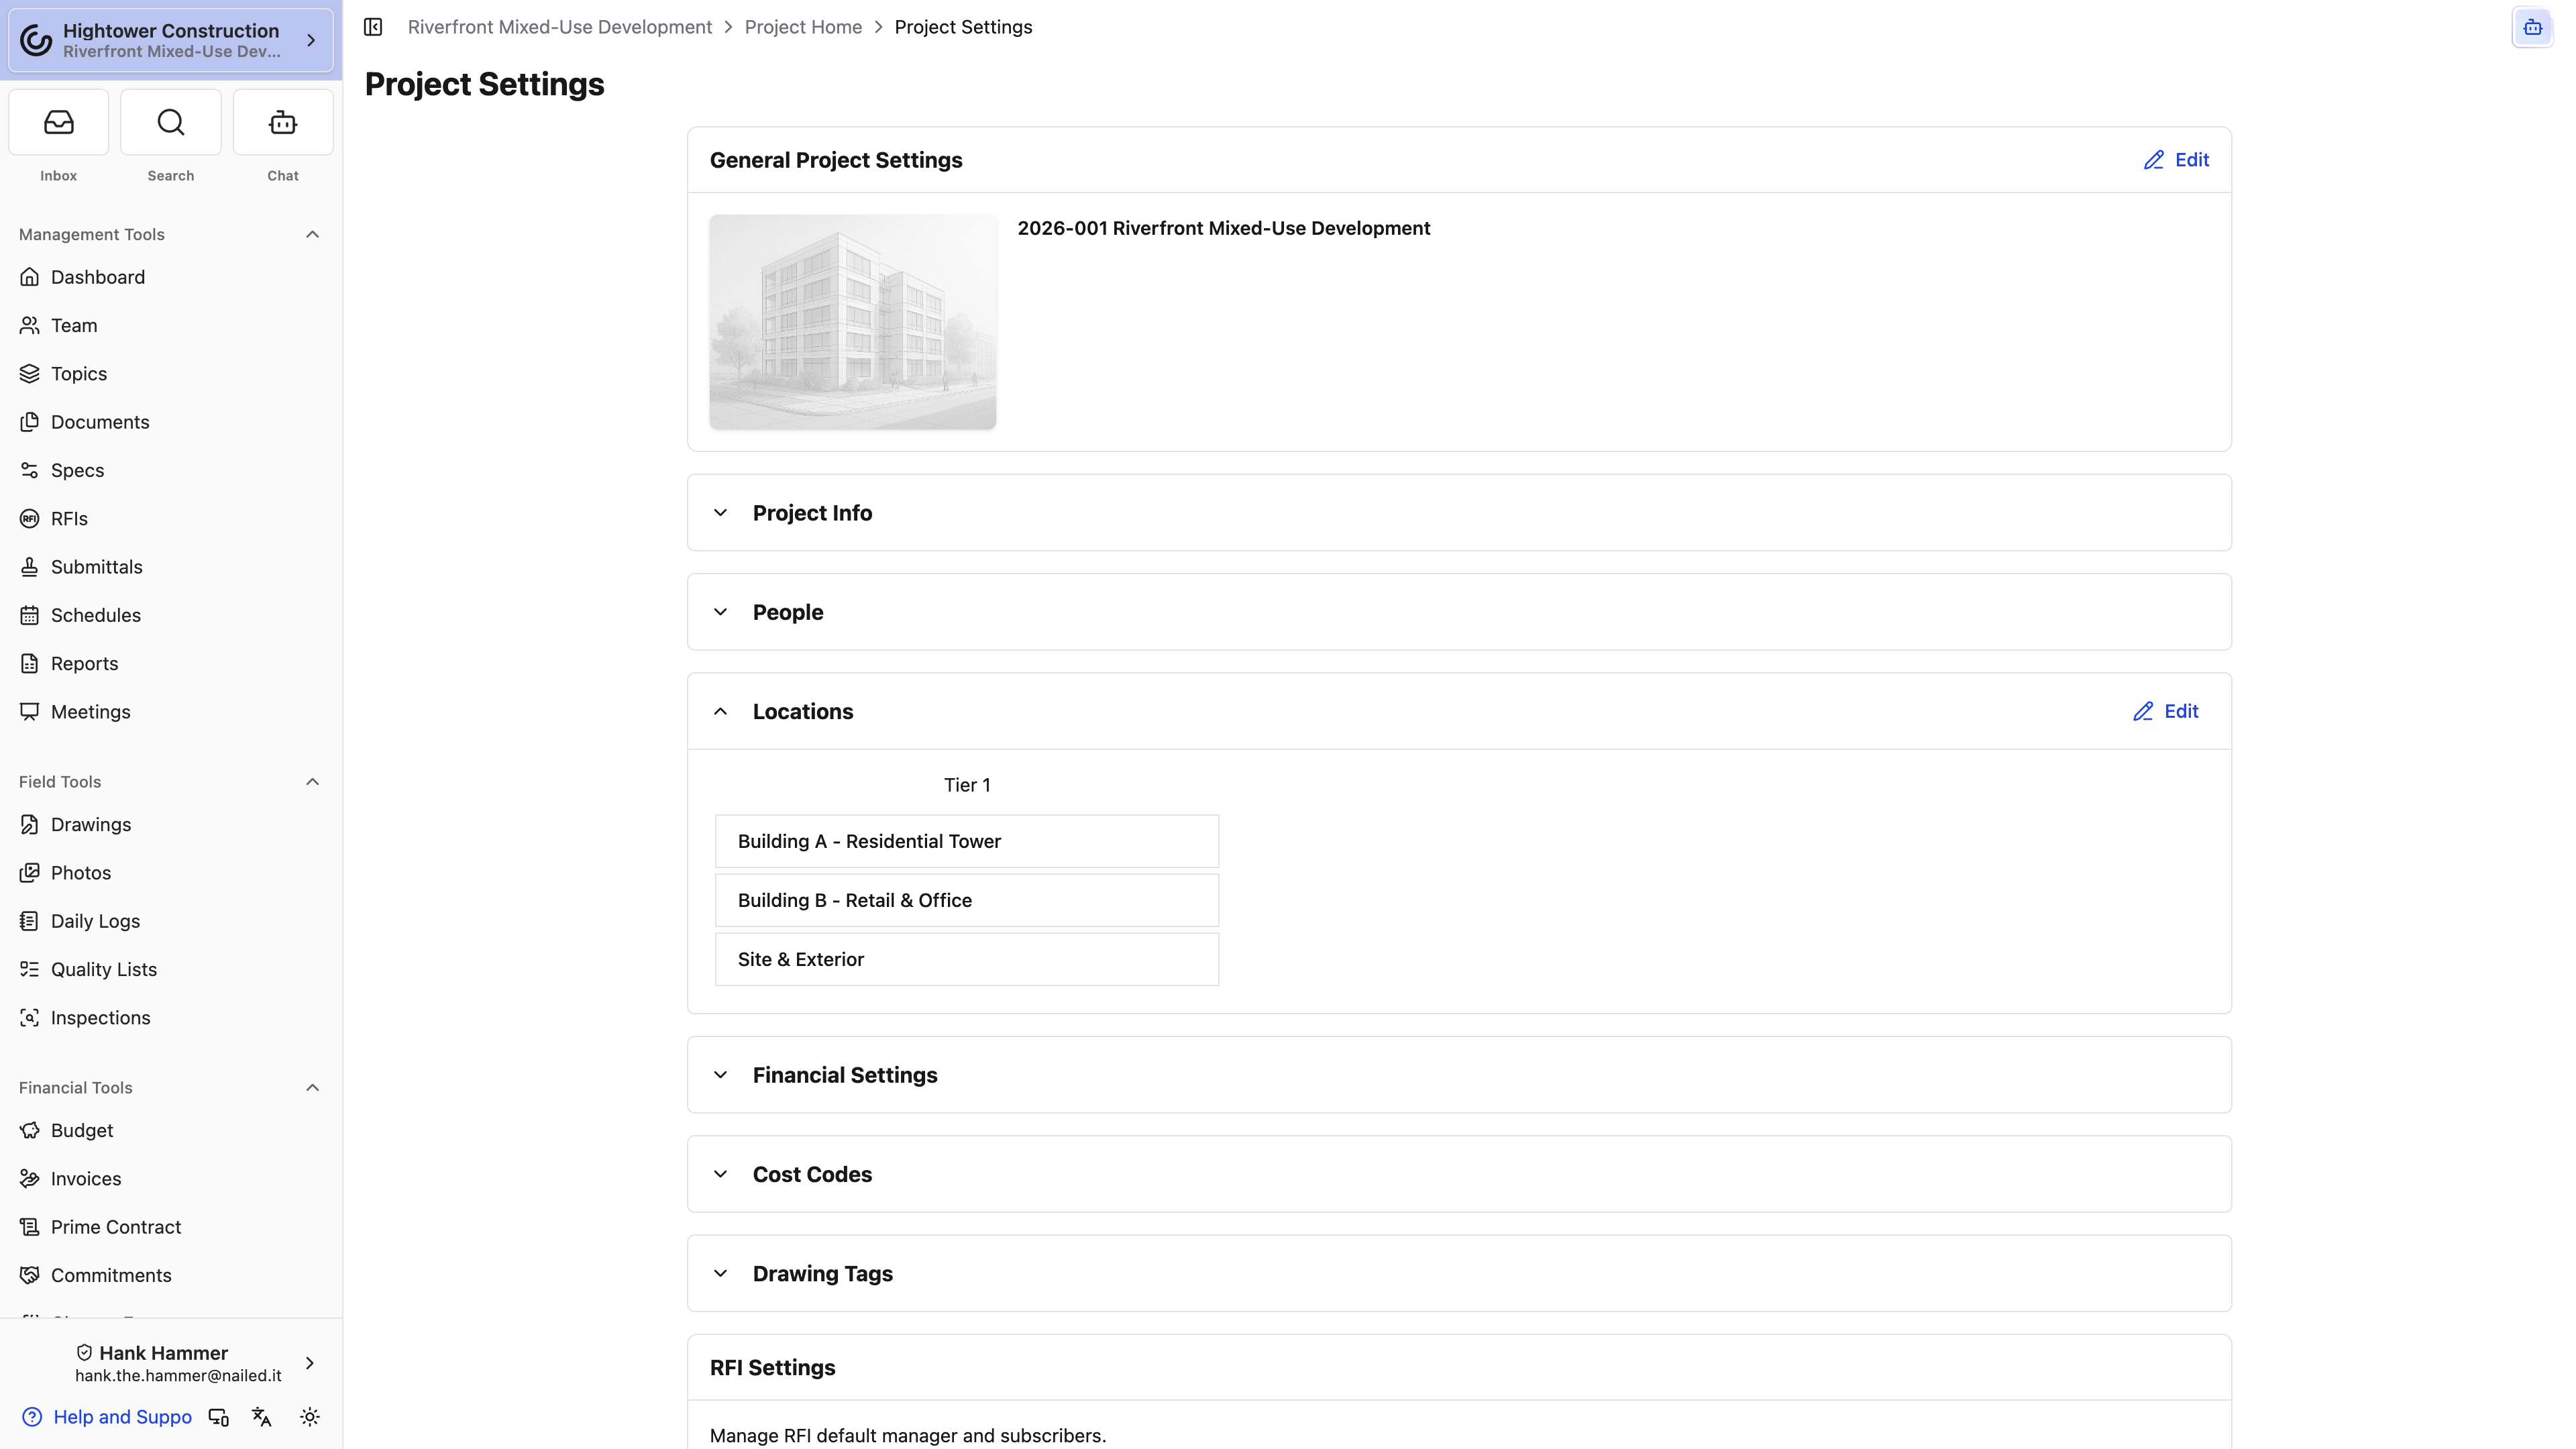
Drawing Areas separate plan collections. Sub Projects group the project work. You set them up in different places.
Drawing Areas
Drawing Areas are managed on the Drawings page, not in Project Settings, and need drawing-management access.
- Open Drawings and select Drawings Menu. In the native app, tap the ⋯ button.
- Under Drawing areas, select Add drawing area.
- Enter an Area name and select Create area.
Once the project has more than one area, Edit drawing areas in the same menu lets you rename, reorder, or remove areas. At least one Drawing Area is required, and an area with published sheets can't be removed. See Organizing drawing areas, disciplines, and sheets.
Sub Projects
- Edit General Project Settings.
- Enable This project has Sub Projects for phases or other project groupings.
- Enter a unique Sub Project Name and use Add Sub Project for more.
- Select Save Project Settings.
Once the project has Sub Projects, the checkbox locks and cannot turn that structure off. Existing Sub Projects remain fixed; newly entered rows can be removed before saving.
Configure locations and people
Use Locations to build the job's place hierarchy, such as building, floor, area, and room. While editing, use a location's three-dot menu → Rename to change its label without moving it in the hierarchy.
When the Financial package is enabled, People assigns the project's Architect and Prime Change Order Third Signer. The Architect name and address appear on the Payment Application cover page.
People does not add project participants. Open Management Tools → Team to add companies and users from the organization directory. See Team.
Configure project tools
Configure project tools and integrations
Review the pages available to your package and permissions. Some leaves appear only with the matching package or permission.
- Drawing Tags maintains tags for project drawings.
- RFI Settings sets the project's default RFI manager and subscribers. The same page is RFIs Menu → RFI Settings.
- Daily Log Settings sets Default distribution recipients for this project's Daily Log distributions.
- Submittal Settings sets numbering, approval templates, packages, and defaults. The same page is Submittals Menu → Submittals Settings.
- Closeouts generates project handoff packages.
- Integrations includes or Exclude from [integration name] Sync for an organization integration.
- Revenue Code Mappings appears when Revenue Codes are enabled.
The organization integration must be connected in Organization Settings before project inclusion can work. Excluding one project does not disable synchronization for the organization.
Tool-specific permissions still apply. Project write access does not grant Financials, Drawings, RFIs, Submittals, Daily Logs, or integration access.
Configure Cost Codes and Financial Settings
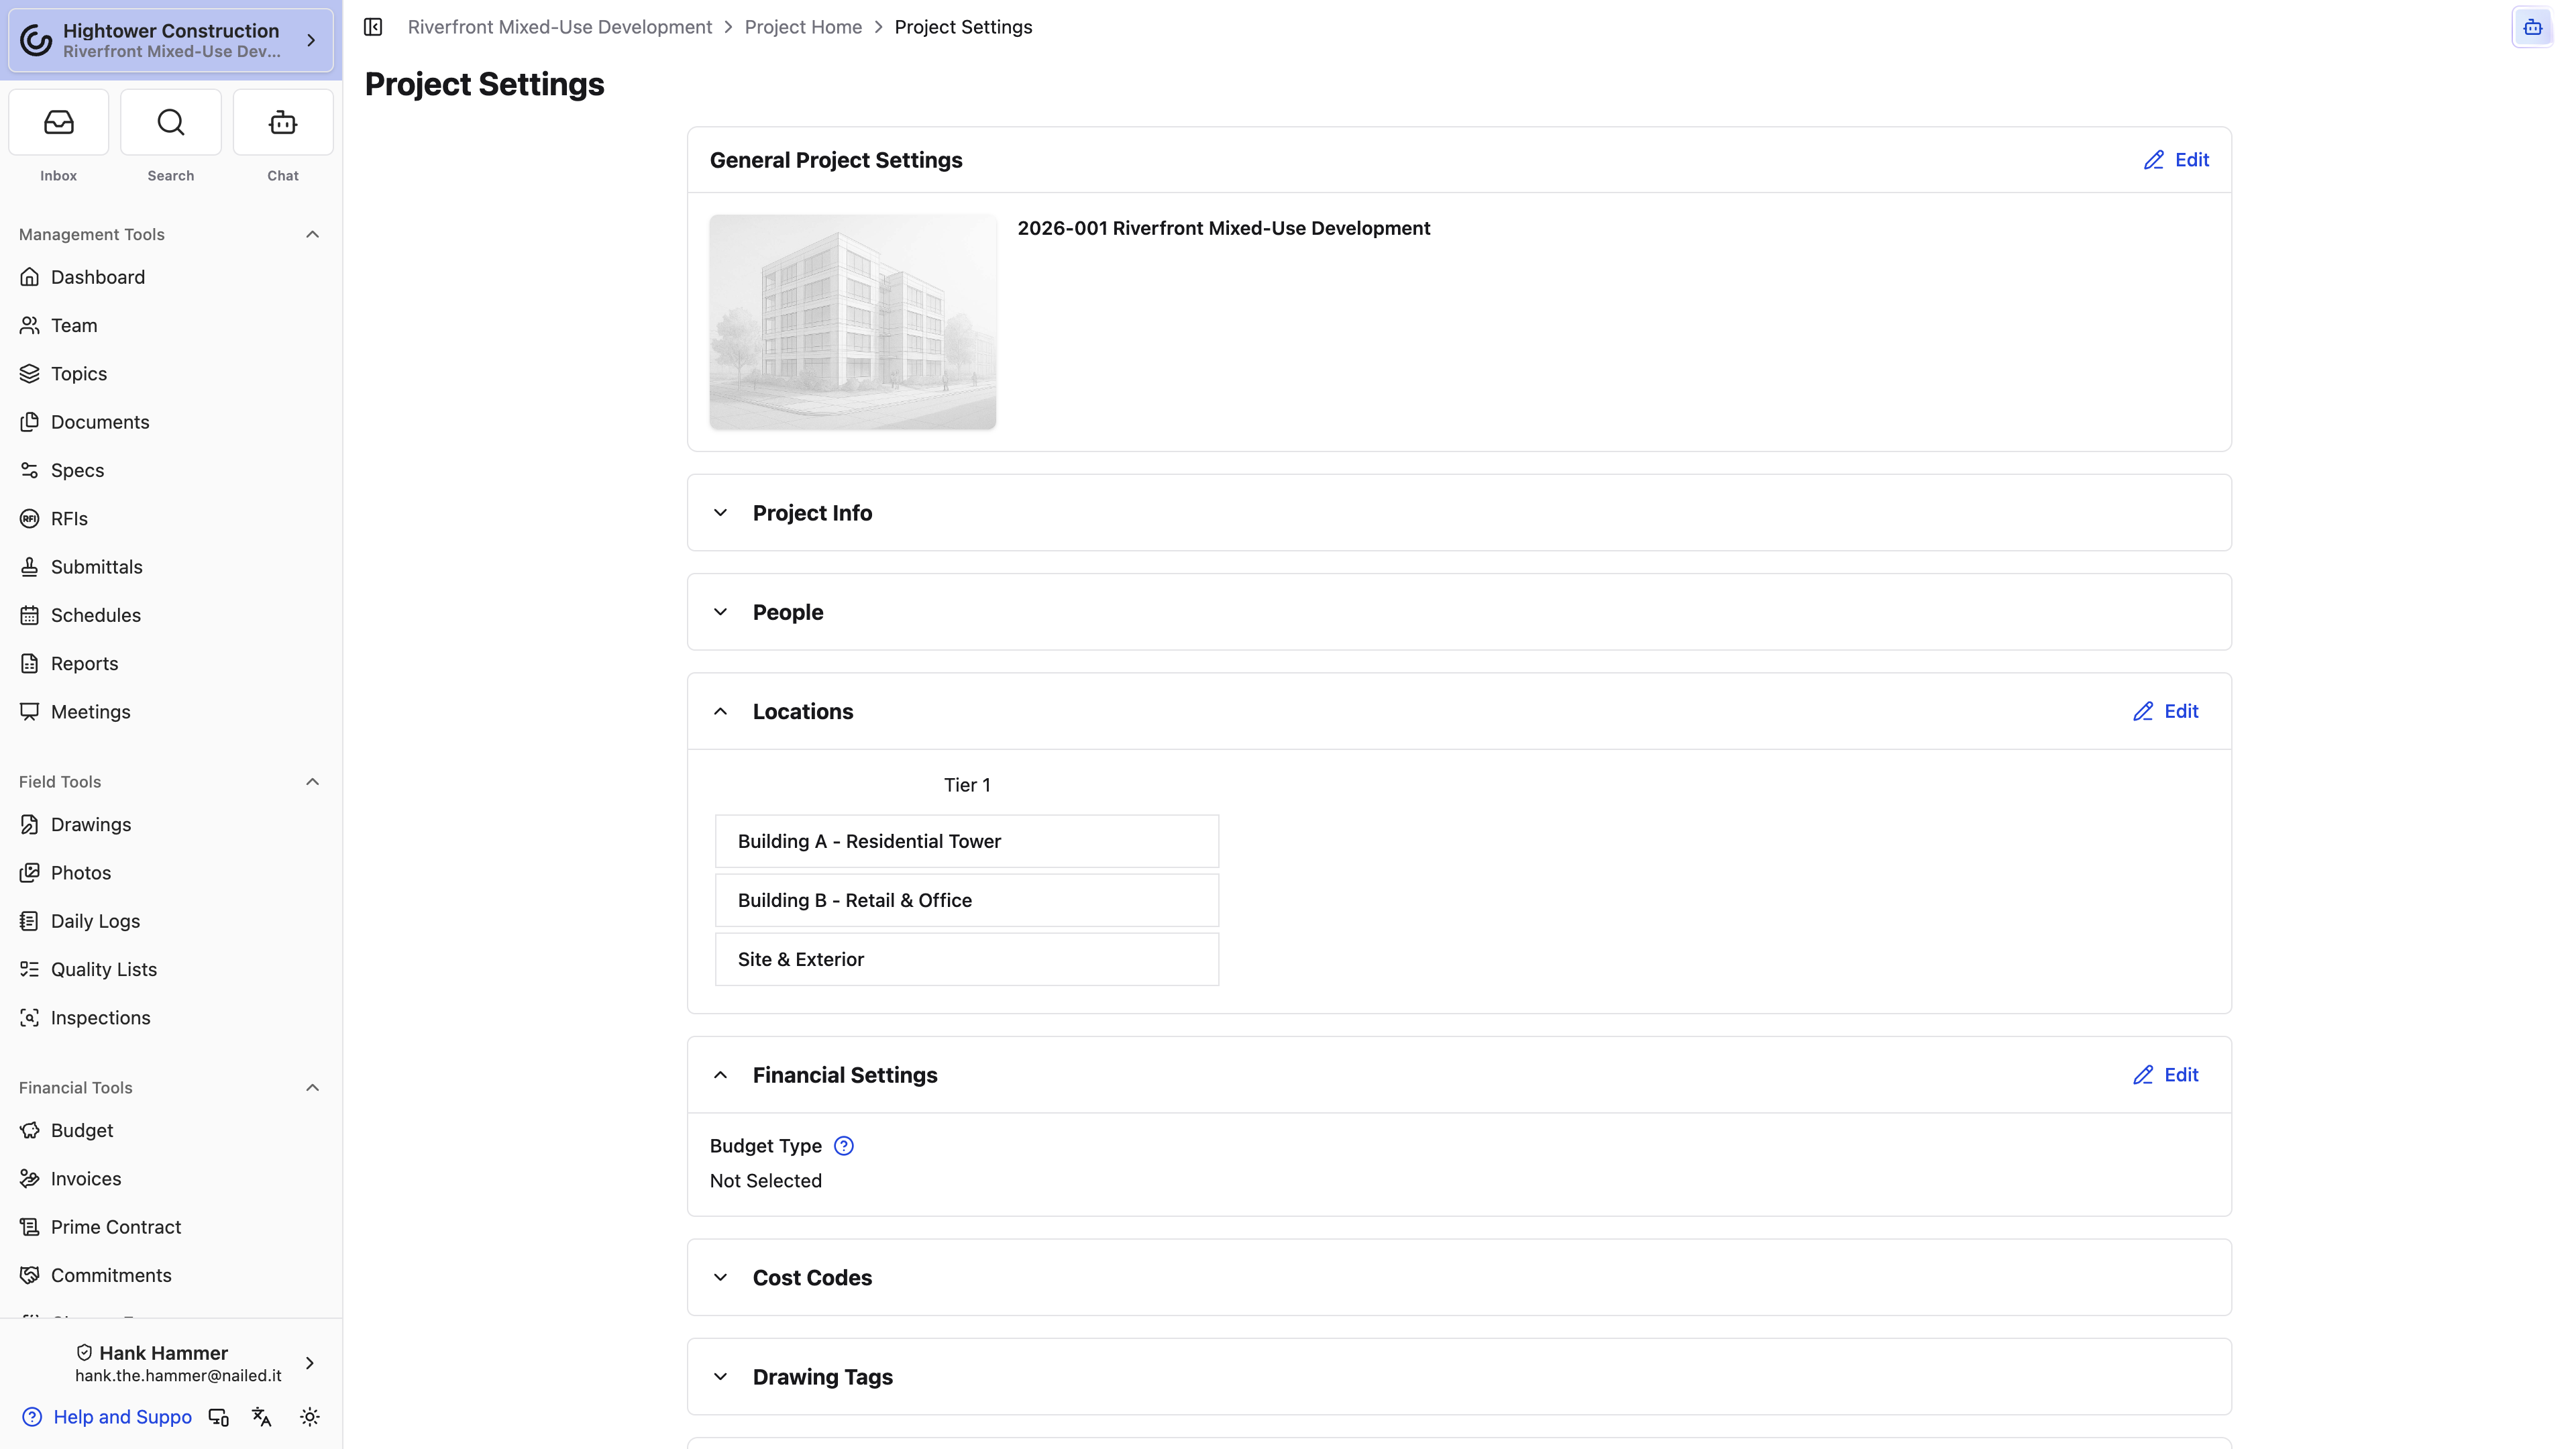
- Open Project Settings and select Financial.
- Use Cost Codes to configure the current project's selection from the organization catalog.
- Use Financial Settings for project-specific financial choices.
- Under Subcontractor Invoice Approvals, add sequential approvers when vendor invoices should wait on named people in order. The empty copy is No sequential approvers. Anyone with Approve invoices can approve submitted invoices. See Configure subcontractor invoice approvals.
- Use Revenue Code Mappings when available.
- Save each section before moving on.
Financial changes require Manage financials like change orders, contracts, receipts (excluding financial reporting) in addition to project settings access. Configuring the approval list needs Manage invoice approval workflows. See Budget.
Maintain and close out
Export project records
Project record exports run through Closeout, which builds a ZIP in the background instead of asking you to sit and wait with a tab open.
- Select Closeouts in Project Settings.
- Select Open Closeouts.
- Select Generate Closeout, tick the sections you need, and generate.
You'll get an email when the archive is ready, and the tile on the Closeout page carries the download. Each section you can tick depends on your read access to that tool, so the person producing a turnover package needs source access as well as Closeout access.
For the full workflow — planning a package, tracking generation, reviewing the ZIP, and exporting a single tool from its own page — see Closeout.
Delete a project
Deleting a project takes it out of Constructable for everyone, along with everything filed under it. It's an Admin-only action for exactly that reason, and it's almost never the one you want — if the job is simply finished, hide it instead.
- Open Project Settings and expand Delete Project.
- Select Delete Project.
- Read the confirmation, which names the project: "Delete Project "Riverside Tower"?"
- Select Delete Project again to confirm.
We return you to the organization's project list, and the project disappears from All Projects, the project switcher, search, and reporting.
Warning: There's no in-app undo and no hidden-projects style recovery view. Once a project is deleted, restoring it means contacting Constructable support — so use Hide This Project for finished work and save deletion for projects created by mistake.
What's the difference between hiding and deleting?
Hiding tidies a project out of the lists while leaving everything reachable; you can bring it back yourself with Show Hidden Projects. Deleting removes the project and its records from the product, and you can't reverse it on your own.
Why don't I see the Delete Project panel?
Only roles with Delete projects see it, and by default that's Admin alone. Project write access lets you hide a project but not delete one.
Hide or unhide a project
To hide:
- Open Project Settings → Visibility.
- Select Hide This Project and confirm.
To restore:
- Open All Projects in card view.
- Open the actions menu and select Show Hidden Projects.
- Open the project.
- Select Project Settings → Visibility → Unhide This Project and confirm.
Hiding removes the project from normal project lists and the switcher. It does not delete its RFIs, drawings, invoices, or other records. Hidden projects are also left out of Global Reports, including WIP and All Lists.
Access and platforms
- Create new projects controls New Project / Add Project and New Template Project / Add Template Project. Creating a project also requires Level of project access → All Projects. Only projects I belong to hides the creation action.
- Update existing projects, hide projects controls Project Settings and the This is a template project toggle.
- Add people to the project team is independent of project write and controls staffing a Project Team.
- Delete projects is nested under project write and Admin-only by default. Project write access does not include it.
- Built-in Admin, Manager, and Employee roles receive project write access by default, but organizations can customize editable permissions.
- Web labels the action New Project, with New Template Project under New Project Options; mobile and native use Add Project and Add Template Project in the actions menu.
- Tool settings, exports, and package-specific blocks require their own access.
- People requires the Financial package. Revenue Code Mappings requires Revenue Codes.
Troubleshoot project setup
New Project or Add Project is missing
Confirm Create new projects and Level of project access → All Projects. Only projects I belong to hides the creation action. On mobile or native, use the All Projects actions menu.
The Template picker is missing
The Template field appears only when you are creating a regular project and the organization already has at least one non-hidden template. New Template Project / Add Template Project creates a template, not a copy of one.
A project name is rejected
Another project has the same name-and-number combination. Change either value.
A Drawing Area cannot be removed
Drawing Areas are removed from Drawings Menu → Edit drawing areas on the Drawings page. An area can't be removed while it contains published sheets — move or unpublish them first — and the project's last remaining area can't be removed at all.
Drawing Areas or Sub Projects cannot be turned off
Drawing Areas have no on/off setting. Every project has at least one, and you can remove extra areas from Edit drawing areas on the Drawings page. Sub Projects can't be turned off once the project uses them: the This project has Sub Projects checkbox locks, and you can add new Sub Projects but not remove existing ones.
A settings section is missing
Check project settings access, the tool's own permission, package availability, organization feature settings, integration connection, and browser support.
People is missing
The organization does not have the Financial package, or your access does not expose that section.
A connected integration is not syncing this project
Confirm the organization integration is enabled and has no Auth Error, then clear Exclude from [integration name] Sync in this project's Integrations section.
A hidden project is missing
Open All Projects in card view and select Show Hidden Projects from the actions menu. A hidden project also does not appear in Global Reports until you unhide it.