Use this guide to upload, review, publish, find, compare, mark up, connect, download, and troubleshoot drawings. It covers exact controls, revision handling, notifications, desktop and native behavior, offline storage, and exports.
Learn how processing, revisions, sheet links, and pinned workflows fit together in Connected Drawings.
Start here
Pick the path that matches your job. You don't need to read every article in order.
- I manage drawing releases: Understand the lifecycle → Upload a set → Review it → Publish it → See what changed
- I review and coordinate plans: Navigate the viewer → Choose a comparison method → Add markup → Save it to a Topic
- I use drawings in the field: Find current drawings → Use drawings on mobile → Prepare sheets for offline use
- I estimate from drawings: Calibrate and measure → Create and export takeoffs
- I need a numbered detail, not a sheet: Follow a blue sheet-number or detail callout in the viewer, or search the sheet. See Finding a detail with the Details tab.
- Revisions were published in the wrong order: Reorder the drawing revision sets.
- Something is missing or not working: Start with Troubleshooting drawings.
Common task recipes
- Publish an addendum or bulletin: Open Add New Drawings in the existing drawing area. Create a new set, or choose Merge into existing set when the pages belong on a set that's already there. Confirm the sheet identities, then publish. See Uploading and managing a drawing set.
- Add plans for a separate building or package: Open Drawings Menu and select Add drawing area, then upload the first set into the new area. See Organizing drawing areas, disciplines, and sheets.
- See what changed in a published revision: After revised sheets from a set are published, select Generate revision report on the set if the briefing isn't there yet, then open Viewing revision changes.
- Find out why a sheet is missing: Follow Where is my drawing? before changing permissions or uploading the file again.
- Compare two revisions: Use Choose the right comparison method.
- Prepare for a site walk: Star the sheets you use most, make the disciplines you need available offline in the native app, and test them before you leave reliable connectivity. See Storing drawings for offline viewing.
- Send plans outside Constructable: Use Choose the right download or share option.
Understand the drawing workflow
Understand how Drawings works
Drawings travel one path, from the PDF that lands in your inbox to the sheet your crew opens in the field. Once that path is clear, most of what you see on the Drawings page — and most of what goes wrong — explains itself.
Upload a set → we split it into sheets → you confirm each sheet's number → you publish → the field sees it
- A drawing area holds one plan set with its own index and its own revision history. Almost every project needs exactly one.
- A drawing set is one upload package, such as an issuance, addendum, or bulletin.
- A sheet is one page extracted from that upload.
- Confirming verifies the sheet number, title, date, and discipline. It's how we know that this A101 is a new version of the A101 you already have.
- Publishing releases that revision to people who can view drawings.
- The Drawings page shows one row per sheet number. A101 appears once, showing whatever the latest published version of A101 is, with every earlier A101 stacked behind it in the revision selector.
Say ASI 3 contains a new A101. You upload ASI 3 as a new set in the same drawing area as the existing A101, confirm the sheet as A101, then publish it. We add it to A101's history and make the new revision current instead of creating a separate plan collection.
Two habits prevent most of the trouble people run into. Keep related revisions in the same drawing area, and confirm sheet numbers exactly and consistently before publishing.
Platform and feature availability
Drawing workflows are available on desktop web, mobile web, and the native app, including administration, bulk actions, comparison, recording, and downloads. Controls adapt to your screen size; the same project permissions apply on every platform. Two exceptions: storing drawings for offline viewing happens only in the native app, and reordering drawing revision sets happens only on the web.
| Feature | Desktop web | Mobile web | Native app |
|---|---|---|---|
| View, search, star, and mark up drawings | Yes | Yes | Yes |
| Drawings index list view and bulk selection | Yes | Yes | Yes |
| Bulk publish, unpublish, edit, and delete drawing-set pages | Yes | Yes | Yes |
| Split View | Yes | Yes | Yes |
| Overlay comparison | Yes | Yes | Yes |
| Download the current sheet as PDF | Yes | Yes | Yes |
| Download an overlay comparison PDF | Yes | Yes | Yes |
| Open a revision in a new tab | Yes | Yes | Yes |
| Record the drawing viewer screen | Yes | Yes | Yes |
| Store a single sheet for offline viewing | No | No | Yes |
| Make a whole discipline or drawing area available offline | No | No | Yes |
| Reorder drawing revision sets | Yes | Yes | No |
| Export selected pages from one drawing set | Yes | Yes | Yes |
Note: Look in the page actions menu, viewer toolbar, or overflow menu for compact-layout controls, then check your permissions and the current record status.
Drawing permissions at a glance
Your drawing access is separate from your access to the workflows connected to a drawing. That's why two people can open the same sheet and see different pins, markup layers, and menu options.
- View drawings allows a project member to open published drawings, search, star sheets, browse published drawing sets, generate and read revision reports, and use permitted viewer features.
- Change drawing sets, drawing areas, and drawing pages, publish and unpublish drawings is the permission used in this guide when we say drawing-management access.
- Comments, Topics, RFIs, Submittals, Lists, and Takeoffs have separate permissions. Lists and the items on them use the Punch Lists permission group in project settings.
- Entering Takeoff mode requires permission to add or change takeoffs, not only permission to view them.
- Your organization's package sits above all of this. RFI and Submittal pins don't appear on a Field-package organization even for someone whose role grants RFI and Submittal access, because those tools aren't in that package. See Roles and Permissions.
Default roles are a starting point, but each project's permission settings decide what someone can actually do. If one drawing action is missing, adjust that specific permission where you can instead of changing the person's broader role.
Choose the right comparison method
Two ways to actually compare, plus one way to avoid needing to. Ask yourself whether you're checking what moved, or reading two different drawings.
- Split View puts both sheets on screen at once, each at full size with its own controls. Use it when the two sheets are laid out differently, when you're holding a plan next to its detail, or when you need to read notes and dimensions on both.
- An overlay stacks the two sheets so anything that shifted shows up in color. Use it when it's the same plan at two revisions and the question is "what actually changed between Rev. 2 and Rev. 3?"
- If you only need to see what a sheet looked like last month, skip both. Open the sheet and pick the older version from the revision selector.
Split View and overlays are available on desktop web, mobile web, and the native app. Choose Split View to read sheets side by side, or an overlay to compare the same geometry. See Platform and feature availability.
Choose the right drawing record
Dropping a pin is the easy part. What you attach to it decides who gets told and whether anyone ends up owing you something, so pick by what you need to happen next.
- A Comment notifies the people you mention and nothing more. Right for "is this dimension what you meant?" — a question a teammate can answer in a sentence.
- An RFI starts a clock and demands a written answer from the design team, and the answer becomes part of the contract record. Right when the drawings genuinely don't tell you what to build.
- A Submittal routes a product data sheet or shop drawing through named reviewers in order and ends in a formal approval. Right before anyone buys or fabricates.
- A List Item puts a fix on somebody's list with a due date and a place to record that it was corrected. Right for work you can see is wrong.
- A Topic assigns nothing to anybody. It's a named place to park markup and talk about it — right for a coordination pass you're working through across several sheets before you know which of the four above it turns into.
Still torn between a comment and an RFI? Ask who has to answer. If it's someone on your team, comment. If it's the architect or engineer, and you'd want the answer in writing at closeout, open the RFI.
Choose the right download or share option
Six ways to get plans out of Constructable sounds like a lot until you work through three questions in order: do you want plans or a list, do you want what's current or what was issued, and do you want a file or a link?
Plans, current, everything: Download All gives you a PDF of the latest published revision of every drawing in the area. This is the right answer most of the time.
Plans, current, only some of them: Download Selected does the same thing for the drawings you select in list view. Use it when the electrician needs the E sheets and nothing else.
Plans, as issued: Download Entire Set gives you one upload package exactly as it arrived, which means it can include pages that were later superseded and pages nobody ever published. Never hand this to the field as the current set.
Plans, just this one sheet: Download from the viewer's toolbar or context menu exports the sheet you're looking at, with whatever markup is currently visible on it. The control stays disabled until the sheet finishes loading (Download is available once the sheet finishes loading). Overlay comparison exports the live Differences, Ghost, or Highlight composite instead of a single sheet. Finish aligning the sheets and wait for the overlay to load before downloading.
A link instead of a file: Share Download Link builds the same package but hands you a URL to paste into an email. Worth knowing: the link points at the package as it was the moment you created it, so generate a new one after drawings change.
A list, not plans: Download Drawing Log gives you a register of sheet numbers, titles, revisions, and dates — the thing you attach to a transmittal. It contains no plans.
Troubleshooting drawings
Most drawing problems come down to one of four things: the sheet hasn't been published yet, you're looking at the wrong drawing area, a sheet number doesn't match, or a permission is missing. Find your symptom below and work through the checks in order.
Where is my drawing?
Before you upload the file again, find out where the sheet actually is in the workflow. It's almost always sitting at one of these four stages:
- Processing: We're still separating pages and reading metadata. Wait for processing to finish.
- Needs Review: Open the Review Drawing Set screen and correct or confirm the sheet details.
- Unpublished: The sheet is confirmed but isn't visible in the main Drawings index yet. Publish it when it's ready for the team.
- Published: Confirm you're in the correct drawing area, clear index filters, and check the viewer's revision selector.
If one person can see the published sheet and another can't, compare their drawing permissions. If nobody can see it in the area they expect, check whether it went to a different drawing area or got published under an unexpected sheet number.
A new upload became a separate drawing
Nine times out of ten it's a sheet-number mismatch — A-101 versus A101. Compare the number you confirmed against the number on the existing drawing before you delete anything or publish more pages. Correcting the number is safer than uploading the same file over and over.
A tool or button is missing
Check these in order:
- Whether the control is in the toolbar, page actions menu, or overflow menu for your layout.
- Whether the current sheet is published and you're on the intended revision.
- Whether your drawing permission allows the action.
- Whether the connected workflow — Comments, Topics, RFIs, Submittals, Punch Lists, or Takeoffs — has its own required permission.
Markup is missing or appears in the wrong place
Confirm the selected revision and markup mode first. Markup carried to a new revision may need repositioning when the underlying plan changed, and takeoff markup isn't carried forward at all. If markup is hidden, select Show all markup in the viewer before you assume someone deleted it.
All my markup went faded or half-transparent
You have a Topic open — a Topic being a named bundle of markup and the conversation about it. Markup belonging to any other Topic dims so the current conversation stands out, and it's read-only while you're in there. Close the Topic to bring everything back to full strength. Pins stay fully opaque even when you change Opacity on a markup tool. If your pins are gone too, someone turned on Hide all markup instead.
Pins are on the old revision but not the new one
Markup and pins are copied onto a sheet when its new revision is confirmed during review. Anything added to the older revision after that point stays where you put it — it isn't retroactively copied forward. Re-place those pins on the current revision.
A detail callout doesn't open the right detail
Open the sheet the callout names and look for the detail yourself. If it isn't there, the callout is printed against a detail that was moved or dropped from the published sheet — a question for the design team, not something a new upload will fix.
A link also fails when the target sheet is unpublished or numbered differently from the callout. Confirm the destination sheet is published in the same drawing area before you treat the callout as a product problem.
A measurement looks wrong
Check the revision, the sheet scale, the units, and the known dimension you calibrated from. A title-block scale may apply to only one viewport, and resized or scanned PDFs can throw the accuracy off.
An offline sheet will not load
Offline storage lives in the native app, so a sheet opened in a browser always needs a connection. In the app, check that the sheet or its discipline shows as stored — a discipline header still showing a count such as 12/40 hasn't finished. Reconnect with the app open so it can finish downloading, then open the sheet once before you head back out.
If you need to reach us, include the project, drawing area, drawing-set name, sheet number, revision, device or browser, and the exact status or error you're seeing. That's everything we need to find it on the first pass.
Set up and publish
Understanding drawing areas, drawing sets, sheets, and revisions
Four words do most of the work in Constructable drawings: area, set, sheet, and revision. Once you know how they fit together, you'll know where an upload lands, what your team can see, and why a new plan occasionally shows up as its own drawing.
The short version
- A drawing area holds one plan set with its own index and revision history.
- A drawing set is a package of PDF files uploaded together.
- A sheet is an individual drawing page, such as A101 or M201.
- A revision is a newer version of an existing sheet.
Most projects only need one drawing area. Inside it, you can upload as many drawing sets and revisions as the job requires.
Drawing areas
Almost every project needs exactly one drawing area, and if that's you, you'll barely notice it exists — we keep it out of the way. You want a second one only when the job really has two plan sets that never talk to each other. Each area keeps its own index, its own disciplines, and its own revision history, which is the whole point: an A101 in one area will never be treated as a revision of the A101 in the other.
When a project has several, you can switch between them from the Drawings page.
Multiple drawing areas earn their keep when parts of a project have genuinely separate plan collections — for example:
- Separate buildings on one campus
- A base building and a tenant-improvement package
- Distinct phases that need independent drawing indexes
Note: Don't create a new drawing area for every issuance or revision. Those belong in separate drawing sets within the same area. Splitting related revisions across drawing areas prevents us from treating them as versions of the same sheet.
Drawing sets
A drawing set is one upload package. It usually represents a plan issuance, addendum, bulletin, or other group of PDFs that arrived together.
When you create a drawing set, you can enter:
- A drawing set name
- The date it was received
- A default sheet date
- An optional description
- One or more PDF files
We process each PDF and separate it into individual sheets, and we take a first pass at each sheet's number, title, discipline, and scale. You review those results before the sheets can be published.
The drawing set remains available after publishing, so you can always trace a revision back to the upload it came from.
Note: Deleting a set removes its sheets from the active drawing workflow. Double-check which set you have open before you confirm a deletion.
Sheets and drawings
A sheet is an individual page from an uploaded drawing set. Day to day, you'll identify it by its sheet number and title — A101: First Floor Plan.
Every version of A101 connects to the same drawing, so you get one complete revision history instead of a separate, unrelated sheet for every upload.
The Drawings page shows the latest published revision of each drawing. Older revisions are still available from the drawing viewer; they just don't appear as separate rows in the main drawing index.
Some details belong to the drawing as a whole, while others belong to one revision:
- Sheet number, title, and discipline apply across every revision.
- Sheet date, publication state, and revision number apply to a specific revision.
Keep this distinction in mind when you edit details. We'll tell you whether your change affects one revision or every revision of the sheet.
Revisions
When you publish a newly uploaded version of an existing sheet, it joins that drawing's revision history, and the newest published version becomes the current revision shown on the Drawings page.
Revision numbering starts at zero. The first published version of a sheet is Rev. 0, so the first reissue you receive becomes Rev. 1. Compact and mobile layouts abbreviate this further, showing V0 and V1.
From the drawing viewer, you can:
- Open an earlier revision
- Return to the current revision
- Compare revisions side by side
- Overlay revisions to highlight changes
If you open an older revision, we won't let you forget it. A red banner appears across the top of the viewer reading You are viewing an older revision of this sheet (Rev. 4 is the current revision), with the current revision as a link so you're one click from the plans you should be working off.
Note: We match revisions using the sheet details confirmed during review, so sheet numbers have to be accurate and consistent. A typo such as
A-101instead ofA101may prevent a new upload from being connected to the sheet you expected.
How the pieces fit together
Here's a typical drawing lifecycle:
- An administrator opens the appropriate drawing area.
- They create a drawing set and upload one or more PDFs.
- We process the files and extract the individual sheets.
- An administrator reviews and confirms each sheet's details.
- The confirmed sheets remain unpublished until an administrator publishes them.
- Published sheets appear on the Drawings page for project members with drawing access.
- Future uploads carrying the same sheet numbers become new revisions of those drawings.
Good to know
- Confirming and publishing are separate steps. Confirming validates a sheet's information. Publishing makes it available to the wider project team.
- The Drawings page is not the same as the Drawing Sets page. The Drawings page shows the latest published sheets. The Drawing Sets page shows upload packages and their processing, review, and publication status.
- Unpublished sheets have limited visibility. Drawing administrators can reach them from the drawing set while they're being prepared, but they don't appear in the main drawing index for the wider project team.
- Drawing permissions matter. Project members with drawing access can view published sheets. Uploading, reviewing, editing, publishing, and unpublishing require drawing-management permission.
- Use consistent sheet numbers. Accurate sheet numbers are essential for revision matching, drawing links, and search.
With this structure in your head, reviewing uploads, publishing revisions, finding sheets, and working in the viewer all stop being guesswork.
Why did my new plan show up as its own drawing instead of a revision?
Its confirmed sheet number didn't match the existing drawing, or it went into a different drawing area. Both are metadata problems, and both are safer to correct than to fix by uploading the file again.
How many drawing areas should my project have?
Usually one. Add another only when the project genuinely has separate plan collections — different buildings on a campus, a base building alongside a tenant-improvement package, or phases that need their own indexes.
Where did the older version of a sheet go?
Nowhere. The Drawings page lists only the latest published revision, but every earlier revision is still available from the revision selector in the drawing viewer.
Organizing drawing areas, disciplines, and sheets
Good drawing organization comes down to one rule — keep related revisions together — plus enough care with disciplines and sheet order that people can find a plan by browsing instead of searching for it.
Choose the right drawing area
Most projects should use a single drawing area. Create more only when the project has truly separate plan collections, such as multiple buildings or independent phases.
When a project has more than one, the Drawings page shows them as tabs across the top and remembers the area you visited last. Desktop shows up to five tabs, then More. On a phone, every area is in a scrollable strip — swipe to reach the ones that don't fit. On the web, the page title also becomes an area switcher: select the area name to jump to any area and see how many sheets each one holds.
Note: Don't use drawing areas to separate issuances. Upload a new issuance in the existing area — either as a new drawing set or merged into one that's already there — so we can connect matching sheets as revisions.
Add a drawing area
Drawing areas are managed from the Drawings page, and you need drawing-management access to see these controls.
- Open Drawings Menu in the upper right of the Drawings page. In the native app, tap the ⋯ button and look under Drawing areas.
- Select Add drawing area.
- Enter an Area name, such as
Building BorParking Deck. - Select Create area.
The first time you add a second area, the dialog also asks you to name the area your existing sheets already live in. Those sheets don't move — you're only giving their area a name that makes sense next to the new one, and you can rename it later. When you save, we open the new area, empty and ready for its first drawing set.
Rename, reorder, or remove drawing areas
Once the project has more than one area, Drawings Menu also offers Edit drawing areas. In that dialog you can:
- Rename an area by typing over its name. Names have to be unique within the project.
- Drag an area by its handle to reorder it, or use Move up and Move down from the row's ⋯ menu. This order sets the tabs and the area switcher for everyone on the project.
- Select Add area to add another one.
- Choose Remove area from the row's ⋯ menu. The row shows Removed when you save, and Undo brings it back until then.
Nothing changes until you select Save changes.
You can't remove the project's last drawing area, or an area that has published sheets — the row reads "Has published sheets. Move or unpublish them first." Removing an area also removes the unpublished drawing sets and sheets inside it, along with their markup, and there's no restore. Check what's still in the area before you save.
Set up disciplines
Disciplines group sheets on the Drawings page and in the viewer's sheet selector. Architectural, Structural, Mechanical, Electrical, and Plumbing are the usual suspects.
From Edit/Reorder Disciplines & Sheets, you can:
- Add or rename a discipline
- Add abbreviations used by sheet numbers
- Reorder disciplines
- Reorder sheets within a discipline
- Delete a discipline
Abbreviations pay off during review. If A is an abbreviation for Architectural, entering a sheet number such as A101 helps us suggest the right discipline instead of making you pick it every time.
An abbreviation can run up to 20 characters, which is enough for the longer prefixes some consultants use, and each one has to be unique within the project. If you go over, the dialog tells you before you save rather than after.
Note: Deleting a discipline doesn't delete its drawings. Its sheets move to Uncategorized until you assign them somewhere else.
Reorder sheets carefully
The order you set here controls how sheets appear within discipline groups and how everyone moves through drawings with the previous and next controls.
If a handful of sheets seem out of place, check their assigned discipline before you start dragging rows around. A sheet in the wrong discipline is usually easier to fix by correcting its details.
When new sheets land in a discipline, we place each one after the last sheet whose number comes before it — A102 sits after A101 even if you already dragged A201 somewhere custom. That insertion doesn't reshuffle the rest of the order you set.
Note: Use the drawing-area management controls to reorder disciplines and sheets. Your role needs drawing-management permission.
Use tags for a second layer of organization
Disciplines answer, “What kind of drawing is this?” Tags answer the project-specific questions that cut across disciplines:
- Which sheets belong to Building A?
- Which sheets are part of a permit package?
- Which sheets should the concrete team review?
Tags don't replace disciplines. They give you another way to filter related drawings across discipline groups. See Finding drawings with search, stars, and tags for day-to-day use.
Set this up once and your team browses a drawing index that reads like the plan set they already know.
Should I make a new drawing area for an addendum?
No. Keep it in the area that already holds those sheets. Create a new drawing set for a new issuance, or choose Merge into existing set when the pages belong on a set that's already there. Putting the addendum in its own area breaks the revision connection you want.
I deleted a discipline by mistake — did I lose those drawings?
No. The sheets move to Uncategorized, and you can reassign them to a discipline from there.
Uploading and managing a drawing set
Every new group of plans or revisions starts life as a drawing set. If you have drawing-management permission, you can add one from the Drawings page by selecting Add/Edit Drawing Sets.
Before you start, gather the source PDFs and open the drawing area that already owns the related revisions — that's the single choice that decides whether these pages become revisions of existing sheets or a parallel set of new ones.
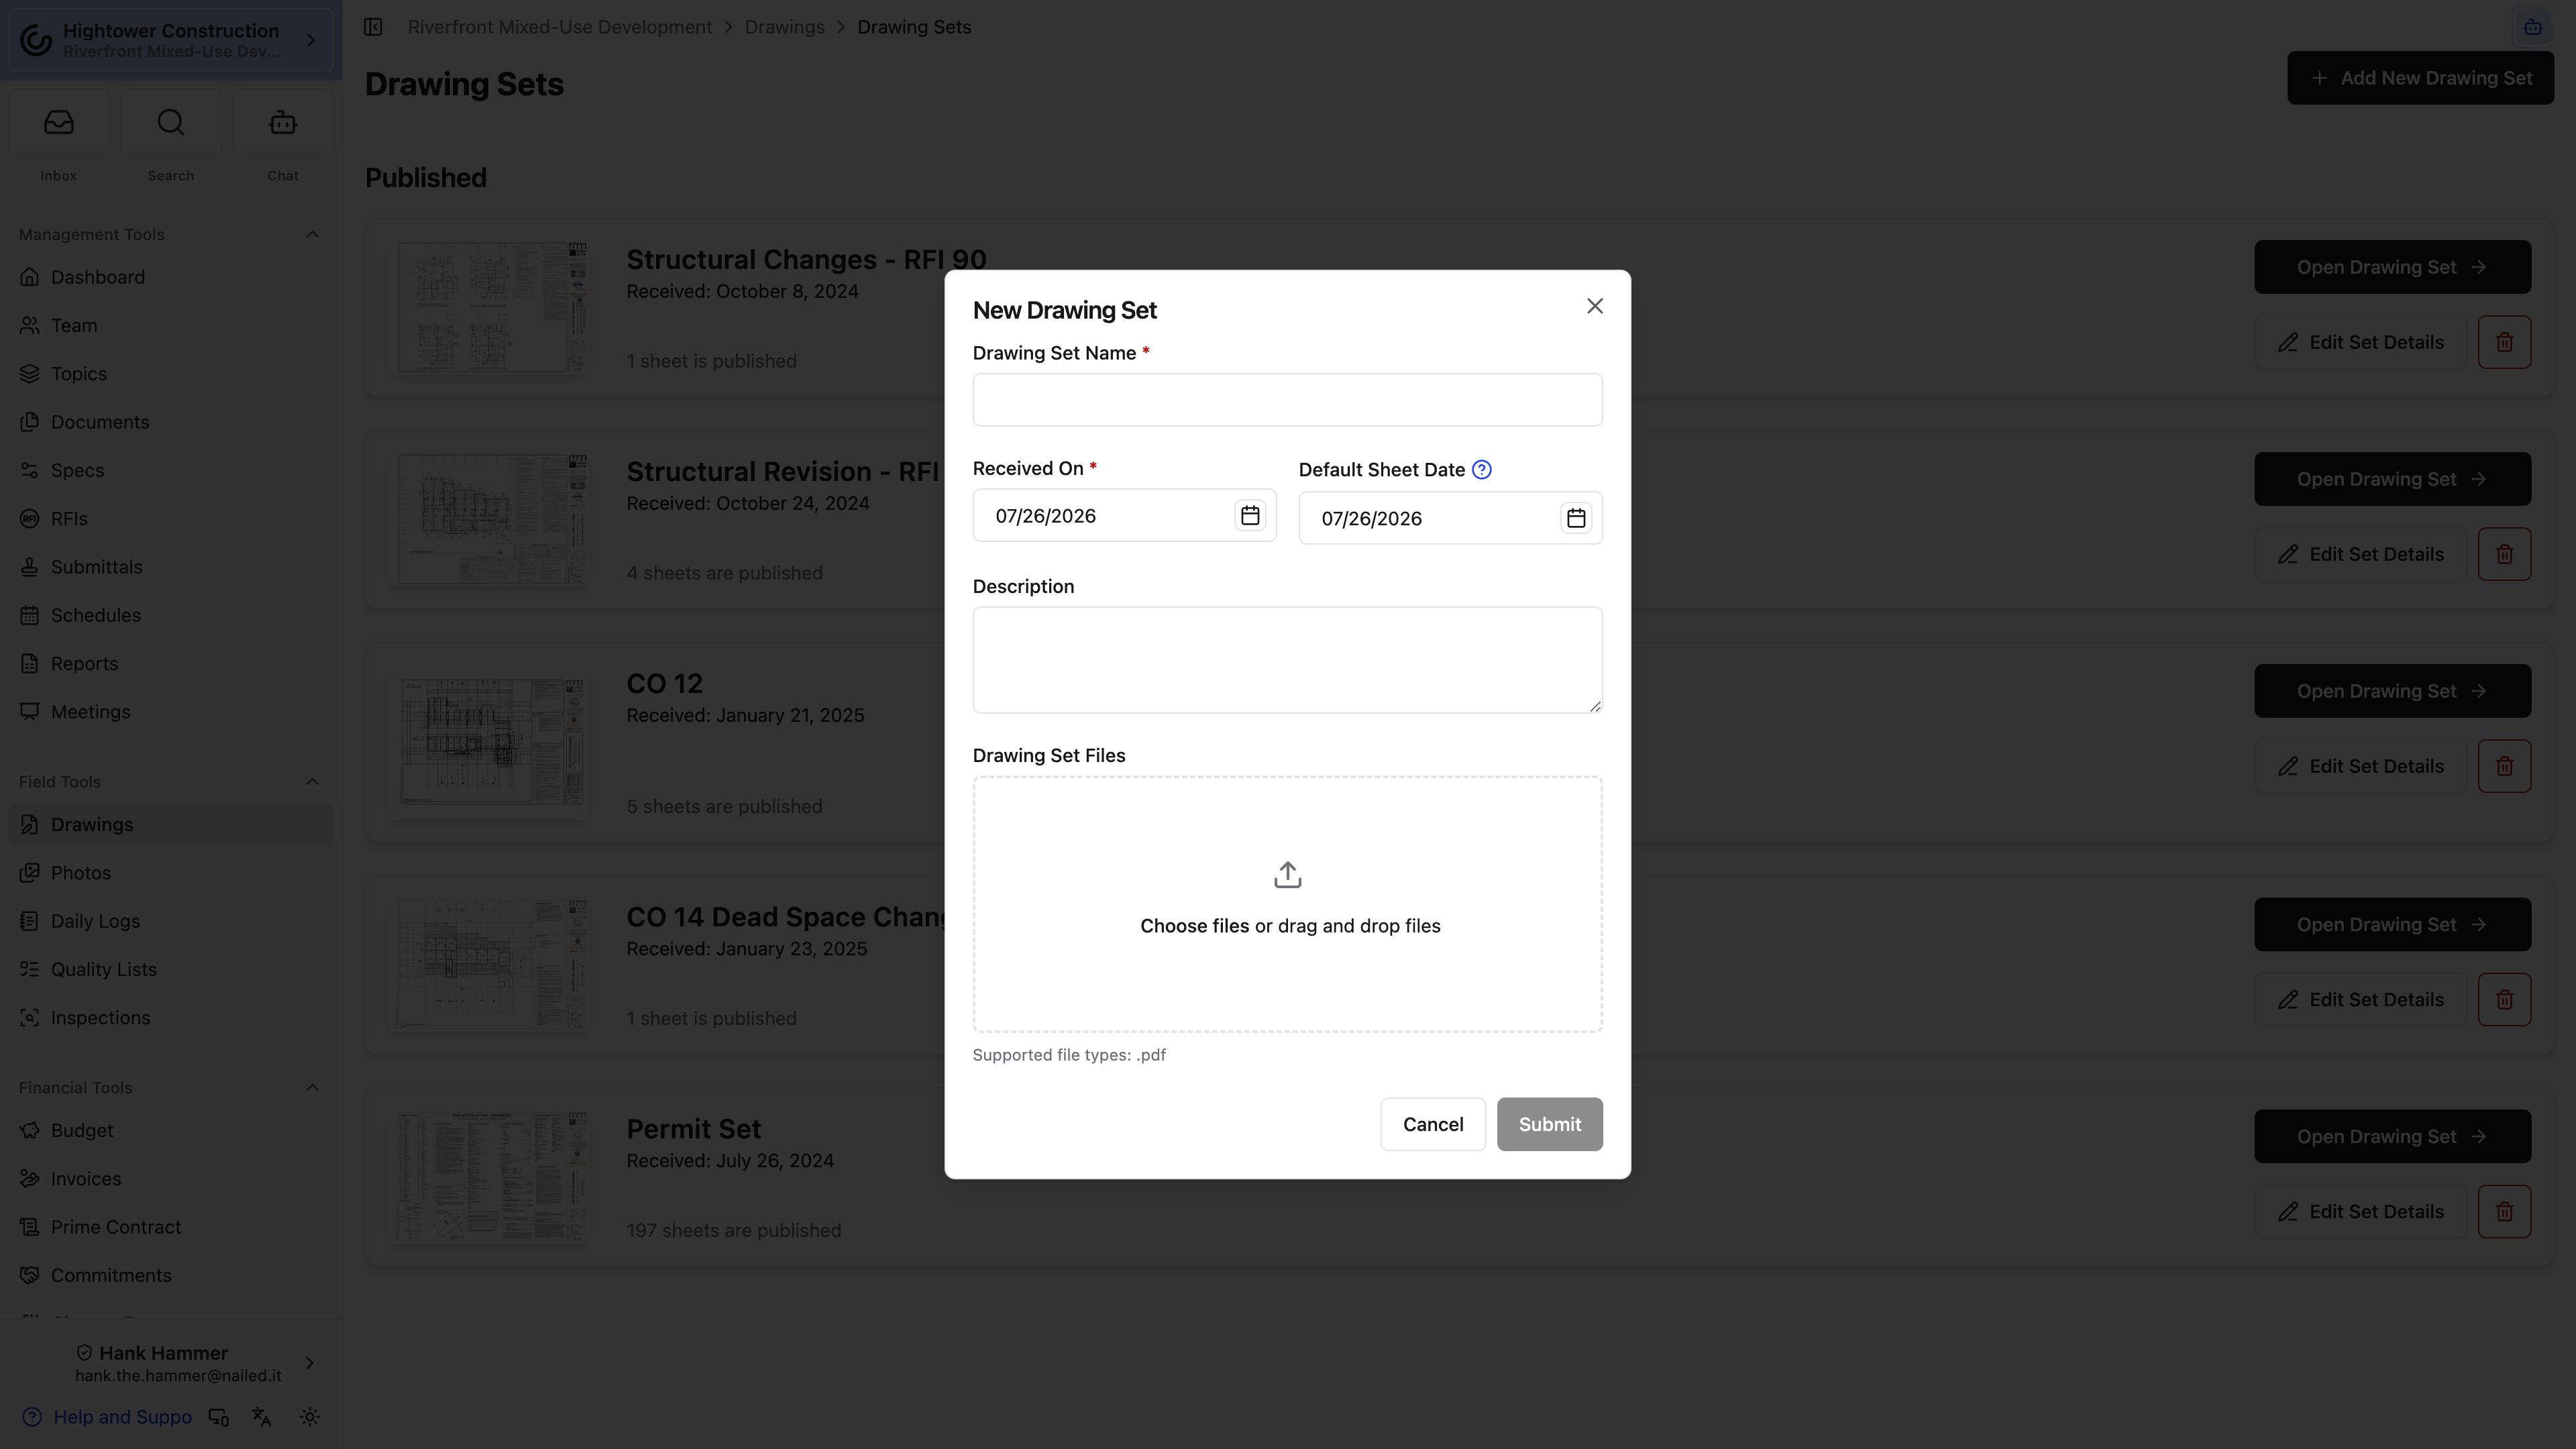
Upload a set
- Open the correct drawing area.
- Select Add/Edit Drawing Sets.
- Select Add New Drawings.
- Leave Create new drawing set selected.
- Enter a clear set name, such as
Issued for Construction - 2026-07-15. - Enter the date the set was received.
- Choose a default sheet date, if one applies.
- Add an optional description.
- Attach one or more PDF files.
- Select Submit.
The drawing-set upload accepts PDF files. If the issuance arrived as several PDFs, attach them all to the same set rather than creating a separate set per file.
Example — ASI 3: Upload all PDFs issued together as one set named ASI 3 - 2026-07-15 in the drawing area that already contains A101. Don't create a new drawing area just because the issuance is new.
Add pages to an existing set
Use this when an addendum or a late PDF belongs on a set that's already in the project — not when you're starting a new issuance.
- Open Add/Edit Drawing Sets and select Add New Drawings.
- Choose Merge into existing set.
- Under Drawing set, pick the target. The placeholder reads Select a drawing set. The option stays disabled when the area has no set you can merge into.
- Check the dates. Picking the target fills Received On and Default Sheet Date from that set. Received On is locked while you're merging, and its tooltip explains why: "Received On comes from the set you're merging into. Edit the set to change it." Default Sheet Date stays editable, so change it when the late pages carry a different date.
- Attach the PDFs and select Submit.
The upload appears on Drawing Sets as a card named after the target set, with (additional drawings) on the end. Review and confirm those sheets the same way you would a new set. A sheet number that's already on the target is blocked with This already exists in the set — fix the number or delete the extra page before you finish.
When every sheet is confirmed, the pages move onto the target set and the upload card goes away. The toast uses the target set's name.
Note: Merge is for adding pages to a set that already exists. A brand-new issuance still wants Create new drawing set so its received date and name stay attached to that package.
Choose a useful default sheet date
The default sheet date gives the imported pages a sensible starting point. You can correct individual dates during review, or edit dates in bulk after processing.
Use the date printed on most sheets, which isn't necessarily the date the files hit your inbox. If the package contains mixed dates, choose the most common one and fix the exceptions during review.
Edit set details
You can change the drawing set's name, received date, default sheet date, and description after uploading it. These fields describe the upload package — they don't touch the sheet number or title of the drawings inside it.
Delete a set
Deleting a drawing set removes its active pages from the drawing workflow. If the set contains published revisions, removing it can change which revision is current.
Note: One drawing set can hold the current revision of many sheets, so a deletion that feels small can reach further than you expect.
Before you delete, confirm all of the following:
- You have the correct drawing area and set open.
- You know whether any of its sheets are published.
- You've downloaded a copy if the files need to be retained outside Constructable.
Pro Tip: If you only need to remove one page, delete that sheet instead of the entire set.
Remove selected sheets from a set
On a drawing set's sheet list, switch to list view, select the rows, and open Bulk Actions. Choose Delete (3 sheets) — the count follows your selection — then confirm Delete in Delete selected sheets?. The copy tells you the drawing set itself stays. The sheets leave the set; there's no restore from this screen. If some rows fail, those stay selected so you can try again.
Bulk delete and bulk publish use the drawing-set selection controls on desktop web, mobile web, and the native app.
Use the publish-status filter — All, Published, or Unpublished — to narrow the list first. Changing the filter clears your selection.
The issuance arrived as five separate PDFs. Do I create five sets?
No. Attach all five files to the same drawing set. The set represents the issuance, not the file.
Can I fix the set name after uploading?
Yes. The name, received date, default sheet date, and description are all editable afterward, and changing them doesn't affect the sheets inside.
Your plans are in the system and on their way to review. Continue with What happens while a drawing set is processing.
What happens while a drawing set is processing
A drawing set you've just uploaded sits under Processing drawing sets on the Drawing Sets page while we split the PDFs into individual sheets and read the title blocks. New sets stay off the Unpublished and Published lists until at least one page is ready, so look at the processing cards at the top rather than hunting for a set row. It runs in the background, so you can close the tab — we email you when the set is ready for review.
You don't have to wait for object detections on every page before you open Review Drawing Set. The sheet preview loads detections for the page you're on; other pages can still be catching up.
While files are still being read, the card can show Analyzing files. Select Cancel if you uploaded the wrong package. Cancel this upload? explains that processing stops and unconfirmed sheets from this upload are removed; confirmed sheets stay on the drawing set. Confirm with Yes, Cancel Upload, or Keep Processing.
What Constructable does
For each uploaded PDF, we:
- Separate the file into individual sheets.
- Create thumbnails and viewer-ready versions.
- Read drawing text for search and sheet links.
- Look for likely sheet numbers, titles, and disciplines.
- Attempt to detect a usable drawing scale.
Note: Treat all of that as suggestions, not final drawing details. You still review every sheet before it can be published.
Follow processing progress
The Drawing Sets page shows the upload under Processing drawing sets. Once pages are available, the card reports how many pages have finished metadata extraction.
We email whoever uploaded the set when every page is ready for review, unless that person has unsubscribed from email. Drawing-area notification preferences don't control this one-time processing email, so you'll get it whether or not you follow the area.
Large or complex PDFs take longer than small, text-based ones. Scanned pages often need more manual correction too, simply because there's less readable text to work from.
If detected details are blank or wrong
Processing can finish even when we can't confidently read a field, and that isn't necessarily an upload failure. Open the Review Drawing Set screen and enter the missing sheet number, title, date, or discipline yourself.
If the upload fails
A failed set appears with an error message. We record the failure for investigation, and you can dismiss the failed set.
Before you upload again:
- Confirm that each attachment is a valid PDF.
- Try opening the file locally.
- Re-save or flatten a damaged PDF if that's practical.
- Avoid re-uploading the same set while an earlier attempt is still processing.
If a valid file fails more than once, reach out to us with the project name, drawing area, set name, and original PDF filename.
How long should processing take?
It depends on the file. Small, text-based PDFs finish quickly; large, complex, or scanned ones take longer. Watch the progress bar on the Drawing Sets page rather than the clock.
A sheet number came through blank. Did the upload fail?
No. We couldn't read that field confidently, which is common with scanned pages. Fill it in during review and the sheet is fine.
When processing finishes, the set moves to Needs Review and the plans are ready for your eyes. Continue with Reviewing and confirming an uploaded drawing set.
Reviewing and confirming an uploaded drawing set
Review is where you check the sheet number, title, date, and discipline we read off each page, and correct whatever we got wrong. Nothing you do here reaches the field — the set stays invisible to the wider project team until you publish it — so it's the safest place in the whole workflow to take your time.
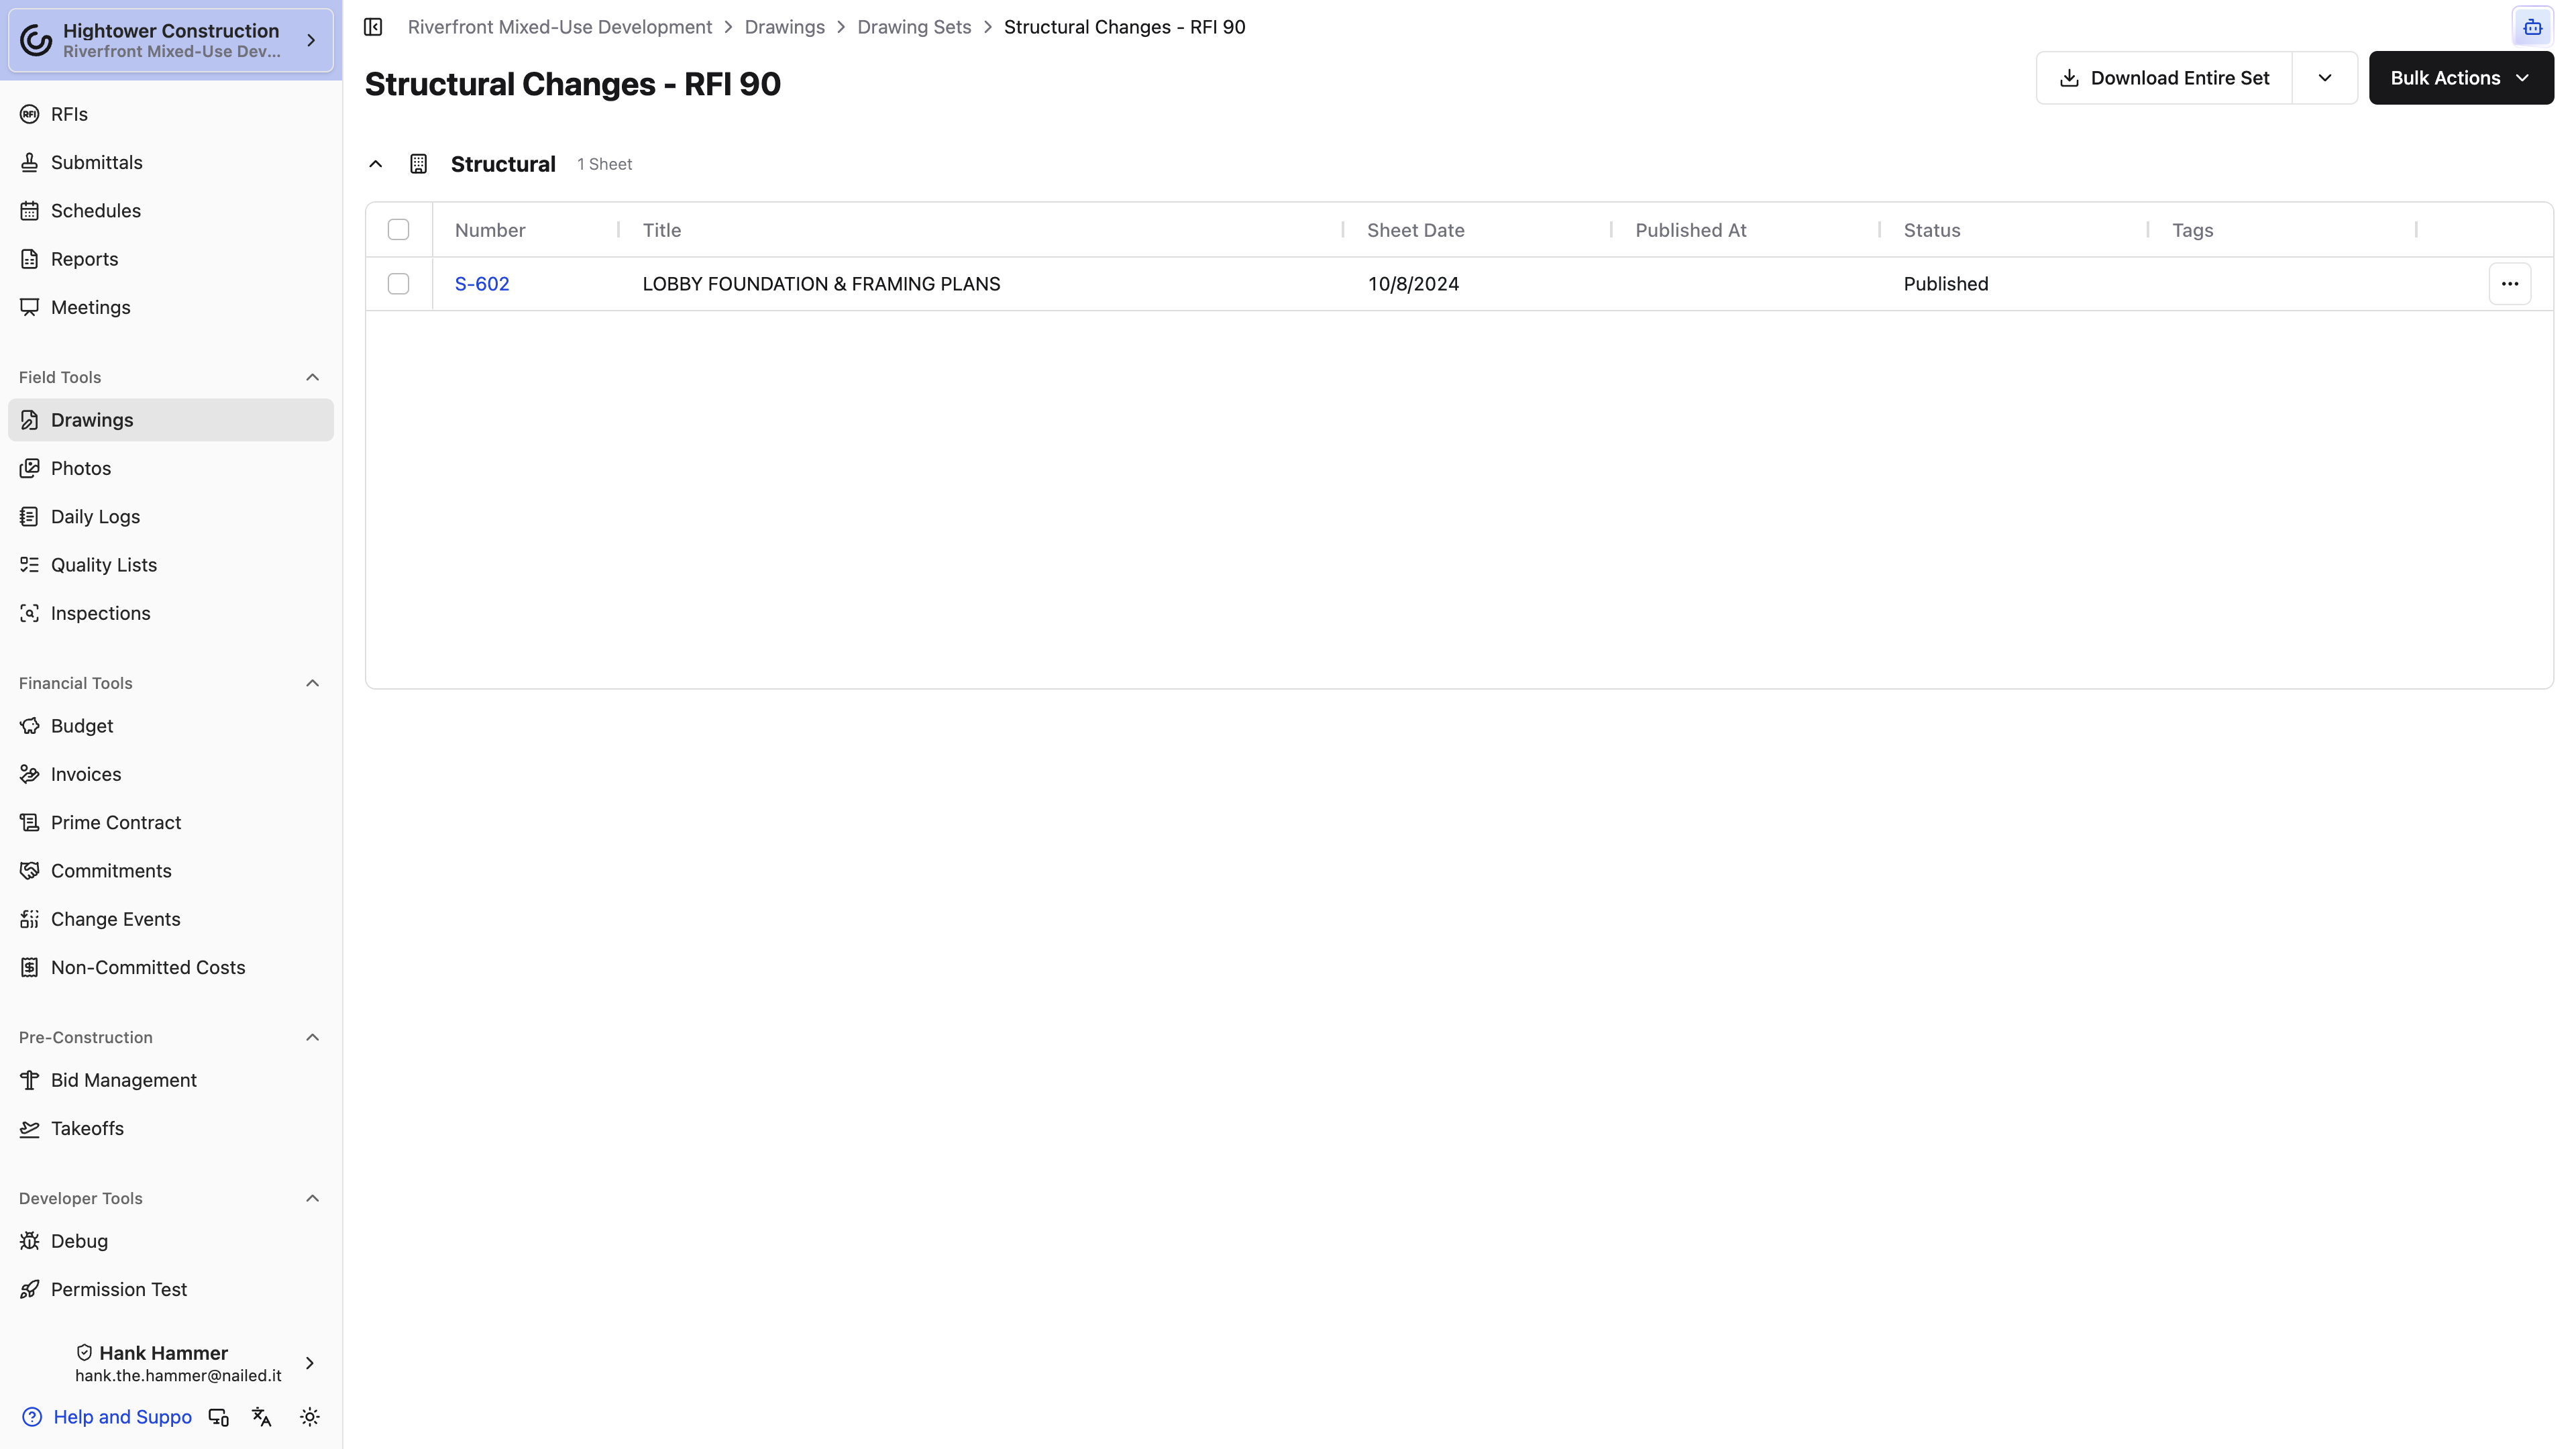
Open the review workspace
On the Drawing Sets page, find the upload under Needs Review and select Review Drawing Set. When the set has a name, the header includes that name after Review Drawing Set.
The Review Drawing Set screen shows:
- A list of sheets grouped by discipline
- A progress bar counting sheets confirmed, ready, and needing a fix
- A sheet preview
- Editable sheet details
- Search, filter, and navigation controls
The preview for the sheet you're on loads as soon as that page's detections are ready. A slow sheet elsewhere in the set doesn't freeze the one you're reviewing.
Each discipline group shows how many of its sheets are confirmed and how many still need a fix. A discipline you've finished collapses and shows Done; sheets without a discipline sit under Unassigned. Select a group header to open or close it, or use the button beside the search field to expand or collapse every discipline at once.
The tabs above the list filter it by status, and each shows its count:
- All shows every sheet in the upload.
- Need a fix shows sheets we can't confirm yet — a missing sheet number or title, or a number that's duplicated in the upload or already in the set you're merging into.
- Ready shows sheets with no problems, waiting for you to confirm them.
- Confirmed shows the work you've already finished.
Review each sheet
For every page, verify:
- Sheet number
- Sheet title
- Sheet date
- Discipline
We start you off with the details detected during processing. When a new upload matches a sheet number that's already in this drawing area, Sheet title prefills from the confirmed drawing instead of the PDF extraction — brand-new numbers still use what we read off the page. Correct anything that doesn't match the title block.
Valid changes save automatically after a short pause, and a Saved indicator confirms it. If a field has an error, fix it before you move on.
Example — ASI 3: If the revised plan is meant to replace A101, confirm its number in the same format as the existing drawing. A101 and A-101 may be treated as different identities.
Select Confirm and Next to confirm the current sheet and keep going. On the last remaining sheet, select Confirm.
Use search and bulk confirmation
Search filters the review list by sheet number, title, or discipline, which helps when you're working through a large set or checking one related group of sheets.
To confirm a batch you've checked, tick the sheets in the list — or tick a discipline header to take every sheet in that group, or Select all visible to take everything the current search and tab show. The bar above the list counts your selection, flags any selected sheets that still need a fix, and offers a confirm button with the number of sheets it will confirm. Sheets that need a fix stay selected after the rest are confirmed, so you can deal with them next.
To confirm everything that's ready in one pass, use the confirm-all button beside the progress bar — at the top of the page on the web, above the list in the native app. Its label counts the ready sheets. It opens Confirm All Sheets; select Confirm All to confirm every sheet without errors. Sheets with missing details or duplicate numbers stay in the queue for individual review.
Note: Spot-check the extracted details before you confirm in bulk. The number you confirm here is the one we match every future revision against, so a wrong number quietly stays wrong on every reissue that follows.
Handle disciplines efficiently
You can select an existing discipline or create one right here during review. If you change the discipline on a sheet with a common number prefix, we may offer to update the other unconfirmed sheets sharing that prefix.
Pro Tip: Take that offer when the prefix is reliable for the set — it saves a lot of clicking. Skip it when the package mixes numbering conventions, because not every project follows the same one.
Remove an unwanted page
Use Delete Sheet when the PDF includes a cover page, a blank page, a duplicate, or anything else that shouldn't become a drawing. After you delete, review moves to the next sheet still visible in your current list — so with the Need a fix tab open, it skips straight to the next sheet that needs work.
Does confirming a sheet make it visible to the team?
No. Confirming settles the sheet's identity; publishing is what releases it. Those are deliberately separate steps.
Why won't Confirm All take some of my sheets?
Those sheets have missing details or duplicate sheet numbers. They stay in the queue so you can resolve them one at a time — open the Need a fix tab to see exactly which ones, with the problem named on each sheet.
Once every sheet is confirmed, the set moves to Unpublished with its sheet numbers settled. The next step is Publishing and unpublishing drawings.
Publishing and unpublishing drawings
Publishing is the moment your confirmed sheets become the current drawings everyone else works from. Until you publish, the set is finished on your side and invisible on theirs — which is exactly the pause you want before releasing an issuance.
Confirming vs. publishing
These two steps are separate on purpose:
- Confirming verifies the sheet's identity and details.
- Publishing makes the revision visible to project members with drawing access.
The gap between them is your chance to look over the entire issuance before any of it reaches the field.
Publish a drawing set
- Open Add/Edit Drawing Sets.
- Open the set you want to release.
- Open Bulk Actions and choose Publish All.
- Review the confirmation message and publish.
To release only part of the set, tick those sheets first. Bulk Actions then offers Publish 12 Selected instead — the menu counts your selection into the label — and Publish All drops away.
On the set's sheet list, the publish-status filter — All, Published, Unpublished — is the fastest way to see what's still waiting. Changing it clears the current selection.
Only confirmed sheets can be published. Published sheets pick up revision numbers and become available from the Drawings page.
Pro Tip: If you're a drawing administrator already looking at an unpublished sheet in the viewer, there's a publish action right in the revision notice at the top. No trip back to the set required.
Example — ASI 3: Publish the approved A101 page when it's ready. We make it the current A101 while keeping the earlier revision in the viewer's history.
Note: Select sheets in the drawing set, then open Bulk Actions to publish or unpublish several sheets at once on any platform.
Publish in stages
You don't have to release a set all at once. Publishing selected sheets is the right move when:
- A partial issuance is approved before the rest.
- A few sheets still need correction.
- Different disciplines are released at different times.
The drawing set status keeps count of how many sheets remain unpublished, so nothing gets forgotten halfway through.
Unpublish a sheet
Unpublishing pulls a revision out of the main drawing index for regular project viewers. The sheet stays available to drawing administrators from the drawing set workflow, so nothing is lost.
You can unpublish selected sheets or every published sheet in a set. Use it when a revision went out by mistake or needs correcting before it's redistributed.
Note: Unpublishing can change the revision sequence and which older revision counts as current. If what you really want is to issue a corrected version, uploading and publishing a new revision is usually clearer than withdrawing historical work.
Let the team know
Publishing and unpublishing both land in the drawings activity log, and both notify the project members who follow that drawing area. Give the set a clear name so recipients can tell what changed without opening anything.
Note: Bidders are excluded from publish-event recipients even when they can view drawings. If bidders need to know a set went out, tell them another way.
Can I publish part of a set?
Yes. Tick the sheets you want, then use the Publish n Selected item in Bulk Actions. The set keeps track of what's still unpublished.
Should I unpublish a sheet or upload a corrected one?
Upload a corrected revision when the fix should stay in the record. Unpublish when the release itself was a mistake and shouldn't be part of what the team sees.
Your issuance is out, and the field is looking at the plans you meant them to see. To learn how the current sheet gets chosen after publication, see Managing revisions and editing drawing details. When the set contained new revisions of existing sheets, generate the briefing of what changed — see Viewing revision changes. If a set went out in the wrong order relative to the others, see Reordering drawing revision sets.
Managing revisions and editing drawing details
Every version of A101 stacks up under one row on the Drawings page, so the index shows you today's plan without burying the ones that came before it. What holds that stack together is the sheet number — this article covers how the match happens and how to edit details without breaking it.
How a new revision is created
When a confirmed sheet matches an existing drawing, publishing it adds a revision instead of spawning another unrelated row. Sheet number consistency is what makes that match work.
When a new revision is confirmed, we can copy scale information and non-takeoff markup forward from the latest published revision. That copying only happens when the new revision doesn't already contain markup, and takeoff marks are never carried forward.
Note: Review the new sheet before you assume copied markup still points at the right thing. When the underlying plan changed, carried-forward markup may need repositioning.
In the ASI 3 example, the newly published A101 becomes the current drawing, and the previous A101 stays available as an older revision for comparison and context.
View revision history
Open a sheet in the viewer and use the revision selector to switch versions. Open an older revision and a notice points you back to the latest one.
You can also open revisions in a new tab, compare them in Split View, or overlay them. See Comparing sheets and revisions with Split View and Comparing drawings with overlays.
On phones and in compact layouts, revision labels shorten to V1, V2, and so on instead of Rev. 1, Rev. 2. Same history, shorter label.
Edit details shared by all revisions
Use Edit Drawing Details when you're correcting information that identifies the drawing itself:
- Sheet number
- Sheet title
- Discipline
- Drawing tags
- Sheet date, which applies only to the current revision
The dialog tells you the split: "Sheet number, title, discipline, and tags apply to every revision. Sheet date applies to the current revision." Changes to sheet number, title, or discipline apply across every revision of the drawing.
Note: Renaming a sheet to a number that's already in use can create a conflict or merge situation. Check what's already sitting at the destination number before you save.
Edit one revision
Edit Revision — on the row's actions in a drawing set's sheet list and on the Drawings page — opens Sheet number, Sheet title, and Sheet date together, which is the fastest way to fix a title block that came through wrong without leaving the set you're reviewing. From a drawing set, you can also edit selected sheet dates or all of them in bulk.
Note: Only the sheet date is genuinely revision-specific. Sheet number and sheet title identify the drawing, so changing either from Edit Revision carries across all of its revisions, exactly as it would from Edit Drawing Details.
Delete carefully
Note: Deleting a published revision can renumber the revisions that remain, and deleting an entire drawing set can affect many drawings at once. Deletion is rarely the smallest tool for the job.
Here's how to choose:
- Edit Drawing Details or Edit Revision when the drawing or revision metadata is wrong.
- Unpublish when a released revision should temporarily disappear from current drawings.
- Upload and publish a new revision when you're issuing a correction that should remain part of the history.
- Delete only when the page should no longer be part of the active record.
Will renaming a sheet number rewrite its history?
The number, title, and discipline apply across all revisions, so yes — the change follows the whole drawing. The revisions themselves stay intact.
My markup didn't come across to the new revision. Why?
Markup copies forward only when the new revision doesn't already contain markup, and takeoff marks never copy forward at all. Anything added to the old revision after the new one was confirmed stays where you put it.
Get these habits right and your revision history stays a reliable record instead of a puzzle.
Reordering drawing revision sets
When an older issuance gets published after a newer one — the bid set goes up a week after IFC — its sheets become the current revisions and the field sees the wrong plans. Reordering the drawing sets puts each sheet's revision history back in the order the plans were actually issued.
The order of the published sets in a drawing area decides revision numbers: the newest set holds each sheet's current revision, and older sets fill in the history behind it. Fixing that order is a web task — it isn't in the native app.
Reorder the sets
- From the Drawings page, select Add/Edit Drawing Sets to open the Drawing Sets page for the area.
- Select Reorder Revisions in the upper right.
- In Reorder Drawing Revisions, drag each set by its handle between Newest at the top and Oldest at the bottom. Each row shows the set name, how many published sheets it holds, and when it was first published.
- Select Reorder Revisions to save.
Only sets with at least one published sheet are listed, and the dialog needs two of them. With fewer, it reads "This drawing area needs at least two published drawing sets." and there's nothing to save.
What changes when you save
Saving republishes sets to match the new order, starting with the oldest set that changed position and including every set newer than it. Rows that will be republished are highlighted in the dialog before you save. Those sheets get new revision numbers and publish dates that follow the order you set, and the set at the top becomes the current revision of each sheet it contains. Older sets below the first change keep their revisions and dates.
Unpublished sheets aren't touched. The reorder shows up in View Drawings Activity Log for the area, listing the sets in their new order.
Note: A revision-changes report that already exists isn't rewritten when you reorder, so it still describes the order the set had when the report was generated.
Why don't I see Reorder Revisions?
You're in the native app, or your role doesn't have drawing-management access. Open the Drawing Sets page in a browser, or ask a project administrator to check your drawing permission.
With the sets in the right order, every sheet's current revision is the one your team should be building from.
Viewing revision changes
Publishing a set does not, by itself, write the briefing of what changed. Once revised sheets from a set are published, anyone who can view drawings can select Generate revision report on that set. Open the finished report when you need to brief the trades — it isn't on the Drawings index.
Open the report
- From the Drawings page, select Drawing Sets. If you manage drawings, the same button reads Add/Edit Drawing Sets. In the native app, both live in the ⋯ menu.
- Find the set whose revised sheets were published. With view-only access, the list shows published sets only.
- If no report exists yet, select Generate revision report. The control sits on the Drawing Sets list and as a banner on the set itself.
- While the description is still running, the set shows Generating revision changes… and the link isn't clickable yet.
- When it's ready, the banner reads Revision changes are ready. Select View revision changes.
Anyone with View drawings can generate the report and open it. Failed generations don't leave a banner — a failed report route is simply not found. Partial completes can still list undescribed sheet numbers in the briefing.
The report is one per drawing set, and it describes sheets that are new revisions of existing drawings. A set holding only first issues (Rev. 0) has nothing to compare against, so Generate revision report doesn't appear for it. Once a report exists, publishing more revised pages from that set updates the same briefing rather than creating another one.
Note: If you published revised sheets and never see Generate revision report or Revision changes are ready, nobody has generated the report yet. Publishing alone will not create it.
Read the briefing
The page title is the drawing set name. The header shows the revision range, how many changed sheets are listed, and when the report was generated.
The briefing is a short AI summary — why the set was issued, the main layout or scope shifts, and which trades need to coordinate — with sheet numbers you can follow. Related RFI, Submittal, Change order, and Document badges appear at the top when several sheets share them, and again on the individual sheet cards.
Sheets are grouped by discipline. Each card has a thumbnail (opens the viewer), the sheet number, the revision range, the title, and what changed. Sheets with no material change stay off the list, so a 40-page set might only show the eight that actually moved.
This work runs as an internal Agent pass. It does not appear in All Chats or under Use a Skill.
Where is View revision changes?
On the drawing set, not on the current Drawings index. Open Drawing Sets (or Add/Edit Drawing Sets), then the set. If nobody has generated the report yet, you'll see Generate revision report there instead of the view link.
You now have a briefing you can send the trades.
Find and manage current drawings
Using the Drawings page
The Drawings page is your project's current drawing index. It shows the latest published revision of every sheet in the selected drawing area, which makes it the one place to go when you need to be sure you're looking at today's plan.
When the project has more than one drawing area, switch areas with the tabs above the index. The search field reads Search sheets and drawing contents... on a single-area project, and includes the area name when there are several.
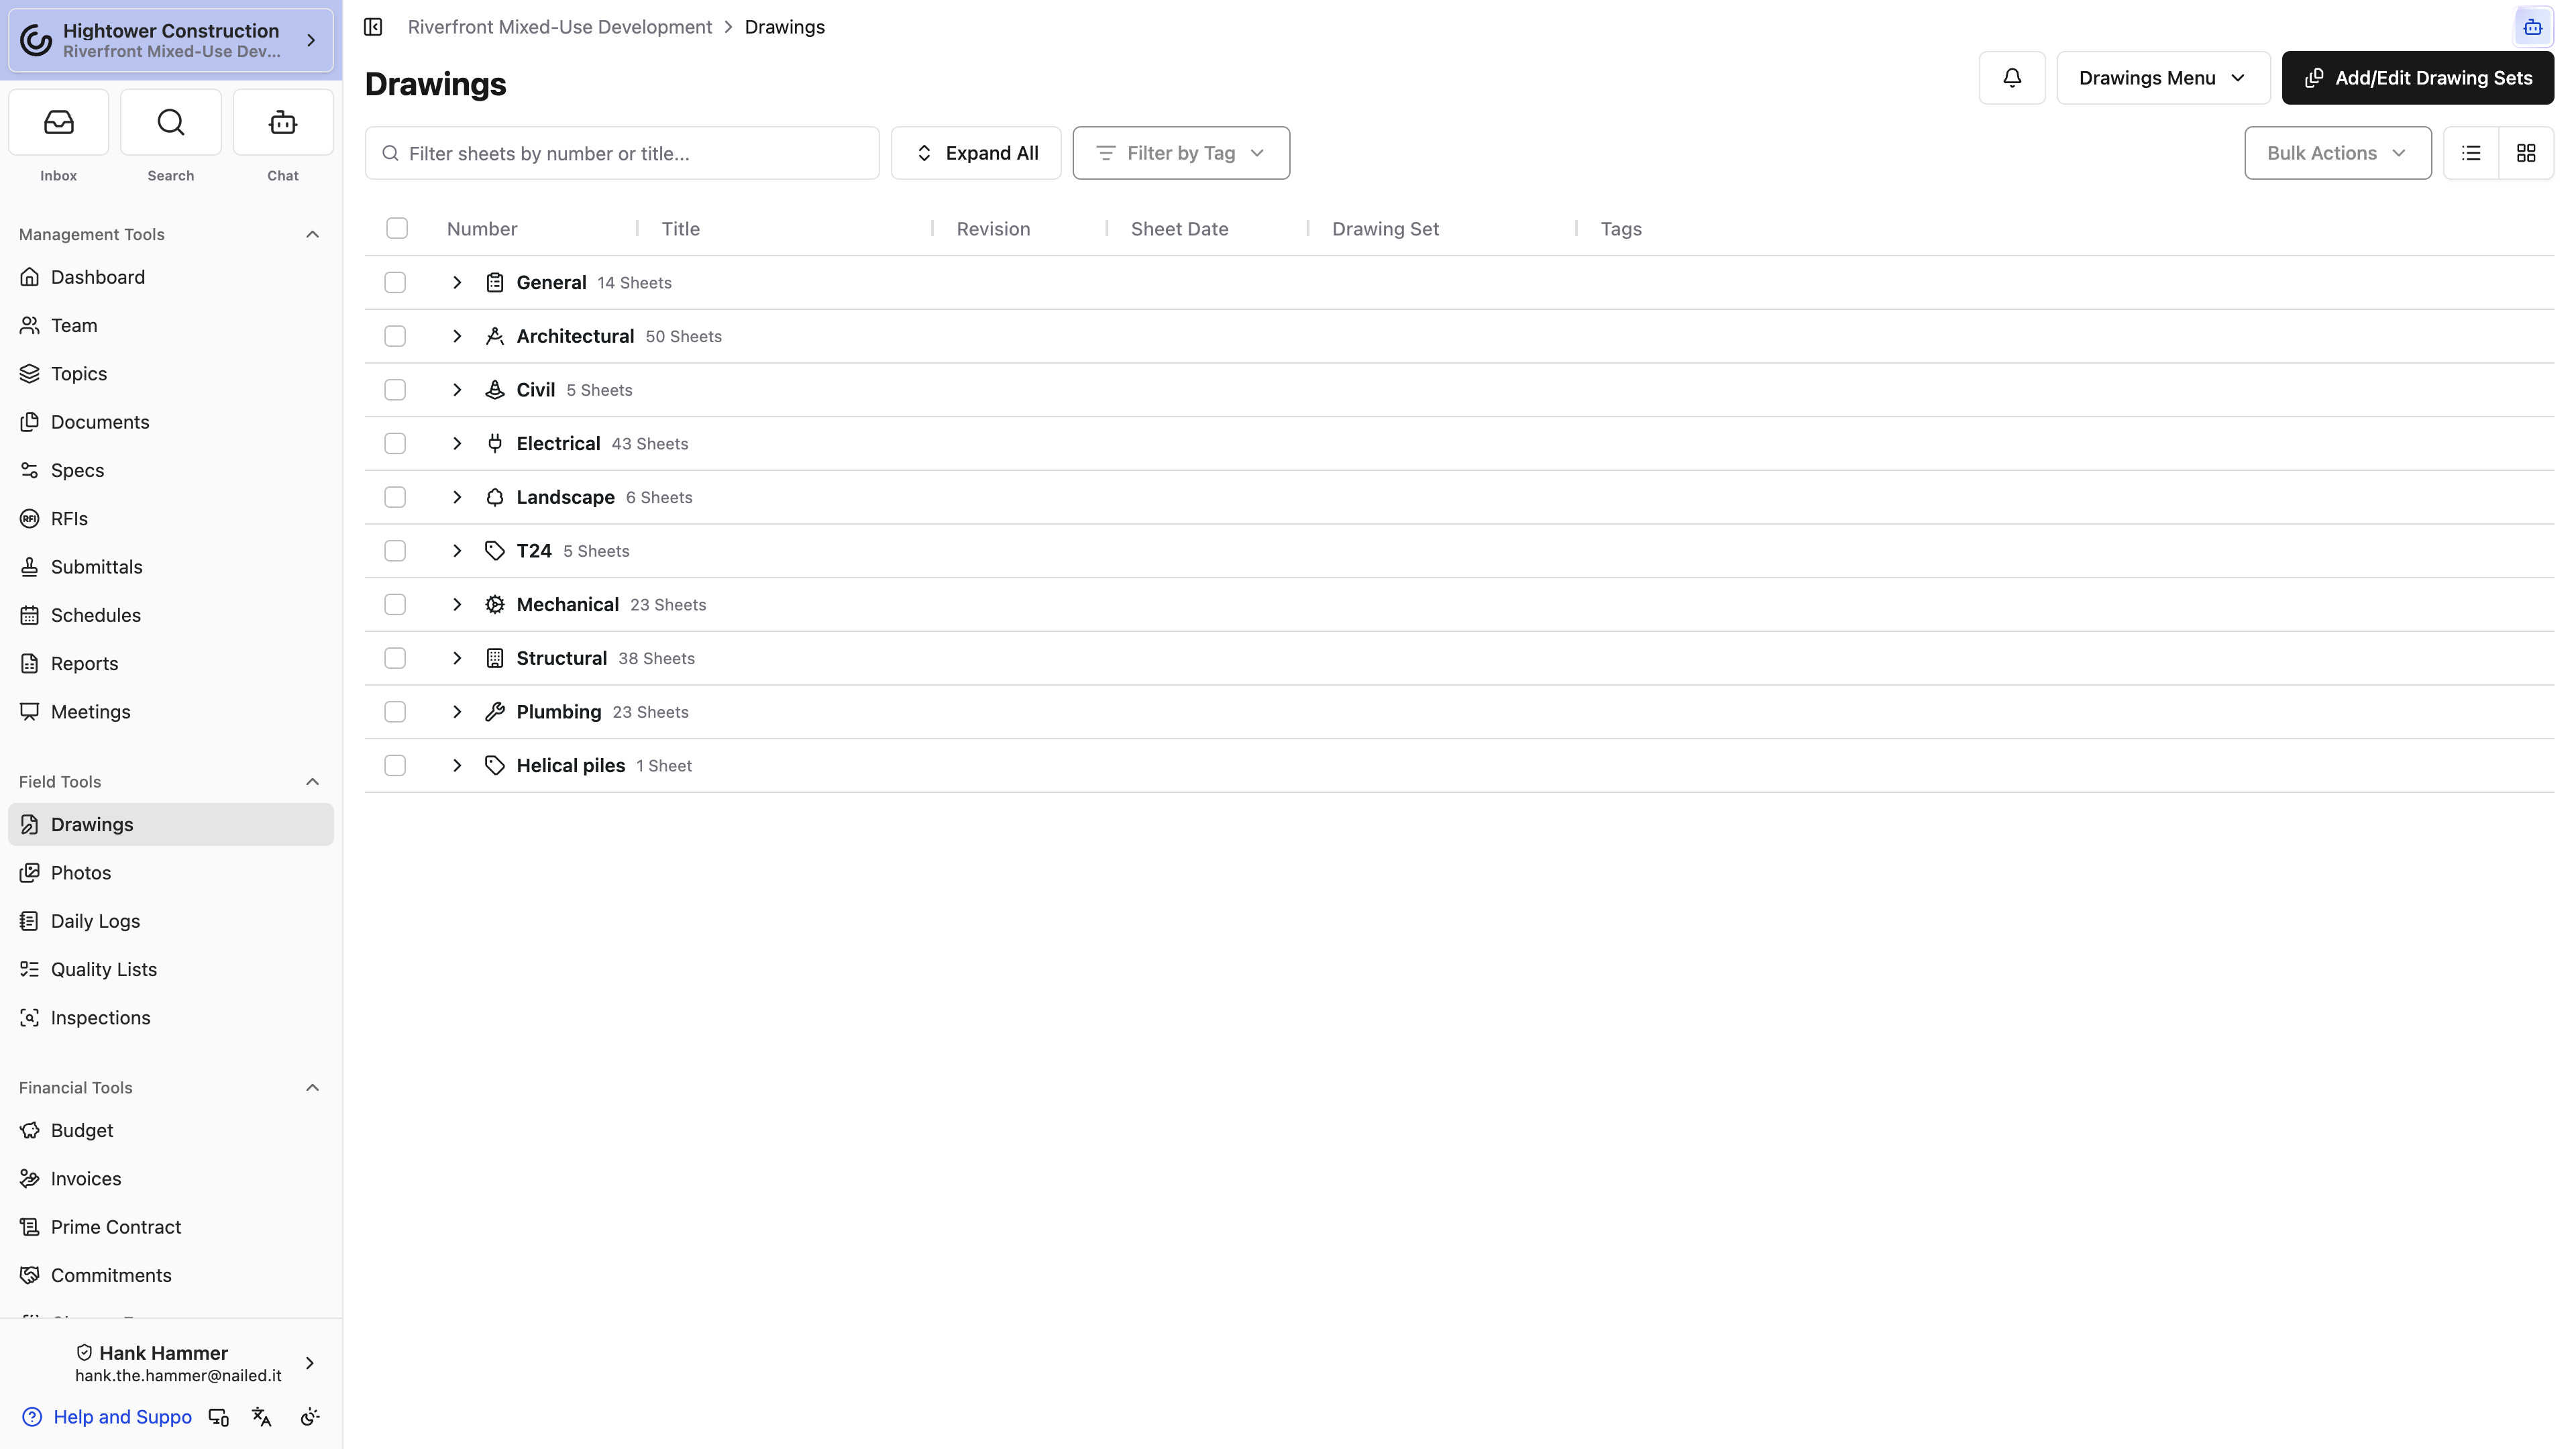
Don't confuse it with Drawing Sets, which is where drawing administrators handle uploads, reviews, and unpublished pages.
Choose a view
Use the controls labelled Drawing view to switch between:
- List view for sheet details, row selection, and bulk actions
- Thumbnail view for a visual scan of the plans
We remember which one you picked. Choose thumbnail view to browse visually or list view to review sheet details and select drawings in bulk.
Thumbnail cards lead with the sheet number, title, and preview. When you need the drawing set a sheet came from or its full revision history, open the sheet and use its revision selector.
Browse discipline groups
Drawings are grouped by discipline. Select a group to expand or collapse it, or use Expand All and Collapse All.
Two more groups appear when they have anything in them:
- Starred for sheets you've marked as favorites
- Uncategorized for drawings without a discipline
Note: Starred sheets still belong to their normal discipline. The Starred group is a shortcut, not a second copy of the drawing.
Understand the list columns
List view can show:
- Number
- Title
- Revision
- Sheet Date
- Drawing Set
- Tags
- Available actions
The index follows a deliberate project order based on discipline and sheet position, and column-header sorting isn't available. If the order is wrong for your project, a drawing administrator can change the shared order from Edit/Reorder Disciplines & Sheets.
Open a drawing
Select a sheet number, title, or thumbnail to open the latest revision in the drawing viewer. When you leave the viewer, we put you back where you were — same view, same expanded groups, roughly the same scroll position.
Expected a sheet and don't see it? Check these four things:
- The selected drawing area
- Active search or tag filters
- Whether the sheet was confirmed but not published
- Whether the latest revision was unpublished
Why can't I sort by sheet date?
The index uses your project's own order — discipline first, then sheet position — instead of column sorting. That keeps everyone looking at the same sequence.
Is a starred sheet a different drawing?
No. Starring adds a personal shortcut group. The sheet stays in its discipline and nothing changes for anyone else.
That's your current plan set, one click from the viewer. For more ways to land on the right sheet, continue with Finding drawings with search, stars, and tags.
Finding a detail with the Details tab
Somebody asks where detail 6 is and the honest answer used to be "somewhere on the A5 sheets." Numbered details are still on the sheets — you get to them from the drawing viewer, not from a separate tab on the Drawings page.
The Drawings page no longer has a Details tab. Area tabs switch drawing areas; they don't list callouts. To land on a numbered detail:
- Open Drawings and pick the drawing area.
- Open the sheet that holds the callout, or open the sheet that points at it.
- Select the faint blue shaded box on a sheet-number or detail reference. When the reference names a specific detail, we zoom to that spot on the target sheet instead of dropping you at the top.
- If you don't see a link, use viewer search for the detail number or title. Scanned or handwritten callouts often won't link.
Details come out of the same processing that happens when a drawing set is uploaded. We only turn callouts into links when we're confident about them — a smudged or hand-drawn bubble may not light up even though you can read it, and the sheet itself is still the authority.
Note: A recognized detail is a callout on the sheet. It isn't a record you can edit, comment on, or assign.
Find it from the reference on the plan, and you stop paging through A5 by memory.
Why is there no Details tab on my drawing area?
There isn't one on any drawing area. Switch areas with the tabs at the top of Drawings, then open a sheet and follow a detail link or search in the viewer.
A detail I can see on the sheet isn't a link
We only link detections we're confident about, so faint, rotated, or handwritten callouts get left out. Use viewer search or the sheet itself for those.
Finding drawings with search, stars, and tags
Nobody should have to scroll a full plan set to find one sheet. Search, stars, and tags each solve a different version of that problem — search for the sheet you can name, stars for the ones you open constantly, tags for the groups your project cares about.
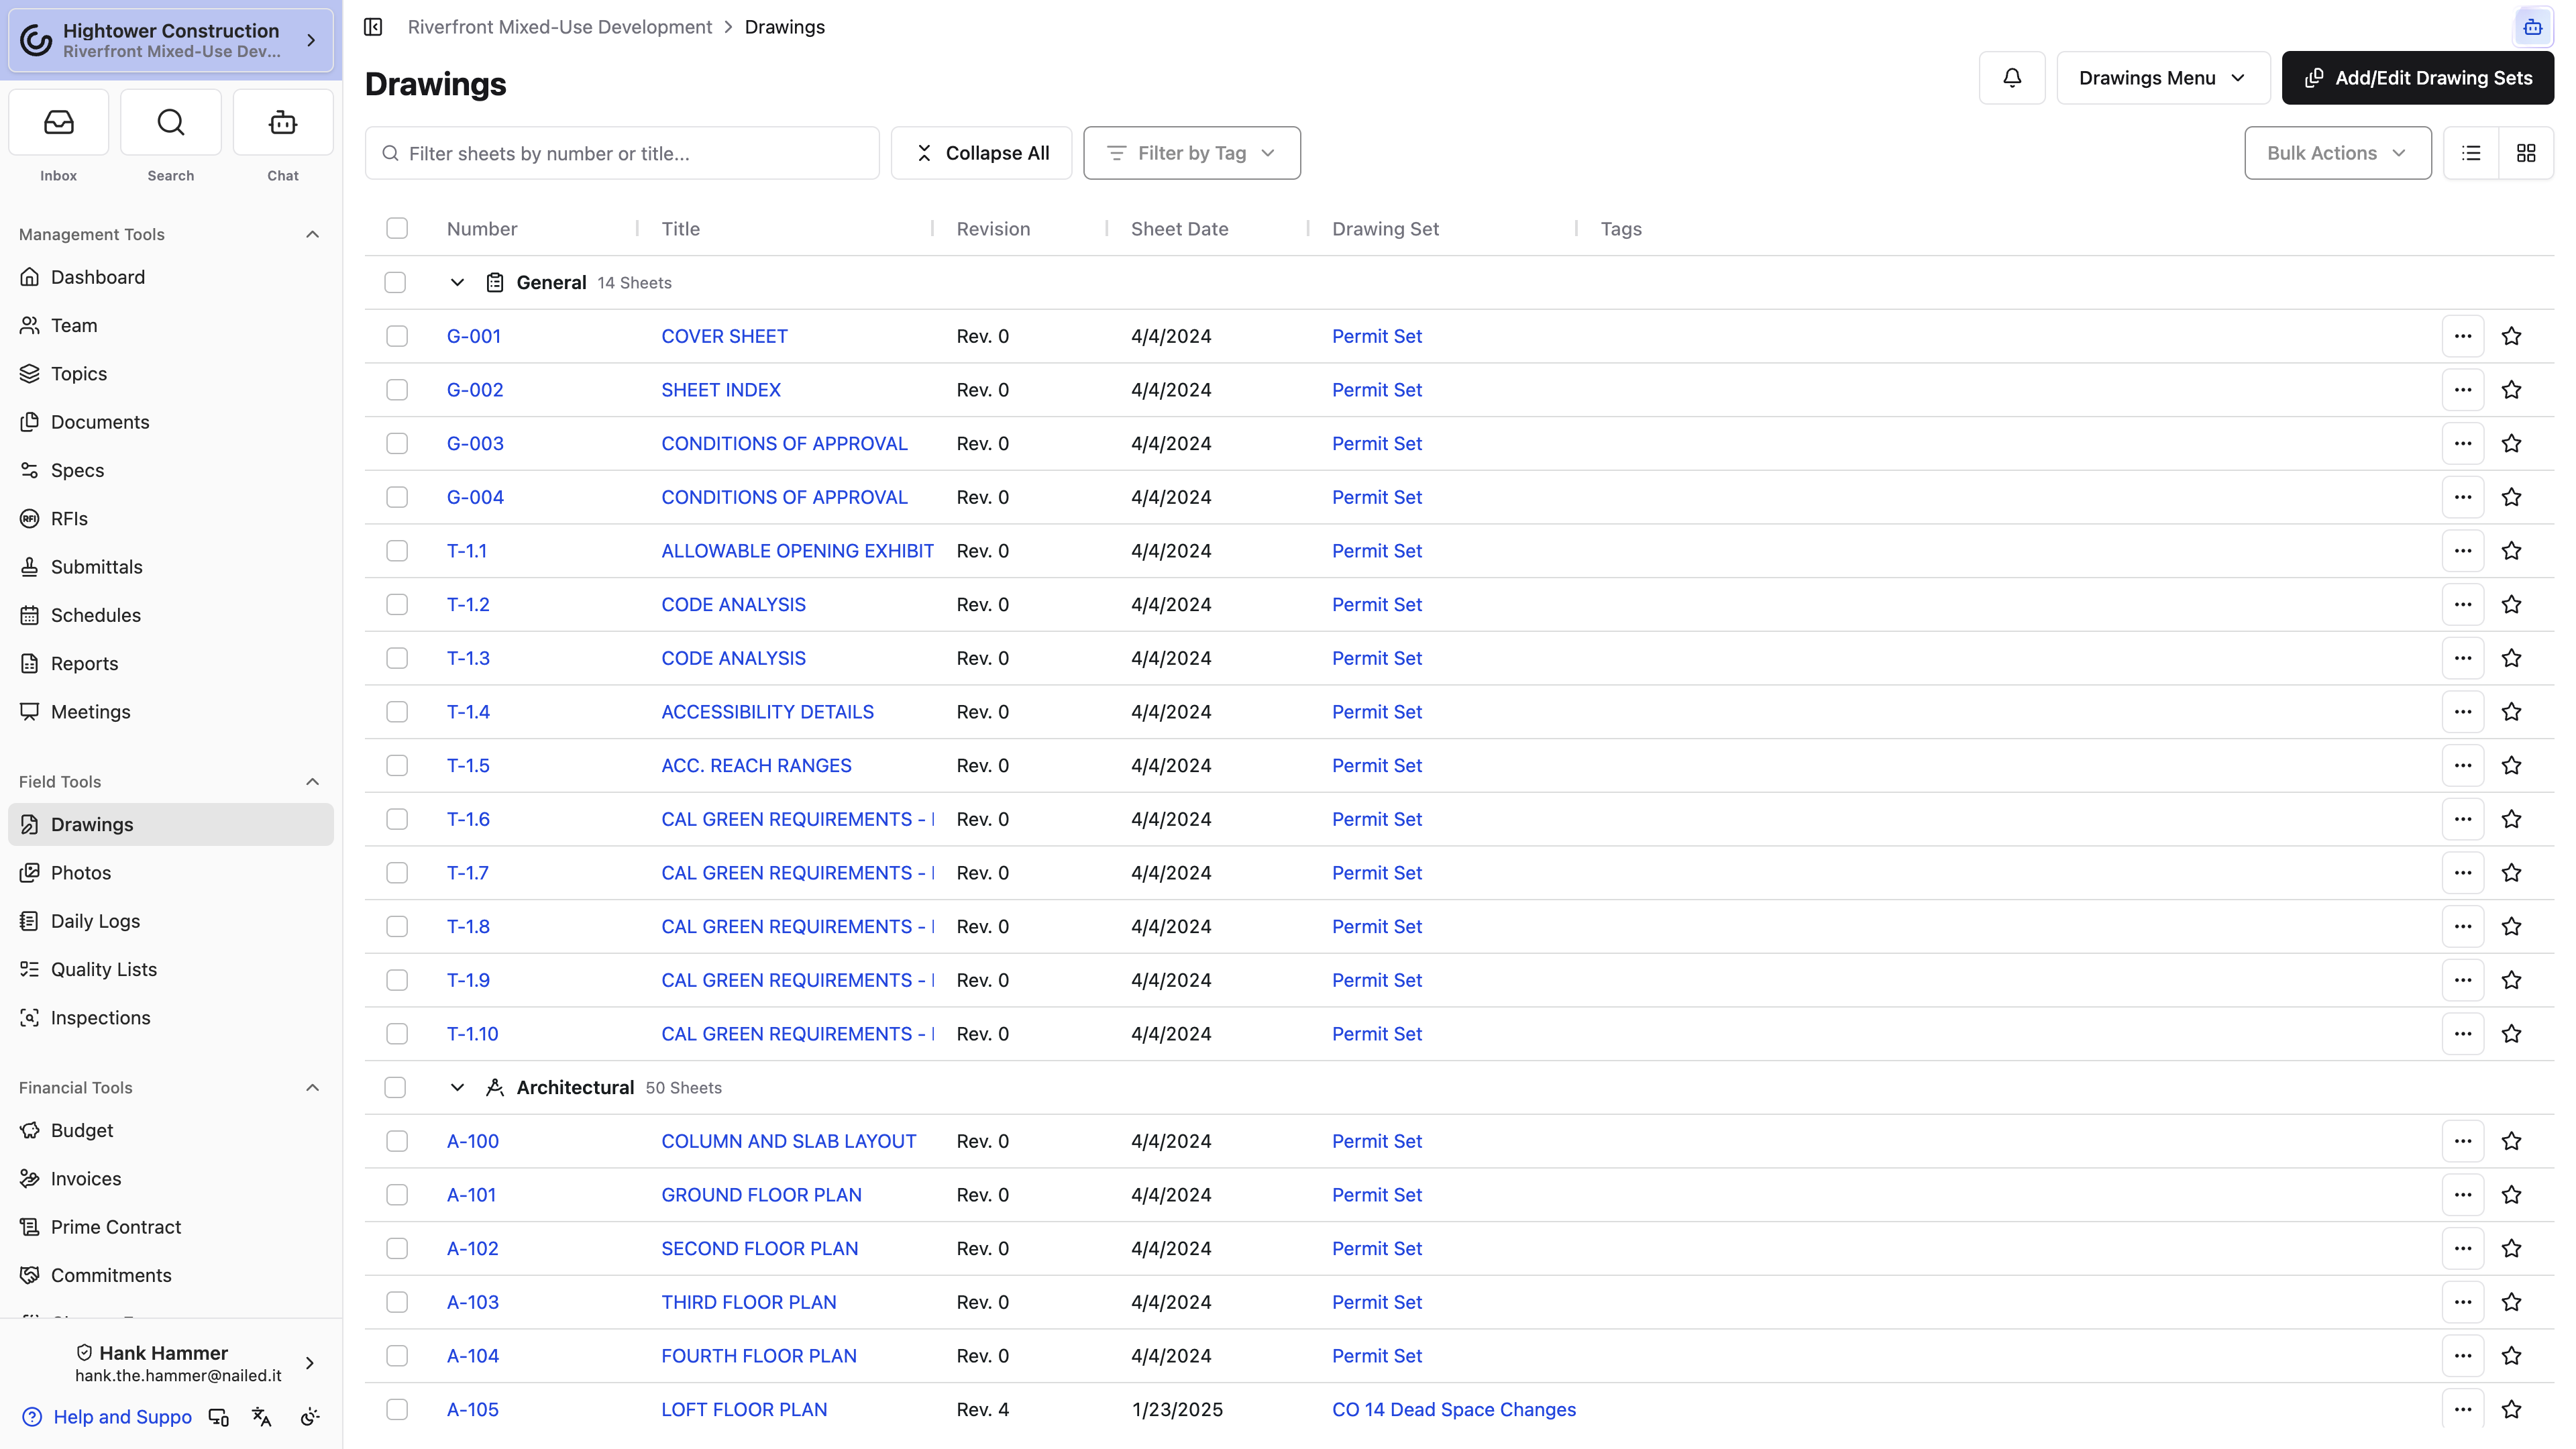
Filter by sheet number or title
Use the search field on the Drawings page to filter the current area. Enter at least two characters. We match loosely against sheet numbers and titles, so a partial term will usually still land you on the right sheet.
While you're online, the same search also reads the text inside the drawings — keynotes, room names, schedule entries — and keeps any sheet where the term appears, even when its number and title don't match. Number and title matches show up right away, and a spinner in the search field shows while we check the contents — or Searching drawing contents... when nothing has matched yet. Open a sheet from the filtered list and your term is already filled in when you open the viewer's search, so you can jump straight to where it appears.
Results stay inside the current drawing area and any tag filter you've applied. If we can't search the contents, a notice tells you so and the list falls back to number and title matches:
- Offline: "You're offline. Only sheet numbers and titles are being searched."
- A failed content search: "Couldn't search drawing contents. Showing sheet number and title matches only."
- A very common term: "Too many sheets mention this. Some content matches aren't shown, so try a more specific search."
Note: We remember your search text per drawing area. If the page looks unexpectedly empty when you come back later, you're almost certainly still filtered — clear the search field.
Content search reads the text we pulled from each sheet during processing, so scanned or handwritten notes may not turn up. Once a sheet is open, use the viewer's own search to step through every match — see Navigating and searching in the drawing viewer.
Star frequently used sheets
Select the star action on a drawing to drop it into your personal Starred group.
Stars earn their keep for:
- A superintendent's most-used logistics and floor plans
- Sheets needed during a specific phase
- A small review set you open over and over
Starring changes nothing for anyone else, and it has no effect on publication or discipline. It's your shortcut.
Organize and filter with drawing tags
Tags are project-defined labels that group sheets across disciplines. Creating tag definitions and assigning them to one or many drawings takes drawing-management access.
To filter:
- Select Filter by Tag.
- Choose one or more tags.
- Choose whether drawings should match any selected tag or all selected tags.
Active filters appear near the toolbar, and you can remove them one at a time or clear the lot.
Pro Tip: The active tag filter carries into the viewer's sheet selector, so you can page through the same filtered group without bouncing back to the index. Filter to
Permit Setbefore you open a sheet and the whole review stays inside that group.
Tags vs. disciplines
Use a discipline for the sheet's primary professional category, and tags for the flexible project-specific groupings that cut across them.
Electrical is almost certainly a discipline. Permit Set, Building B, or Foreman Favorites are better as tags.
Why does search find nothing when I know the text is on the sheet?
Check for the offline notice first — without a connection, the Drawings page search only looks at sheet numbers and titles. If you're online, the text may not be readable on that sheet: scanned pages and hand-drawn notes often don't come through. Try a shorter, more distinctive term, or open the sheet and search it from the viewer.
Can other people see my starred sheets?
No. Stars are personal. Use a tag when you want a group everyone on the project can filter by.
Between the three, you should be able to get to any sheet in a couple of seconds.
Using bulk actions, activity, and notifications
Retagging forty sheets one at a time is nobody's idea of a good afternoon. In list view you can select a batch of drawings and retag, recategorize, download, or share them in one pass. The same menu is where you check who changed what, and where you turn the drawing area's email notifications up or down.
Select drawings
Use the row checkboxes to select individual drawings. Selecting a discipline group can select its visible descendants, which is the fast way to grab an entire discipline.
Note: Switch to list view and select at least one drawing to open Bulk Actions. Check drawing-management permission for editing actions.
Available bulk actions
Depending on your permissions, you can:
- Add or remove drawing tags
- Change disciplines
- Edit Sheet Dates for the selected sheets — list view, with drawing-management permission. The dialog is Edit Sheet Dates; each row has Sheet Date and Clear sheet date. Save, and a toast confirms how many sheets were updated.
- Download selected drawings
- Create a shareable link for selected drawings
Tag, discipline, and sheet-date edits need drawing-management permission. Downloads and share links are open to anyone who can view the selected drawings.
Note: Bulk tag editing adds or removes only the tags you choose — it isn't a wholesale replacement of every existing tag. Check which edit mode you're in before you save.
View drawing activity
Open the Drawings menu and select View Drawings Activity Log to review the events tied to that drawing area.
It's the right place to settle questions like:
- When was a set published?
- Was a sheet unpublished?
- Who changed or removed drawing information?
Note: The activity log tells you what happened in the past. When you need to know which revision is current right now, check the viewer instead.
Manage notifications
Drawing notification settings decide how much email a drawing area sends you, and the setting you pick for one area overrides your project and personal defaults for that area only.
If you customized an area and want your normal settings back, reset it to defaults. Your personal and project notification settings are reachable from here too when the change should be broader.
Note: Notification options only affect the alerts you receive. They never change your permission to view or edit drawings.
Why don't I see bulk actions?
Switch to list view and select at least one drawing, then open Bulk Actions. In compact layouts, check the page actions or overflow menu.
Does turning off drawing notifications hide drawings from me?
No. Notifications and permissions are completely separate. Muting an area just means we stop telling you about it.
One pass through list view and a whole discipline is retagged, downloaded, or shared.
Downloading and sharing drawings
You can pull down current drawings, a handful of selected sheets, a whole uploaded drawing set, or just the sheet you're looking at. The one decision worth making first is whether your recipients need today's plans, one historical upload package, or a single sheet.
Download all current drawings
From the Drawings menu, select Download All. The PDF you get contains the latest published revision of every drawing in the selected area.
This is the right answer most of the time when you're distributing a current plan set.
Download selected drawings
In list view:
- Tick the rows you want.
- Open Bulk Actions.
- Select Download Selected. The menu counts your selection into the label, so it reads Download Selected (12 sheets).
You get a PDF containing the latest revision of only those drawings.
On every platform, use Download Selected for a chosen group from the current drawing index, Download All for all current drawings, or export selected pages from an individual drawing set for pages from that upload package.
Download a drawing set
Open a drawing set and choose Download Entire Set, or select specific pages within the set.
A drawing set page works the same way the Drawings index does, which matters on a large issuance. Search it from the same search field as the index — sheet numbers, titles, and, while you're online, the text inside the set's sheets — narrow it with Filter by Tag, open or close the discipline groups with Expand All and Collapse All, and switch between List view and Thumbnail view with the Drawing view buttons. In list view you also get Published At and Status columns, so you can see at a glance which pages of the set went out and which are still Unpublished. Tick rows there and the set's bulk actions apply to that selection.
Note: A drawing-set download gives you that upload package as it was, which can include older revisions and unpublished pages. Check what's in it before you hand it to someone as the current project set.
Include markup
The export dialog has an Include published markup checkbox, on by default. Clear it when the recipient needs clean plans; leave it on when the annotations are the whole point of the handoff.
Note: You only export markup you're allowed to see, so your access to RFIs, Submittals, list items, and other records changes what shows up. Two people exporting the same sheet can end up with different PDFs.
Create a shareable link
Choose Share Download Link for all or selected drawings. We generate the PDF, upload it, and hand you a link to copy.
Note: That link points at a snapshot, not a live view. When drawings change, generate a new link — the old one keeps serving the old package.
Download the drawing log
Select Download Drawing Log for a PDF register of the area's latest published drawings. It carries the sheet and revision metadata you'd want for a transmittal or coordination record, and it's a register rather than a plan set.
Export the current sheet
From the drawing viewer's toolbar or context menu, select Download to export the active sheet with its visible markup. Wait until the sheet has finished loading — the control stays disabled with Download is available once the sheet finishes loading until then.
Note: The current-sheet export has no Include published markup checkbox the way the bulk export does — it takes whatever is on screen. If you need it clean, select Hide all markup in the viewer first, then download.
There's no separate print workflow in the viewer. Export the PDF and print it from your normal PDF application.
Which download gives me the plans we're building from today?
Download All. It assembles the latest published revision of every drawing in the area. Download Entire Set gives you a historical upload package instead.
I sent someone a share link last month and it's out of date. Can I refresh it?
Generate a new link. The existing one points at the package we built when you created it.
Pick the option that matches the ask and your recipients open exactly the set you meant to send.
View, compare, and mark up
Navigating and searching in the drawing viewer
The drawing viewer is where you'll spend most of your time. You can inspect sheets, move through revisions, search the text printed on the plans, and work with markup without ever going back to the drawing index.
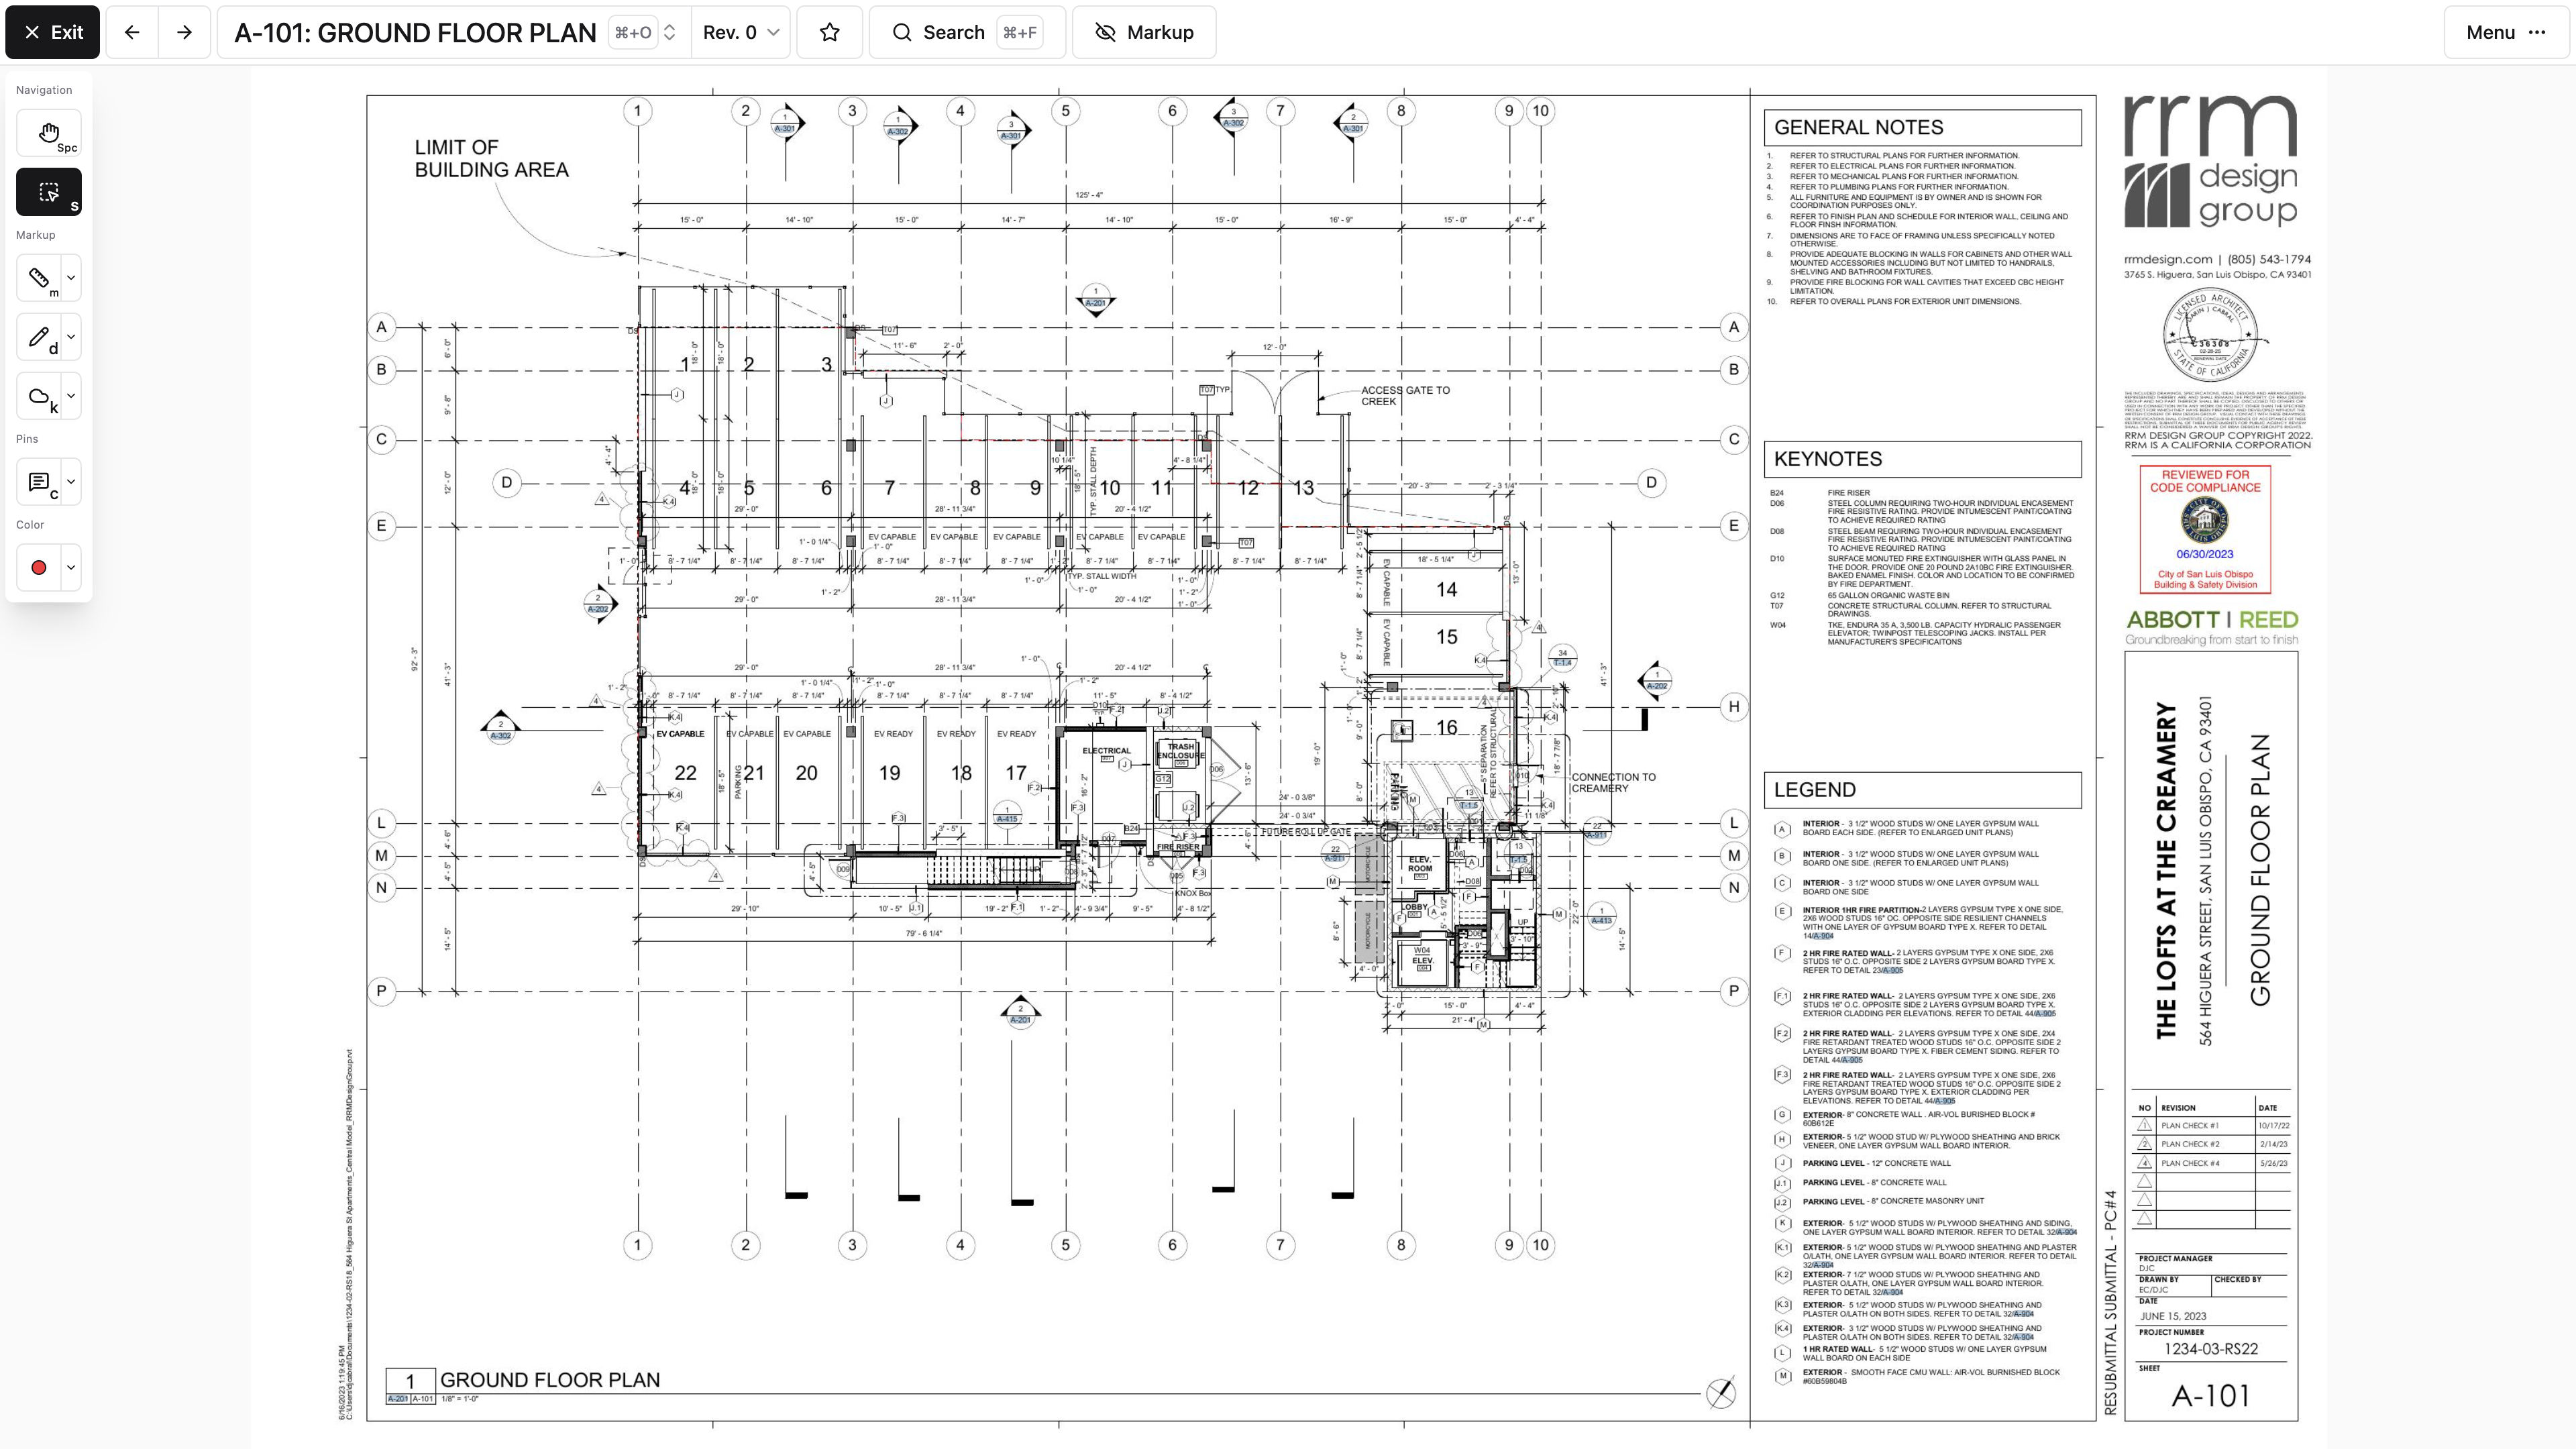
Pan, zoom, and select
Use the Pan tool to move around the sheet and the Select tool to work with markup and pins. On desktop you start in Select; in the native app, and whenever the scrollwheel-zoom preference is on, you start in Pan instead.
You don't have to switch tools to pan. Hold the spacebar while you click and drag, and you'll pan without leaving Select.
Note: The Pan tool won't let you select or edit ordinary markup — that's the point of it. Pins are the exception: you can still tap a pin while panning to open it.
To zoom, press + and -, hold Control (Command on Mac) while scrolling, or pinch on a trackpad.
Copy text off a sheet
Retyping a keynote or a door-schedule row into an RFI is how typos get into correspondence. Select text, under Selection tools in the toolbar, lets you drag across the text printed on the sheet instead. A Copy button appears beside what you've highlighted; select it and we confirm with Text copied, ready to paste anywhere.
This reads the sheet's own text layer, so it works on drawings issued as real PDFs and comes up empty on scanned or photographed sheets — the same reason viewer search can't find a phrase on a scan.
Note: To copy text from a sheet, open that sheet and choose Select text. Close the comparison first to work directly with the sheet text.
Shortcuts on desktop:
| Key | Action |
|---|---|
S | Select tool |
Hold Space | Pan while Select stays active |
M | Measure distance |
A | Measure area |
D | Pencil |
H | Highlight |
T | Text |
K | Cloud |
C | Comment pin |
+ / - | Zoom in and out |
← / → | Previous and next sheet |
Esc | Return to the default tool |
Delete | Remove the selected markup |
Cmd/Ctrl + Z | Undo |
Cmd/Ctrl + A | Select everything in the active Topic |
Cmd/Ctrl + O | Open the sheet selector |
Cmd/Ctrl + F | Open search |
Your scroll-wheel behavior depends on your user setting. If the wheel zooms when you expected it to scroll, check Scrollwheel zooms the drawing viewer under User Preferences in My Account.
On touch devices, pinch to zoom and drag to pan — no keyboard shortcuts needed. On phones, sheet and revision controls live in the bottom bar while Pan or Select is active. When you choose a markup or measurement tool, that space changes to tool controls; tap the checkmark button at the right end of the bar to put the sheet controls back.
We load a quick preview first, then replace it with detailed PDF tiles as needed. A brief change in sharpness while zooming is normal.
Move between sheets
Use the previous and next buttons, arrow keys, or mobile swipe controls to move through the current drawing order.
Open the sheet selector to:
- Browse thumbnails by discipline
- Filter by sheet number or title
- See starred sheets
- Replace the current sheet
- Open a sheet in a new tab
- Open the sheet in Split View, or overlay it on the one you're looking at
If you entered the viewer with a drawing-tag filter active, the selector stays within that filtered set until you clear the filter.
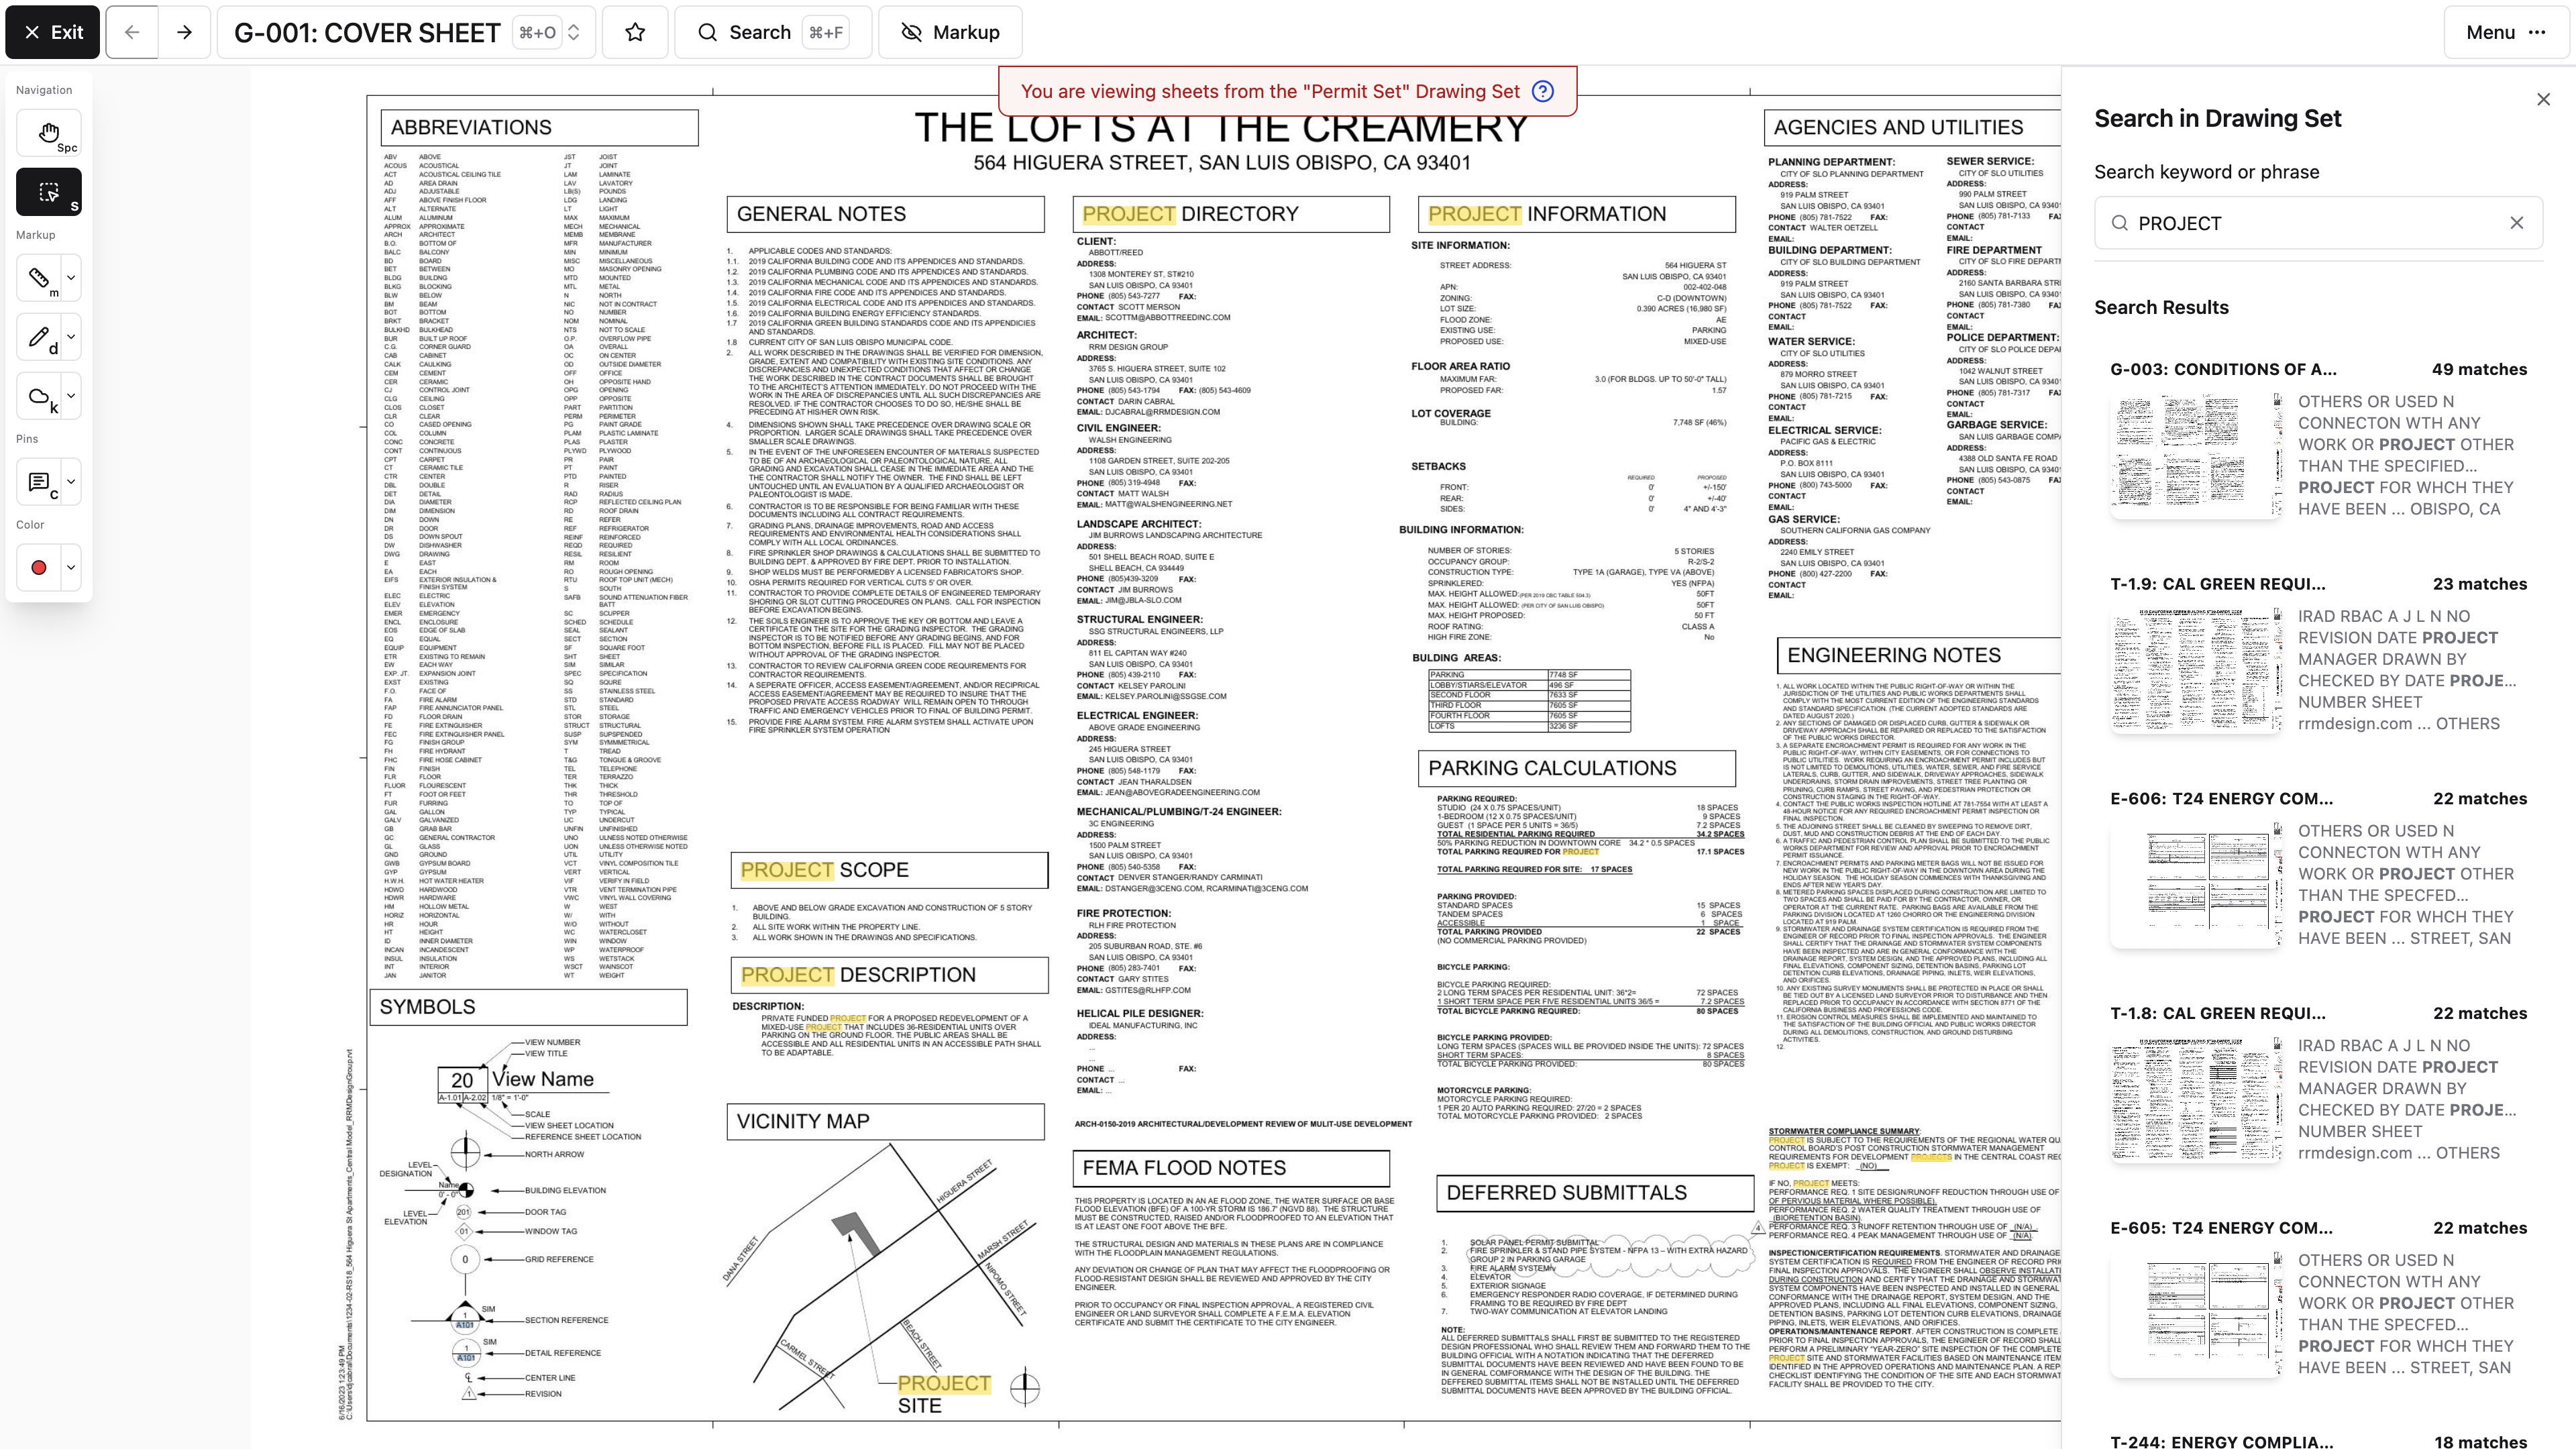
Search drawing content
Viewer search reads the text extracted from the drawing sheets themselves, not just sheet titles — so you can go looking for a keynote or a room name.
You can:
- Enter a term or phrase.
- Use exact matching when wording matters.
- Preview matching sheets.
- Open a result and jump to its highlighted location.
Note: Scanned or low-quality text may not be fully searchable. If you can see a phrase on the sheet but search won't find it, try a shorter distinctive term or search by sheet number instead.
Follow sheet-number links
We recognize many of the sheet references printed in the plans — both the plain sheet numbers in the text and the circled detail bubbles that point somewhere else. They show up as a faint blue shaded box over the reference. Select one and we'll open the target sheet, so you're not hunting through the index for the detail a plan just pointed you at.
When the reference names a specific detail, we go one better and zoom to that detail on the target sheet instead of leaving you at the top of it. See Finding a detail with the Details tab if you're looking for a callout from the index rather than from a reference already on screen.
Links depend on readable drawing text or a recognized callout, plus a matching sheet in the area. A reference won't link if the target sheet is unpublished, numbered differently, or wasn't recognized during processing.
Follow a sheet link to open the referenced sheet or detail. Use Open in Split View when you want to keep the original sheet beside the destination, or use the viewer back history to return to your starting point.
Hide markup temporarily
Select Hide all markup in the viewer when you need a clean look at the underlying sheet; the same control then reads Show all markup to bring it back. On narrow layouts the button shows only the word Markup with an eye icon. Either way it only changes what you see — nothing is deleted or unpublished.
Pins go with it. Comment, photo, RFI, Submittal, and list-item pins all disappear alongside clouds and text, which is what you want when you're reading the sheet or capturing it for someone else, and worth remembering when a pin you were about to open vanishes.
Why does the sheet look blurry for a second when I zoom?
We load a quick preview first and swap in detailed PDF tiles behind it. That brief change in sharpness is the handoff, not a problem with the file.
My scroll wheel zooms when I want it to scroll. Can I change that?
Yes. Scrollwheel zooms the drawing viewer is a user preference under User Preferences in My Account.
Learn the handful of shortcuts above and you'll move through a plan set about as fast as you can think.
Comparing sheets and revisions with Split View
Split View puts two sheets or revisions side by side so you can read both of them properly instead of flipping back and forth and trying to hold one in your head. You'll need access to both sheets or revisions you want to compare.
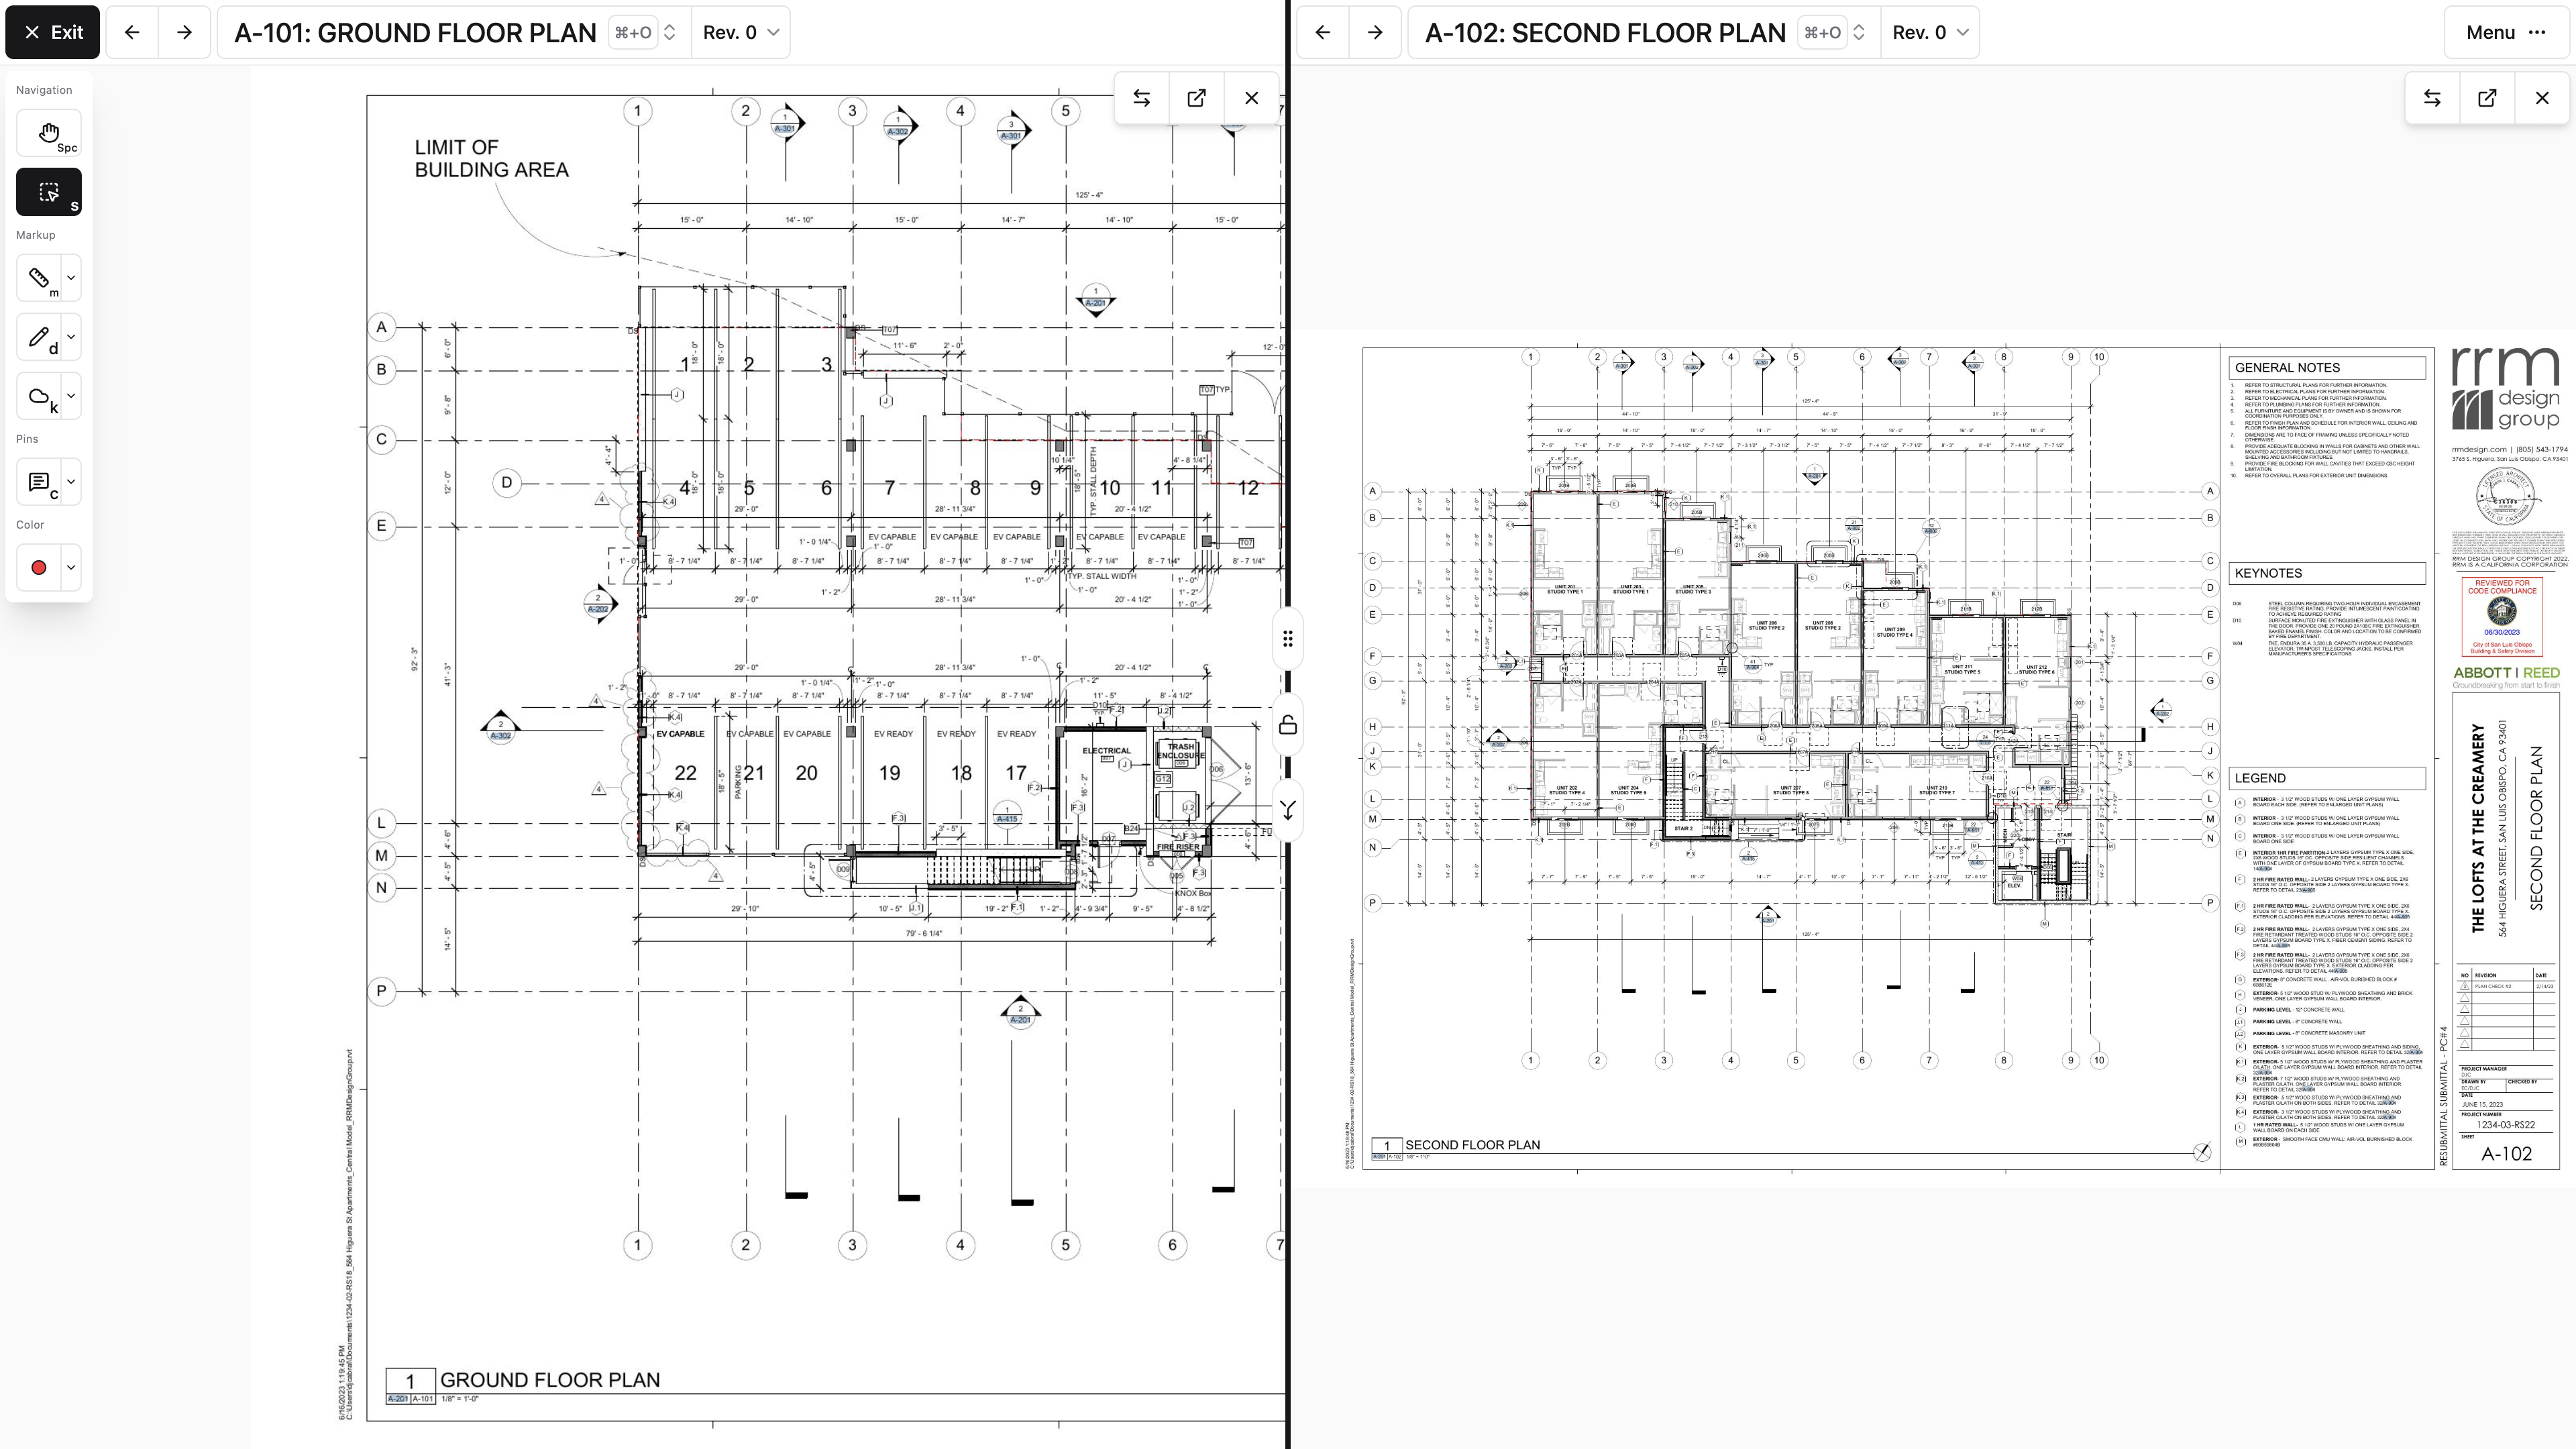
Open Split View
From the sheet or revision selector:
- Find the second sheet or revision.
- Choose Open in Split View.
- Resize the panels as needed.
You can compare two revisions of one drawing, or two entirely different sheets.
Work with the panels
Whichever panel your pointer is over is the one that gets your keyboard shortcuts and tools, so move the pointer before you press anything.
Split View controls let you:
- Swap the primary and secondary sheets
- Open a panel in a new browser tab
- Close the secondary panel
- Navigate each panel's sheet or revision
Each panel pans and zooms on its own to start with. Two buttons on the divider between them change that. The padlock is Lock Views, which pins both panels to the same spot on the sheet; select it again for Unlock Views. Below it, the arrows button syncs movement across views, so panning or zooming one panel moves the other with it. Both work best when the two sheets share a similar size, orientation, and origin.
Note: Split View and opening a revision in a new tab are available on desktop web, mobile web, and the native app. Use the sheet or revision selector to choose the action.
When Split View is the right tool
Split View is what you want when:
- You want to read both sheets normally.
- The sheets have different layouts.
- You're comparing a plan with a related detail.
- You want independent markup context on each side.
Reach for an overlay instead when the sheets represent the same geometry and you want the differences stacked directly on top of one another.
Calibrate a sheet
Close the secondary panel before setting or correcting a sheet's scale, then reopen Split View to continue comparing.
Why is calibration greyed out?
Split View is open. Close the second panel and the scale controls come back.
Can I use Split View on my iPad?
Yes. Open the sheet or revision selector and choose Open in Split View in the native app or mobile web. Overlay comparison is also available.
Two plans, both readable, one screen — which is usually all a coordination question needed in the first place.
Comparing drawings with overlays
An overlay stacks one sheet directly on top of another so changes to the linework jump out at you. It's the fastest way to answer "what actually moved between Rev. 2 and Rev. 3?" when both drawings cover the same physical area.
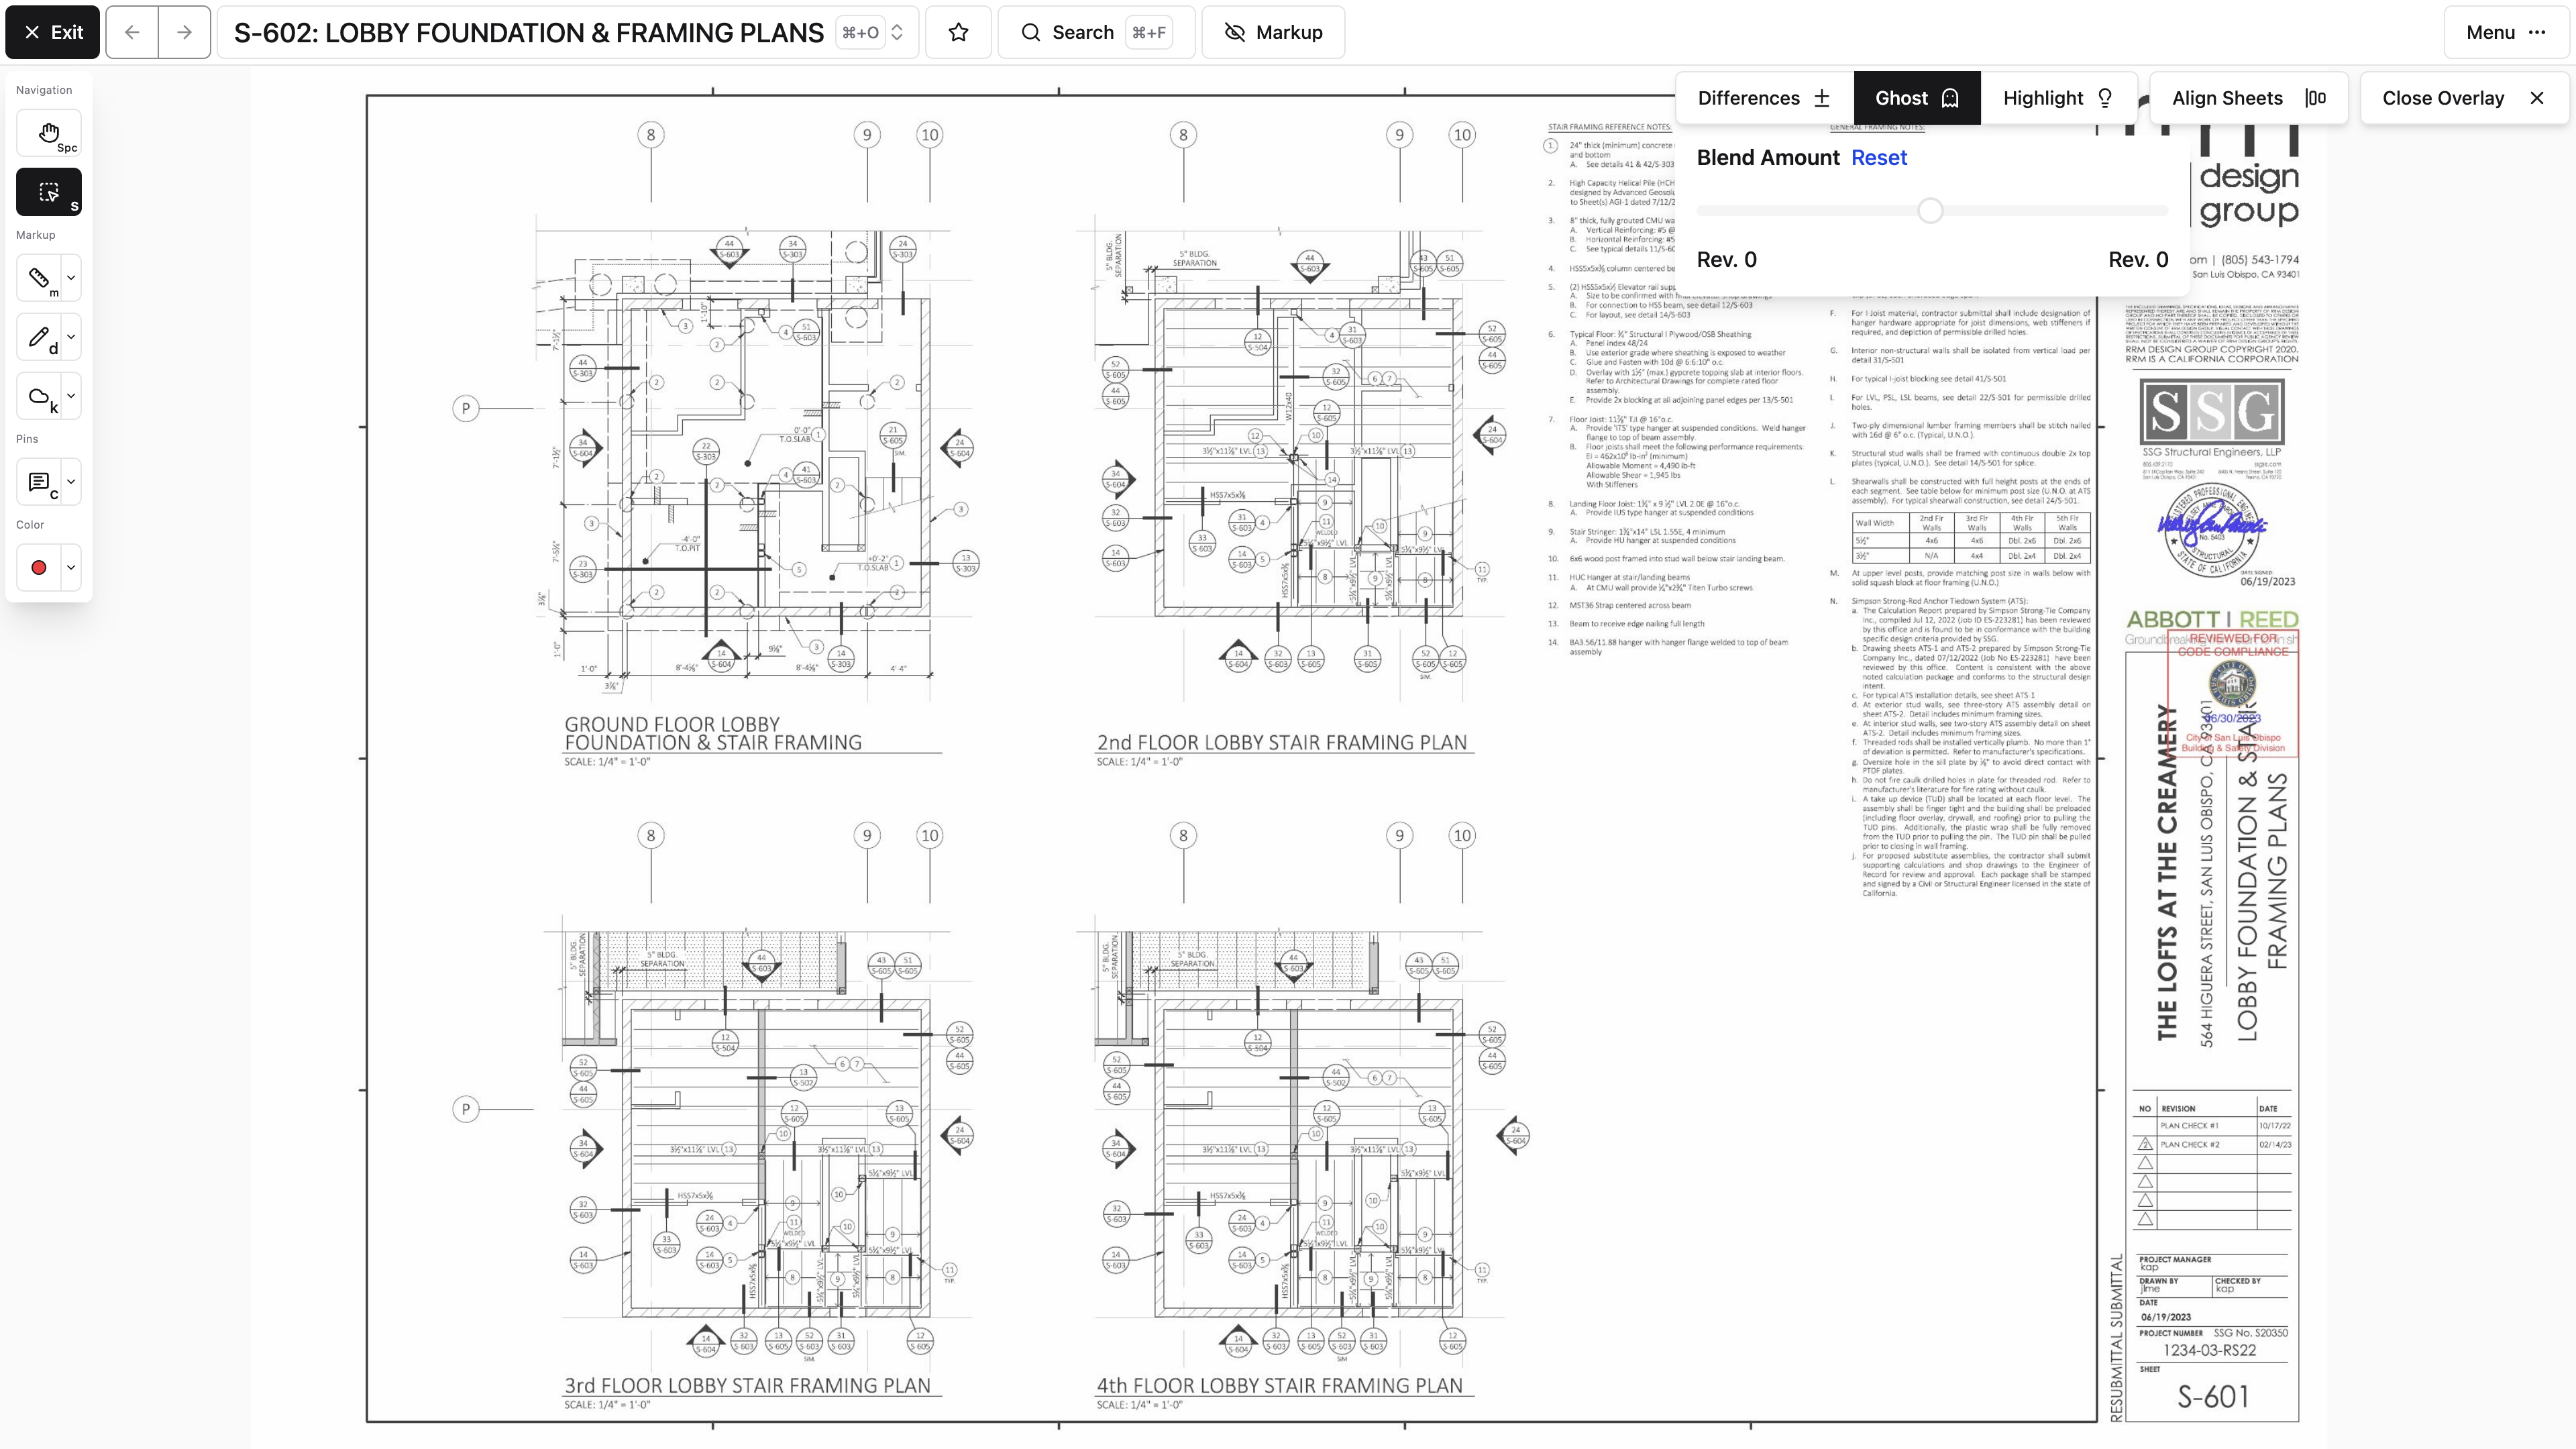
Start an overlay
Open the sheet or revision selector, find the comparison sheet, and choose the overlay action. You can start one from the revision selector too. On phones and tablets, the sheet picker and overlay controls shift into compact layouts.
Overlays work in supported desktop and mobile browsers, including Safari on iOS, and in the native app. A smaller screen changes the control layout, not what the comparison can tell you.
Choose a comparison mode
- Differences tints the two sheets against each other so anything that moved shows up as one colored line next to another. Reach for this when you're chasing a dimension or a wall that shifted.
- Ghost fades one sheet to a faint image over the other, which keeps both drawings legible. Reach for this when you still need to read notes and callouts while you compare.
- Highlight picks out the regions that differ rather than the individual lines. Reach for this first on a busy sheet, to find the two or three areas worth looking at closely.
For Differences and Ghost, the Blend Amount slider shifts the balance between the two sheets. Slide it back toward the middle if the comparison starts getting hard to read.
To take the overlay with you, select Download to export the live composite as a PDF on desktop web, mobile web, or the native app. Finish aligning the sheets and wait for the overlay to be ready before exporting.
Align sheets with three points
If the sheets don't line up:
- Select Align Sheets.
- Choose three matching reference points on the first sheet.
- Choose the same three points on the second sheet.
- Review the aligned result.
Pro Tip: Pick reference points that are far apart and unmistakable — grid intersections or fixed building corners. Three points clustered in one small area will look aligned right there and drift badly across the rest of the sheet.
Note: Finish or cancel alignment before choosing a comparison mode or closing the overlay.
A comparison is not a change record
An overlay shows you what looks different. It doesn't decide what's contractually significant, and it isn't a record anyone can act on later. Confirm what you find against the issued documents, then capture the decision in a Topic, an RFI, or whichever workflow the change belongs in.
Should I use an overlay or Split View?
Overlay when the two sheets cover the same geometry and you want differences stacked on top of each other. Split View when the layouts differ or both sheets need to stay readable.
The two sheets won't line up. What now?
Use Align Sheets and pick three widely separated matching points on each sheet, like grid intersections.
Two minutes with an overlay usually tells you more about a revision than reading both sheets ever would.
Adding and editing drawing markup
Markup is how you point at something on a plan and make everyone else see it too — a cloud around the conflict, an arrow at the detail, a note explaining what you need. Draw it in the viewer, then save it where the right people will find it.
Markup never belongs to the drawing itself. It belongs to a Topic — a named bundle of markup plus the conversation about it — or to a record like an RFI that carries its own Topic. That's why your permission to mark up a sheet comes from Topics access rather than from drawing access, and it's why you'll see a save step that asks where the work should go.
Choose a markup tool
The viewer includes:
- Pencil
- Highlighter
- Text
- Callout — a boxed note with a leader arrow pointing at the thing it's about
- Lines and arrows
- Clouds
- Rectangles, circles, and ellipses
- Cross symbols
Choose a color and line thickness before drawing, or select existing markup to update it.
Add a callout
Callout sits with the other markup tools in the toolbar. It's the one to reach for when a note needs to point at something specific — "verify this embed" with an arrow at the embed — instead of floating near it.
- Select Callout.
- Press where the arrow should point.
- Drag to where you want the text box, and release.
- Type your note.
A single click without dragging places the box up and to the right of the arrow tip, or flips it when that would run off the visible sheet. If you finish without typing anything, we remove the empty callout. Callouts are included when you Download a sheet, and the text stays selectable in the PDF.
Edit text you've already placed
With Text selected, click an existing text markup to put the cursor back in it. Callout works the same way on an existing callout. This works on markup in the Topic you have open, or on your unsaved draft markup when no Topic is open. Markup from other Topics is faded and read-only. There are three thicknesses — Thin, Normal, and Thick — and eight colors. Picking a color or size with nothing selected sets it for whatever you draw next; picking one with markup selected restyles that markup instead.
Select and edit markup
Use the Select tool to choose one or more shapes. Depending on what you've selected, you can:
- Move or resize it
- Copy, cut, and paste
- Copy or move it to another Topic
- Delete it
Standard clipboard shortcuts work on desktop, and the viewer's context menu has the same actions.
Note: Undo and Redo cover the current editing session only. Once you leave the viewer, that history is gone, so don't count on undoing your way out of something tomorrow.
Why some markup looks faded
Open a Topic and the sheet's other markup fades back. That's deliberate: with a Topic open, the markup belonging to it stays at full strength while markup from every other Topic drops to half opacity, so you can see your conversation's work without losing the surrounding context. Close the Topic and everything returns to normal.
Pins never fade. A comment, RFI, or List Item pin stays fully visible no matter which Topic is open, and changing Opacity on a markup tool affects lines, shapes, and highlights — not pins. You should always be able to see that a location already has something attached to it.
Faded markup isn't just a visual cue — it's also read-only. Select it and a small popover tells you which Topic it came from, with a link across to it: Open Topic for a plain Topic, or Open RFI, Open Submittal, or Open Takeoff when the markup belongs to one of those instead.
On a phone, the active tool, color, and line thickness are grouped into the bottom toolbar. The full tool list opens in a drawer, and the checkmark button at the right end of the bar returns you to Pan without deleting the markup you just created.
Finish measurements and multi-point shapes
Some tools stay active while you keep adding points. Select End or Done when the shape is complete, or switch back to Pan.
Note: If the viewer seems to keep drawing every time you try to navigate, you've still got a tool active. Check the toolbar and return to Pan or Select.
Hide vs. delete
Hide all markup gives you a clean drawing view for a moment and puts everything back when you select Show all markup. Delete removes selected markup from its Topic for good.
When you delete a pin, we ask you to confirm if that pin is attached to comments or another project record.
Save work in context
Draw anything while no Topic is open and you land in Draft Mode — a banner across the top of the viewer says so, with Save and Discard buttons on it. Your work is yours alone and isn't part of any shared record until you select Save and choose where it goes. RFI and List Item pins are the exception: they never go into Draft Mode, because they link straight to their own records instead.
Why can't I edit markup that's already on the sheet?
It belongs to a different Topic. Faded markup is read-only — select it and use the Open Topic link in the popover to switch into the conversation that owns it. Once that Topic is open, select Text or Callout and click the existing note to change its wording.
Where did my markup go after I closed the viewer?
If it was still in Draft Mode, it was never saved to a Topic. We do warn you first: leaving the viewer with unsaved draft markup raises an Unsaved Draft Markup Warning, where Save To Topic opens the save dialog, Discard and Exit throws the work away, and Cancel keeps you on the sheet.
Your observation is now on the plan where the next person will actually see it. Continue with Saving and collaborating with Topics.
Saving and collaborating with Topics
A Topic keeps related drawing markup and the conversation about it in one place, across a single sheet or a dozen, without unrelated notes getting mixed in. Think of it as a layer you and a few other people are drawing on together. How wide an audience you can share one with depends on your Topics permissions.
Work in Draft Mode
Draw with no Topic open and you're in Draft Mode, with a banner across the top of the viewer saying so. Your work is private and isn't part of any shared project record yet. Discard on that banner throws it away; Save opens the Save Markup dialog.
The dialog tells you what to do: "Choose an option and then click "Save Markup"". Pick one of four:
- Private keeps it to yourself. Repeated private saves collect in one personal Topic, so this is the low-friction option for sketching something out before you're ready to show anyone. It's selected when the dialog opens.
- Publish to Project shares it with everyone on the project, gathered into a single shared Topic.
- Create New Topic gives the markup its own title and its own sharing settings — the right choice when this is real coordination someone needs to respond to. Choosing it opens a title field and Who should have access to this topic?.
- Save to Existing Topic merges it into a conversation that's already running. Pick it from Select existing Topic.
Then select Save Markup. It's the same button whichever option you chose, so the option you picked is what decides where the markup lands.
Note: If Private is the only option, you don't have permission to create or publish Topics. Your markup is still saved and still yours; ask a project administrator about Topics access if you need to share it.
If you try to leave with unsaved draft markup, Constructable warns you. Saving before navigating is the safest choice.
Private and project saves get named for you. Your personal Topic is titled Jane Doe's Private Markup, with your own name in it, and the shared one is Public Markup. Those defaults are fine for scratch work and useless for anything you want found again later, so use Create New Topic with a real title once markup matters.
Only comment markup and pins can be saved into a Topic this way. RFI and List Item pins belong to their own workflows and follow their own create-or-link flow instead.
Create a useful Topic
Give the Topic a clear, specific title, such as Level 2 corridor coordination instead of Review.
A Topic can include:
- Markup on multiple sheets
- Comment threads
- Attachments and media
- Screen recordings
- Mentions and notifications
Your team can return to the marked locations and see that context together.
Choose visibility
Depending on your permissions, a Topic can be:
- Private to you or shared with specific people
- Available across your organization
- Available across the project
Start with the narrowest audience that can actually finish the work. Widening access later is easy, and it's the natural move once an internal review is ready for the broader team.
Note: Topic permissions are separate from drawing permissions. Someone can have full access to a sheet and still not see every Topic sitting on it.
Manage Topic markup
Select markup to copy or move it to another Topic, RFI, or Submittal. Copying leaves the original in place; moving changes where the markup belongs.
Archive a Topic when the work is done or has gone quiet. Archiving clears the clutter without treating the conversation as disposable.
Note: Archived Topics drop out of Select existing Topic. If a Topic you were expecting isn't there, someone probably archived it — Unarchive Topic brings it back.
The same ⋯ menu also has Delete Topic, which is not a stronger archive. Deleting removes the Topic along with the markup drawn into it and the comment Threads underneath, and nothing brings it back. Reach for it when a Topic was started on the wrong sheet, not when coordination finished. Individual comment pins work the same way: Delete Thread in a thread's menu removes that conversation permanently, while Resolve closes it and leaves it readable.
Exporting a Topic to PDF includes its drawn markup, text, and measurements, but not comment pins. That's usually what you want in a distributed set, though it does mean the PDF won't show where the conversations were. Point people at the Topic itself when the discussion is the substance.
Markup changes sync with the project as you work. We use shape locking to cut down on conflicting edits, but two people still shouldn't be editing the exact same shape at the same moment.
What's the difference between saving privately and creating a new Topic?
A private save drops everything into one personal Topic named after you — fine for scratch work. Create New Topic gives the markup its own title and sharing settings, which is what you want when someone needs to respond to it.
Why is Create New Topic missing for me?
You don't have permission to create or publish Topics. Private still works and your markup is still yours. Ask a project administrator about Topics access.
Can I move markup from one Topic to another?
Yes. Select it and copy or move it to another Topic, RFI, or Submittal. Copying keeps the original where it is.
Your markup and the conversation about it now live in the same place, on the sheet where it happened.
Measuring and calibrating drawings
You can measure lengths and areas right in the drawing viewer, which beats walking a tape for anything you're sizing up. The number is only as good as the sheet's scale, though, so check the revision and the scale before you write anything down.
Anyone who can view drawings can measure. Setting or correcting the sheet's scale is different — that changes the number everyone else gets, so it takes drawing-management access.
Check the scale first
We may detect a scale while processing the drawing. When it was set automatically, the measurement toolbar says so.
Before you rely on a measurement:
- Confirm that you're on the correct revision.
- Check the displayed scale.
- Measure a known dimension if one is available.
- Recalibrate if the result is off.
Note: A scale printed in a title block may apply to only one viewport. Detail sheets carrying several scales deserve extra care before you trust a number off any one of them.
Calibrate from a known distance
Open Page Scale Calibration and choose Calibrate by Line.
- Select Calibrate by Line.
- Click the two ends of a dimension you know the real-world length of.
- Enter that real-world distance.
- Save the calibration.
If the sheet is drawn to a standard architectural scale, you don't have to draw a line at all — Page Scale Calibration offers the common scales as pills, from 1/64"=1'-0" up through 1"=1'-0", plus 1"=30'-0" for civil sheets. Tap the one printed in the title block. The pills only appear while the sheet has no calibration line on it; once there is one, that line is the scale until you change it.
The dialog also offers a Round to Nearest setting — 1 inch, 1/2 inch, 1/4 inch, 1/8 inch, or 1/16 inch — which controls how measurements are reported. Once a calibration line exists, the toolbar shows Using Calibration Line, and you can nudge either end of that line with the Select tool if you placed it slightly off. Update the real-world value if you do.
Use the longest reliable known dimension you can find. Short reference distances magnify every bit of sloppiness in where you clicked.
Pro Tip: Sanity-check a fresh calibration by measuring a second known dimension before you trust any of the numbers. It takes five seconds and catches the case where you picked the wrong reference line.
Note: Close the second panel before changing calibration, then reopen Split View to continue comparing.
Measure distance
Choose Measure and place points along the path. Multi-segment measurement is what you want for routed work — conduit, pipe, anything that turns corners — rather than straight-line distance.
The toolbar keeps a running total as you work. Select End to finish the run, then Done to leave the tool.
On phones, measurement actions collapse into compact icons in the bottom context bar. The current total stays visible, though sheet-wide and drawing-wide takeoff totals are much easier to review on a larger screen.
Measure area
Choose Area and trace the perimeter. Close or finish the polygon and we'll calculate the area.
Note: Takeoff settings may display square feet, square yards, or multiplied units. Check which unit you're looking at before that number lands in an estimate.
Precision and copied values
Measurements follow the sheet's Round to Nearest setting, and the measurement toolbar lets you copy the current measurement, the sheet total, or the drawing-wide total to your clipboard.
Treat digital measurement as a planning aid. Poor scans, an incorrect scale, and resized source PDFs all affect accuracy, so confirm critical dimensions against the contract documents or the field before anyone builds to them.
How do I know whether a sheet's scale is trustworthy?
Measure a dimension you already know. If it comes back right, the scale is good; if not, recalibrate from a known line. The toolbar also tells you when the scale was detected automatically rather than set by a person.
Can I fix a calibration line I placed slightly off?
Yes. Once a calibration line exists, nudge either end with the Select tool, then update the real-world value to match.
With the scale verified, the numbers you pull off the sheet are ones you can plan around.
Connect drawings to project workflows
Using pins, comments, and screen recordings
A pin ties an exact spot on a drawing to a conversation or a project record, so instead of writing "the third column from the north stair, roughly," you take people straight there. Which pins you get depends on what you can already reach — pinning an RFI to a sheet takes RFI access, not just drawing access.
Choose a pin type
The pin tools are:
- Comment
- Photo
- List Item
- RFI
- Submittal
On desktop, Comment sits on the toolbar as its own button and the rest live behind the pin expander next to it. Extract isn't a pin at all — it sits under Selection tools with Select text, covered in Extract text from a region.
Each tool is gated on the matching permission, so your list may be shorter: Photo needs photo write access, Comment needs comment write access, and List Item, RFI, and Submittal are hidden from bidders entirely.
RFI and Submittal also depend on your organization's package. On a Field-package organization those two tools aren't offered, no matter what your role allows, because RFIs and Submittals aren't part of that package. Comment, Photo, and List Item are available on every package.
Place a pin
- Open the correct sheet and revision.
- Choose a pin tool.
- Select the exact location on the drawing.
- Choose whether to create a new record or attach one that already exists. For an RFI, those choices read Create new RFI here... and Pin existing RFI here...; the other pin types follow the same pattern with their own record name.
- Add the details the team will need.
Selecting a pin that's already placed opens a summary. From there you can read the key information, open the whole record — View Full RFI, for an RFI pin — or keep the conversation going.
Pro Tip: If the RFI already exists, choose Pin existing RFI here... instead of Create new RFI here.... You get the same marker on the sheet and one record instead of two for somebody to reconcile at closeout.
Place and manage a Photo pin
A Photo pin keeps field evidence at the exact drawing location where it was captured. Choose Photo, place the pin, then add media:
- In the native app, select Take photos to use the camera or Choose existing photos to use media already on the device.
- On web, upload a supported image or select Choose existing photo to reuse a project photo.
- On a pin that already has photos, use Take, Add, or Pick to add more. Select Edit, remove individual photos, then select Done editing when you're finished.
The pin shows how many photos it holds. Photos uploaded from a pin are kept in the system-managed Pinned album, and opening one in Photos shows the connected sheet under Sheets.
Note: Removing a photo from the pin changes that drawing connection. Deleting the pin and deleting the photo itself are separate actions, so read the confirmation before removing project evidence.
Add comments
A comment pin starts a conversation anchored to that location. It's the right tool for quick coordination that doesn't need the structure of an RFI, Submittal, or List Item.
Make the first comment do some work:
- What did you notice?
- What response or action is needed?
- Who should be involved?
Tag the people who need to weigh in — a mention is what actually notifies them.
On a phone, select Reply to open the reply dialog. Desktop keeps the reply form inline with the thread.
Record your screen
Screen recording lets you talk through a drawing while you navigate it — zooming in, pointing at things, explaining the problem out loud. The recording attaches to the relevant comment conversation.
A recording can run up to 10 minutes.
Note: If you try to leave the drawing during an active recording, we'll warn you that the recording may be discarded. Stop it and let it attach before you navigate away, or you'll lose the whole take.
Use the record control in the drawing viewer on desktop web, mobile web, or the native app. People with access can watch the saved recording on any platform.
Extract text from a region
Extract, under Selection tools in the toolbar, reads a region of the sheet the way a person would rather than pulling the PDF's text layer, so it's the one to reach for on a scan or on a schedule whose columns won't come across cleanly. Click and drag around the text you want, and give it a moment — a dense schedule takes longer than a couple of notes.
If the drawing was issued as a real PDF and you only want a line or two, Select text in the same group is quicker; see Copy text off a sheet.
When it finishes, you'll see a preview plus three actions:
- Copy Rich Text takes the words and their formatting, which is what you want when pasting a schedule or table somewhere that will keep the layout.
- Copy Plain Text takes just the words.
- Clear Extraction Area discards the selection so you can try a different region.
Results depend on how clean the source PDF is, so read what came out before you paste it somewhere that matters.
Delete pins carefully
Note: Deleting a pin removes the drawing marker and may affect its connected viewer context, but it doesn't necessarily delete the underlying RFI, Submittal, or List Item. Read the confirmation message before you continue — it tells you which of the two you're about to do.
Should I use a comment pin or an RFI?
Use a comment for coordination that just needs an answer from someone on the team. Use an RFI when the question needs a formal design response and a record of it.
Can I record my screen from the app on my phone?
Yes. Open the drawing viewer and use the record control to capture your screen. People with access can also watch recordings on their phones.
Anyone who opens that sheet now finds the conversation waiting at the exact spot it's about.
Creating and viewing RFIs from drawings
When a drawing raises a question, the drawing is where the question should start. An RFI pin keeps a formal question attached to the exact location that prompted it. You'll need RFI access on top of drawing access to use it.
Create an RFI from a sheet
- Open the relevant sheet and revision.
- Choose the RFI pin tool.
- Place the pin at the affected location.
- Create a draft RFI or connect an existing one.
- Add the RFI details and continue the normal review workflow.
Note: The pin gives the RFI drawing context; it doesn't replace a clear title and question. Plenty of people will read this RFI in an email, not in the viewer, so write it so it stands on its own.
Browse RFIs in the viewer
Open the viewer menu and choose RFIs. The side panel lets you browse the RFIs and drafts you have access to, open their details, and see the markup or comments attached to them.
Selecting an RFI can bring its drawing markup into focus. When an RFI touches several locations, its marked-up sheets are the fastest way to walk through all of them.
Draft visibility
Draft RFIs may be limited to their creator or to people with broader RFI access. Publishing drawing sheets doesn't publish an RFI, and sharing a Topic doesn't change an RFI's status.
Permissions
RFI mode requires permission to view RFIs, and creating or editing one requires the corresponding write permission. Some project roles, bidders among them, won't see the RFI pin tool at all even though they can view drawings.
Note: If you can see an RFI pin but not its details, your RFI access is narrower than your drawing access. That's a permissions difference, not a broken pin.
Does placing a pin send the RFI to anyone?
No. The pin creates or connects the record; the RFI then follows the normal review workflow from there.
Why can't I see the RFI behind a pin?
Drawing access and RFI access are separate permissions. You have enough of the first to see the marker and not enough of the second to open the record.
The question is now anchored to the plan that raised it, so whoever answers can see exactly what you were looking at.
Working with Submittals and list items on drawings
Submittal and List Item pins tie those records to the plan locations they're actually about, so the person picking the work up can see where it is rather than reading a description of it. You'll need Submittal or Punch List access on top of drawing access.
Add or open a Submittal
Reach for a Submittal pin when a drawing location relates to a product, a shop drawing, or an approval workflow.
- Choose the Submittal pin tool.
- Place the pin.
- Create a draft Submittal or choose an existing one.
- Complete the Submittal in the normal workflow.
Open Submittals from the viewer menu to browse the items, drafts, comments, and related markup you have access to without leaving the drawing.
Note: The pin is context. The official Submittal record still controls its status, assignments, and approval history, so don't treat the marker as the source of truth.
Add or open a List Item
Use a List Item pin to record an issue at the exact place you observed it.
From the pin, you can create a new item or connect one that already applies. Write enough description and attach enough media that someone can verify the condition without you standing next to them.
Open Lists from the viewer menu to browse items along with their list context.
Use the right workflow
Two questions settle almost every case. First: does something have to happen before the work can proceed? If not, it's a comment. Second: who has to make it happen?
- The architect or engineer has to answer a question about intent — RFI.
- Someone has to approve a product or shop drawing before it's bought — Submittal.
- A trade has to go back and fix something you can see — List Item.
Pick wrong and the item still exists, it just stops showing up where anyone is looking for it. A concern buried in a comment thread never lands on a log, never gets a due date, and never appears in a report.
Permissions and roles
Submittal and List Item tools show up only when your project role can reach those records. Drawing access alone isn't enough.
There's a second reason the Submittal pin can be absent, and it isn't your role: Submittals and RFIs aren't part of the Field package, so their pin tools don't appear on a Field-package organization at all. List Item is unaffected — it's there on every package.
If you need to connect a record and the pin type isn't there, ask a project administrator to look at your project permissions rather than assuming the tool is missing for everyone.
The List Item pin tool isn't in my menu. Why?
Your role doesn't have access to list items, which live under the Punch Lists permissions in project settings. Drawing access doesn't include them.
If I delete the pin, does the List Item go away?
No. Deleting a pin removes the marker from the sheet. The List Item stays on its list with its assignment, due date, and history intact — it just loses its location on the plans. Read the confirmation message before you continue, because it tells you exactly what's about to go.
The record and the location now travel together, which is usually the difference between an item that gets fixed and one that gets argued about.
Creating and exporting drawing takeoffs
Takeoffs keep your measured and counted quantities on the plans themselves, so months later you can still see exactly where a number came from. You'll need permission to add or change takeoffs, plus a verified sheet scale for anything you measure.
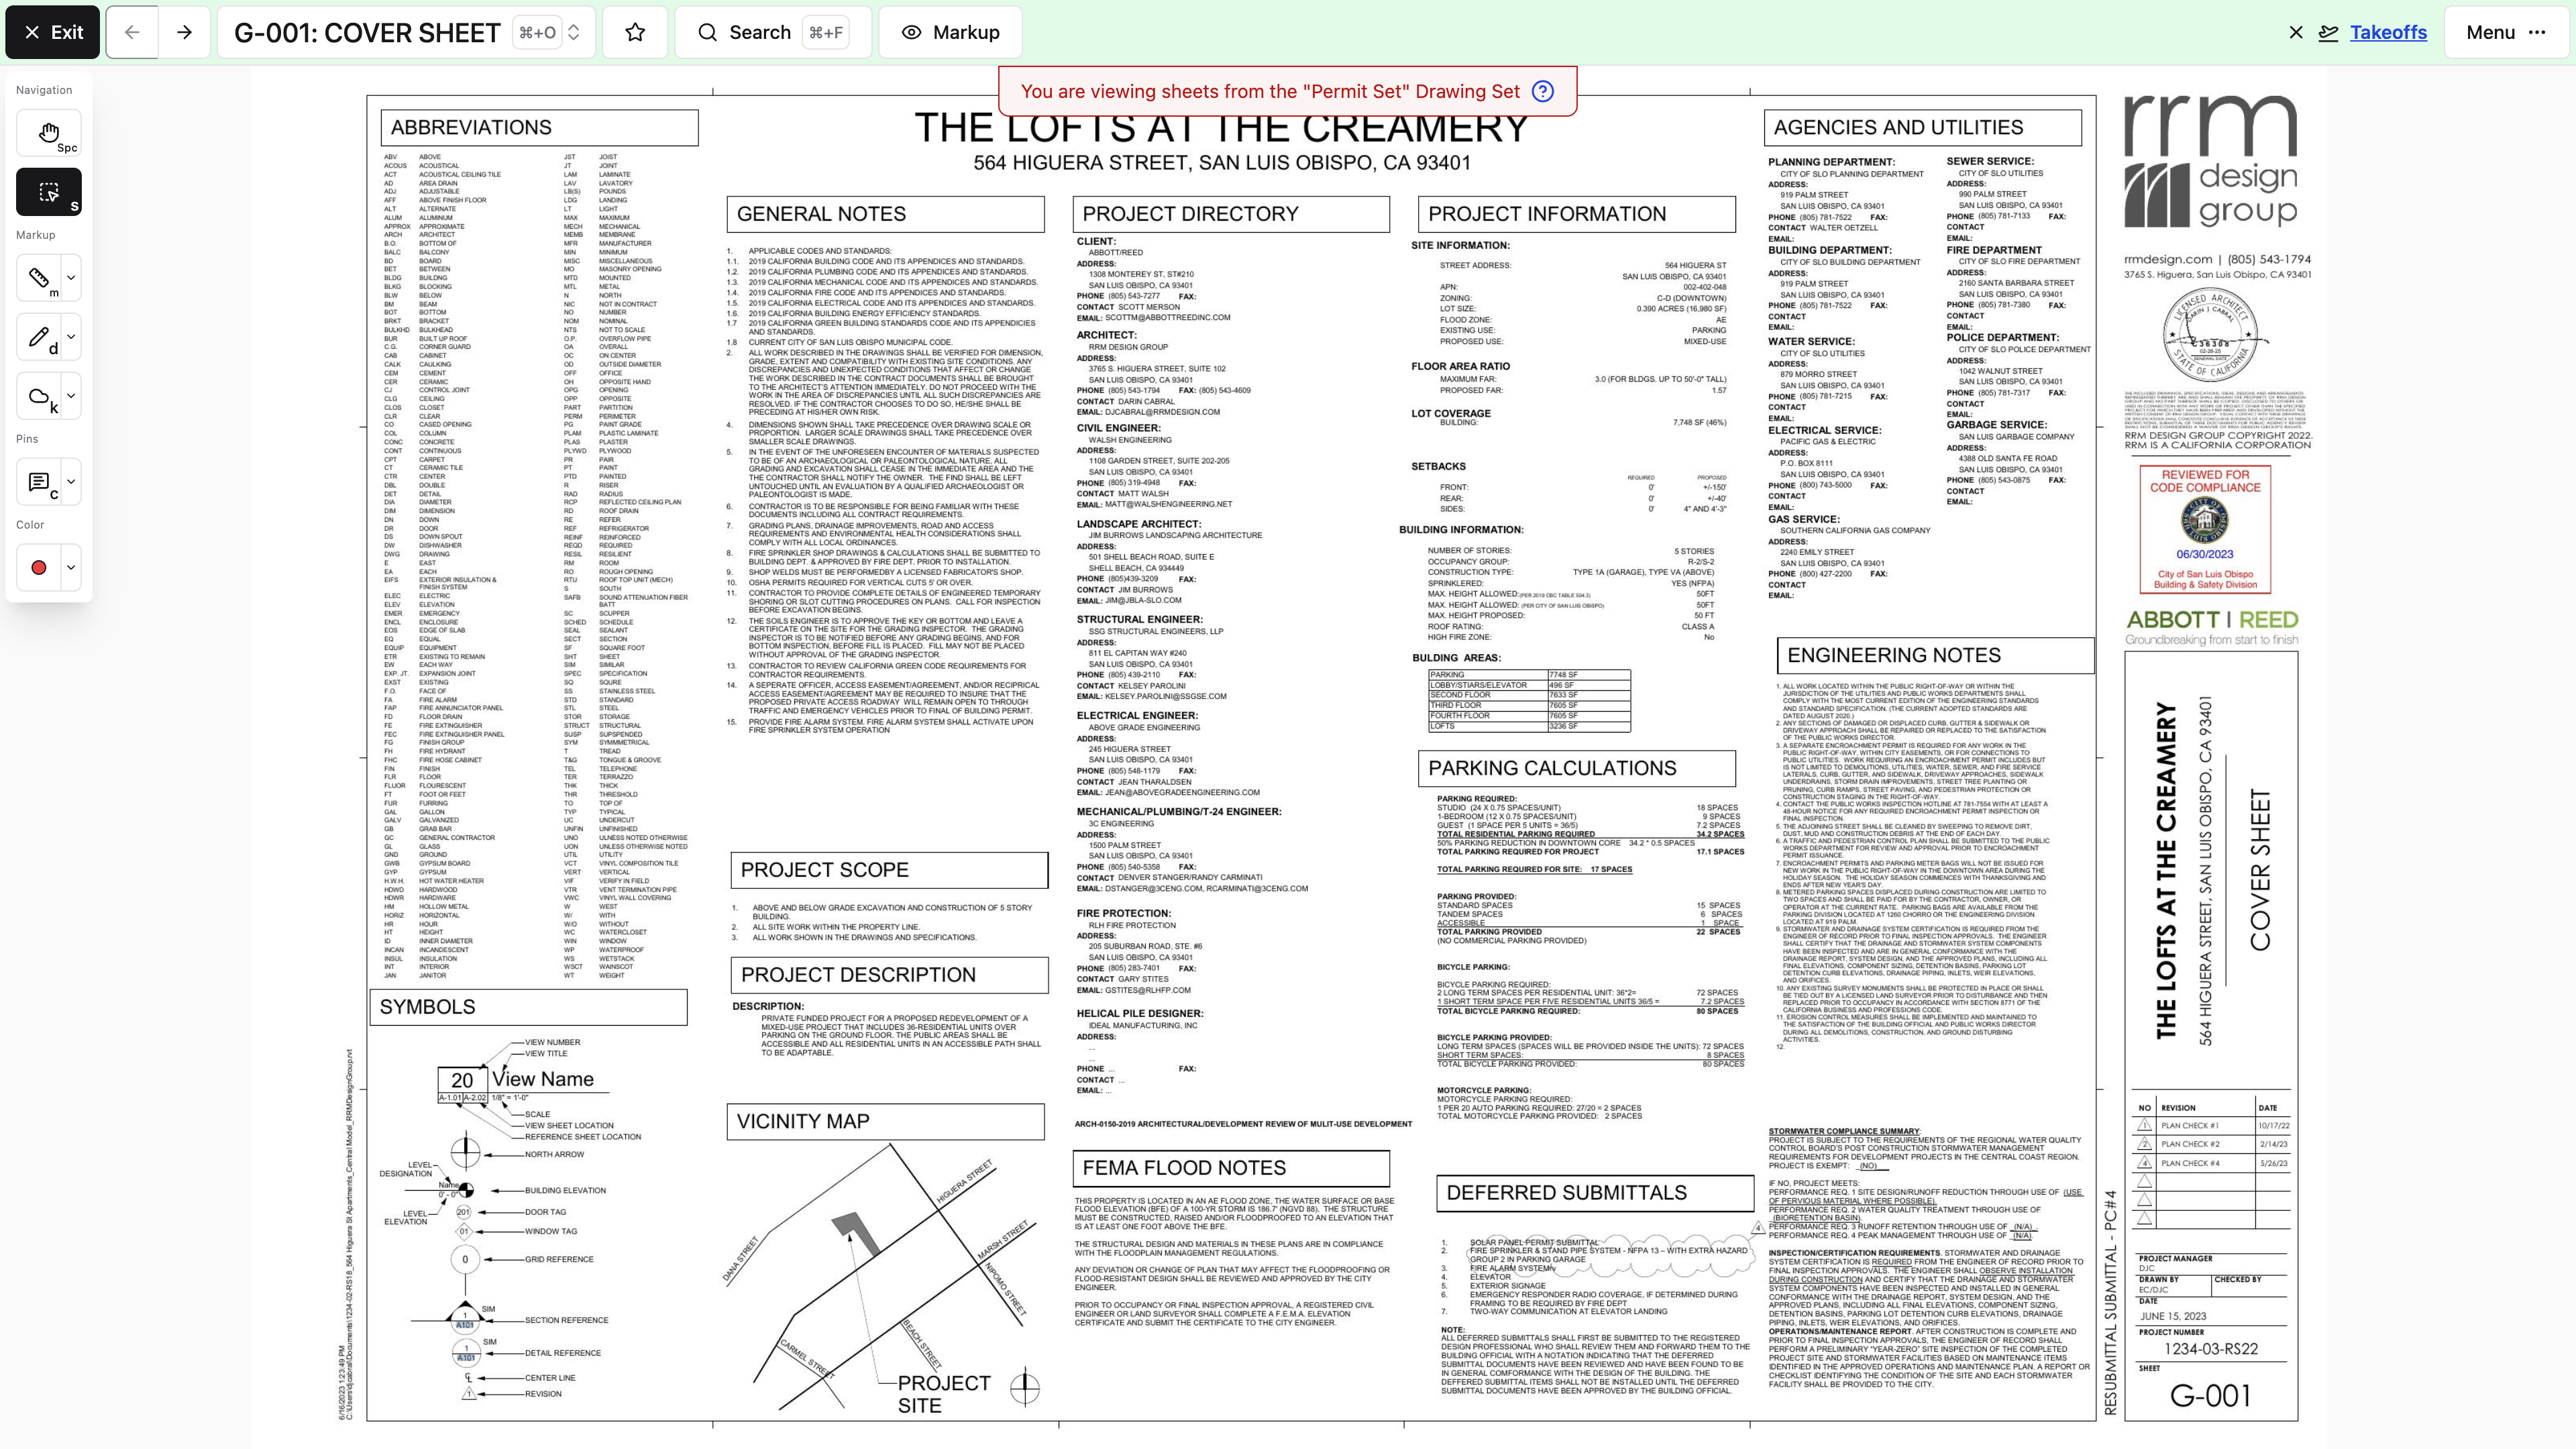
Understand the hierarchy
- A takeoff set groups a body of estimating work.
- A category groups related takeoff items.
- A takeoff item defines what is being counted or measured.
A Concrete set might hold Slabs and Footings categories, each with its own measured items.
Create a takeoff
- Open Takeoffs from the viewer menu.
- Create or open a takeoff set.
- Add a category.
- Add an item with the appropriate unit and optional multiplier.
- Select that item.
- Place quantity counts or linear and area measurements on the relevant sheets.
The Quantity tool only appears while you're in Takeoff mode.
Note: Linear and area items depend entirely on the sheet scale. Verify the calibration before you start measuring, or you'll be redoing the whole item later.
Review totals
The measurement toolbar can show:
- The current measurement
- The item's total on the current sheet
- The total across drawings
- Multiplied totals where configured
Note: Check which takeoff item is active before you place marks. A measurement filed under the wrong item produces a total that looks perfectly reasonable and is wrong — the hardest kind of mistake to catch.
Move and organize items
You can edit categories and items, or move an item into another category. Keep naming and units consistent and your exports will read cleanly for someone who wasn't there when you built them.
Export takeoffs
Takeoff sets and categories can be exported to:
- CSV for quantity data
- PDF for marked-up sheets
The PDF export offers a takeoff legend, which you turn on or off as you set the export up.
Note: Look over the selected sheets and legend items before you share an export, especially when the takeoff still holds private or unfinished work.
Takeoffs sit behind their own permission, separate from drawing access, so not everyone on the project can reach them.
Why can't I find the Quantity tool?
It only exists inside Takeoff mode. Open Takeoffs from the viewer menu and select an item first. Entering Takeoff mode also needs permission to add or change takeoffs, not just to view them.
Do my takeoff marks carry over to a new revision?
No. Takeoff marks aren't carried forward when a new revision is confirmed, so plan on redoing them against the current sheet.
Every quantity in your estimate now points back to the exact mark on the exact sheet it came from.
Work in the field and manage access
Using drawings on a phone or tablet
Standing in the building is exactly when you need the plans, so the phone and tablet experience is built for that: open current drawings, use the viewer tools, and reach connected project records without going back to a trailer.
Browse drawings
On phones and tablets, choose thumbnail or list view for the drawing index. Sheets stay grouped by discipline, and you can:
- Switch drawing areas from the tab strip — every area is in the strip, so scroll sideways if they don't all fit
- Search sheet numbers, titles, and drawing contents
- Filter by drawing tags
- Open starred sheets
- Select a sheet thumbnail
Use list selection and Bulk Actions to edit, publish, unpublish, delete, download, or share drawings in groups. The same drawing-management permissions apply on mobile web and in the native app.
Navigate the viewer
The mobile viewer gives you touch controls for:
- Pan and zoom
- Previous and next sheet
- Sheet selection
- Markup tools
- Measurements
- Pins and connected records
Phone and tablet layouts differ, so a control you know from one may live in a menu or drawer on the other.
Work in landscape
Landscape gives the drawing more room and is usually more comfortable for markup or measurement. The viewer accounts for device safe areas, so controls stay clear of notches and system bars.
Compare and manage drawings on mobile
Use Split View, overlays, new-tab revision navigation, recording, bulk administration, and PDF exports on mobile web and in the native app. Open the sheet selector, drawing-set actions, or viewer overflow menu to find controls in compact layouts.
Note: On phones, the bottom bar changes with your active tool. If the sheet selector or revision control seems to have vanished, you're still in a tool: tap the checkmark at the right end of the bar, or switch back to Pan. Viewer modes such as Topics, RFIs, Submittals, Lists, search, and markup visibility live in the ellipsis menu.
Prepare before heading to the field
If the connection out there is going to be unreliable, use the native app to make the disciplines or sheets you need available offline while you're still online. See Storing drawings for offline viewing.
Where did the sheet selector go?
You have a markup or measurement tool active, and the bottom bar switched to that tool's controls. Tap the checkmark at the right end of the bar, or go back to Pan.
Can I compare two sheets on my phone?
Yes. Use Split View to read sheets side by side or an overlay to compare their geometry. Both are available on mobile web and in the native app.
Current plans, in your pocket, with the same pins and markup everyone back at the office is looking at.
Storing drawings for offline viewing
Basements, elevator shafts, and half the sites you'll ever walk have no signal. In the native app, save sheets to your device ahead of time — one sheet, a whole discipline, or the entire drawing area — so the plans open anyway. Offline storage isn't available in a web browser.
Do it while you're online. What we save for each sheet is its thumbnail, the quick preview, and the optimized PDF of the current revision. Very deep zoom may look less detailed offline than it does on a live connection.
Make a discipline available offline
This is the fastest way to get a trade's sheets onto your phone before a walk.
- Open the Drawings page in the native app.
- Find the discipline group and tap the download button on its header.
- Review the drawer: Sheets is how many sheets still need downloading, Download size is roughly how much space they'll take, and Available is the free space on your device.
- Tap the button to save those sheets offline. Its label counts the sheets.
While sheets download, the group header shows a count of how many are stored so far, such as 12/40. When every sheet is stored, it reads Saved offline.
If the device doesn't have room, the drawer says Not enough storage and tells you how much space to free up. Clear space in your phone's storage settings, or remove another discipline you no longer need offline, then try again.
Make the whole drawing area available offline
Tap the ⋯ button on the Drawings page and choose Make All Available Offline under Offline. The same drawer opens for every discipline in the area at once. Once the whole area is stored, that menu item reads Remove All Offline Sheets.
Store a single sheet
- Find the sheet's thumbnail on the Drawings page.
- Tap Store on device in the thumbnail's footer.
- Wait for the stored indicator before going offline.
Making a discipline or the whole area available offline — or removing it — replaces any sheet-by-sheet choices inside it.
Stored drawings stay current
Stored sheets follow the latest published revision. Whenever the app is open and online, it downloads any newer revision of a stored sheet and removes the superseded copy once the new one is fully saved. When a discipline or the whole area is stored, sheets newly published into it download too.
Note: Updates only happen while you're connected. If a new revision publishes while you're out of signal, your device keeps showing the revision it already has until you reconnect with the app open.
Confirm storage before relying on it
Pro Tip: Don't find out in the basement. Open a few stored sheets while you still have signal and confirm they load.
Storing a sheet isn't the same as downloading a PDF into another app. The stored copy belongs to Constructable and is used by its drawing viewer.
Remove stored sheets
To remove one sheet, tap its stored indicator, then Remove in Remove sheet from this device?. To remove a discipline, tap Saved offline on its header and confirm Remove offline sheets — the drawer tells you how much space you'll get back. For the whole area, use Remove All Offline Sheets in the ⋯ menu.
After that, loading those sheets again takes an internet connection. Removing the local copy doesn't delete the project drawing.
Keep offline drawings ready
- Make the sheets you need available offline, and test them while online.
- Open the app with a connection before each site walk so stored sheets can catch up to the latest revisions.
- Comments, connected records, and search need network access. After you reconnect, confirm that anything important you captured in the field has actually landed in the project.
If a drawing will not load
When the viewer can't reach the asset it needs, it shows an offline message. Check whether the sheet or its discipline finished storing, then reconnect with the app open so the download can complete.
Can I store every drawing at once?
Yes, in the native app. Tap the ⋯ button on the Drawings page and choose Make All Available Offline. Check that your device has room first — the drawer shows the download size next to your available space.
Will comments and pins work offline?
Reconnect to refresh connected records, comments, and search, then confirm that your field work has synced to the project.
Head out knowing the plans will open whether or not the signal does.
Understanding drawing permissions and visibility
Drawing access comes in two levels — viewing published drawings and managing them — and the workflows attached to a drawing carry their own permissions on top. When a button is missing, this article tells you which permission to go look at.
Drawing viewers
People with View drawings access can:
- Open the Drawings page
- View published sheets and revisions
- Search drawings
- Star sheets
- Download or share drawings they can access
- Browse published drawing sets from Drawing Sets
- Generate and open revision reports
- Use viewer features allowed by their other permissions
Published drawings are the normal project-wide view. Confirmed but unpublished sheets stay out of the main index for regular drawing viewers, which is the point of publishing being its own step.
Drawing administrators
People with drawing-management access can also:
- Create and manage drawing areas from Drawings Menu
- Upload, edit, and delete drawing sets
- Review and confirm sheets
- Publish and unpublish sheets
- Reorder published drawing revision sets
- Edit drawing and revision details
- Manage disciplines, sheet order, and tags
By default, administrators, managers, and employees can manage drawings, while subcontractors, consultants, owners, and bidders can view published drawings but not manage drawing sets. Those are defaults — your project's own permission settings decide what's actually true, so check them before assuming something is broken.
Connected-workflow permissions
Not every viewer mode comes from the drawing permission:
- Adding comment pins requires permission to add or edit comments.
- Topics have separate view, edit, and sharing rules.
- RFIs require RFI access.
- Submittals require Submittal access.
- Lists and the items on them use the Punch Lists permissions in project settings.
- Opening Takeoff mode requires permission to add or change takeoffs.
Note: Because these are separate, you and a teammate can open the same sheet and see different pins, markup layers, and menu options. Neither view is wrong. Some roles, bidders among them, can view drawings while the RFI, Submittal, and List Item pin tools stay hidden.
Visibility is not the same as notification
Permissions decide what someone can reach. Notification settings decide what they hear about. Turning off drawing notifications doesn't take away drawing access, and subscribing to an area doesn't grant any.
Troubleshoot a missing action
When a control isn't there:
- Confirm that you're in the correct drawing area and revision.
- Check whether the sheet is published.
- Check whether the feature is available on your device or current view.
- Ask a project administrator to verify both the drawing permission and the connected workflow's permission.
Note: Resist widening someone's whole project role just to unlock one drawing tool. Change the specific permission instead — the broad change is the one you'll regret later.
A teammate can see a sheet and I can't. What's different?
Usually the drawing permission itself, or the sheet is unpublished and they're a drawing administrator. Compare access before you go looking for the file again.
I can see a pin but can't open what's behind it.
Your access to that workflow — RFIs, Submittals, list items — is narrower than your drawing access. The marker is visible; the record isn't.
Knowing which of the two permissions is missing turns "it's broken" into a one-line request for your administrator.