Use this guide to set up Lists, capture field issues, assign corrective work, review and complete items, export reports, and troubleshoot blocked actions. It covers desktop web, mobile web, and native-app behavior.
Start here
- I set up quality workflows: Choose a list type → Create a list → Create templates → Configure custom fields.
- I record field issues: Add a list item → Add evidence and drawing locations.
- I perform corrective work: Work assigned items → Move work through review.
- I approve work: Review status and evidence → Export the list.
- Something is missing or blocked: Start with Troubleshooting Lists.
Common task recipes
- Run a punch walk: Create a Punch List, add items with location, trade, assignee, approver, due date, and photos, then send each item through review.
- Jump straight to a list you use daily: Expand Lists in the project sidebar and select it from the shortcuts underneath.
- Give crews location access: Download location QR codes, post them in the field, and scan a code from the app to filter or add items at that location.
- Reuse a standard checklist: Manage templates, then choose a template while creating items.
- Collect extra details on every item: Open List Settings → Custom Fields, then Add Field or Add Section.
- Drop fields a list never uses: In the same Custom Fields page, select a built-in field such as Trade and turn off Show on this list.
- Log a safety incident: Use Incidents under Field Tools, not a list whose type is Incidents. See Incidents.
- Issue a report: Filter the list down to the items you want, then export a PDF with or without item photos.
Understand access and workflow
Understand how Lists work
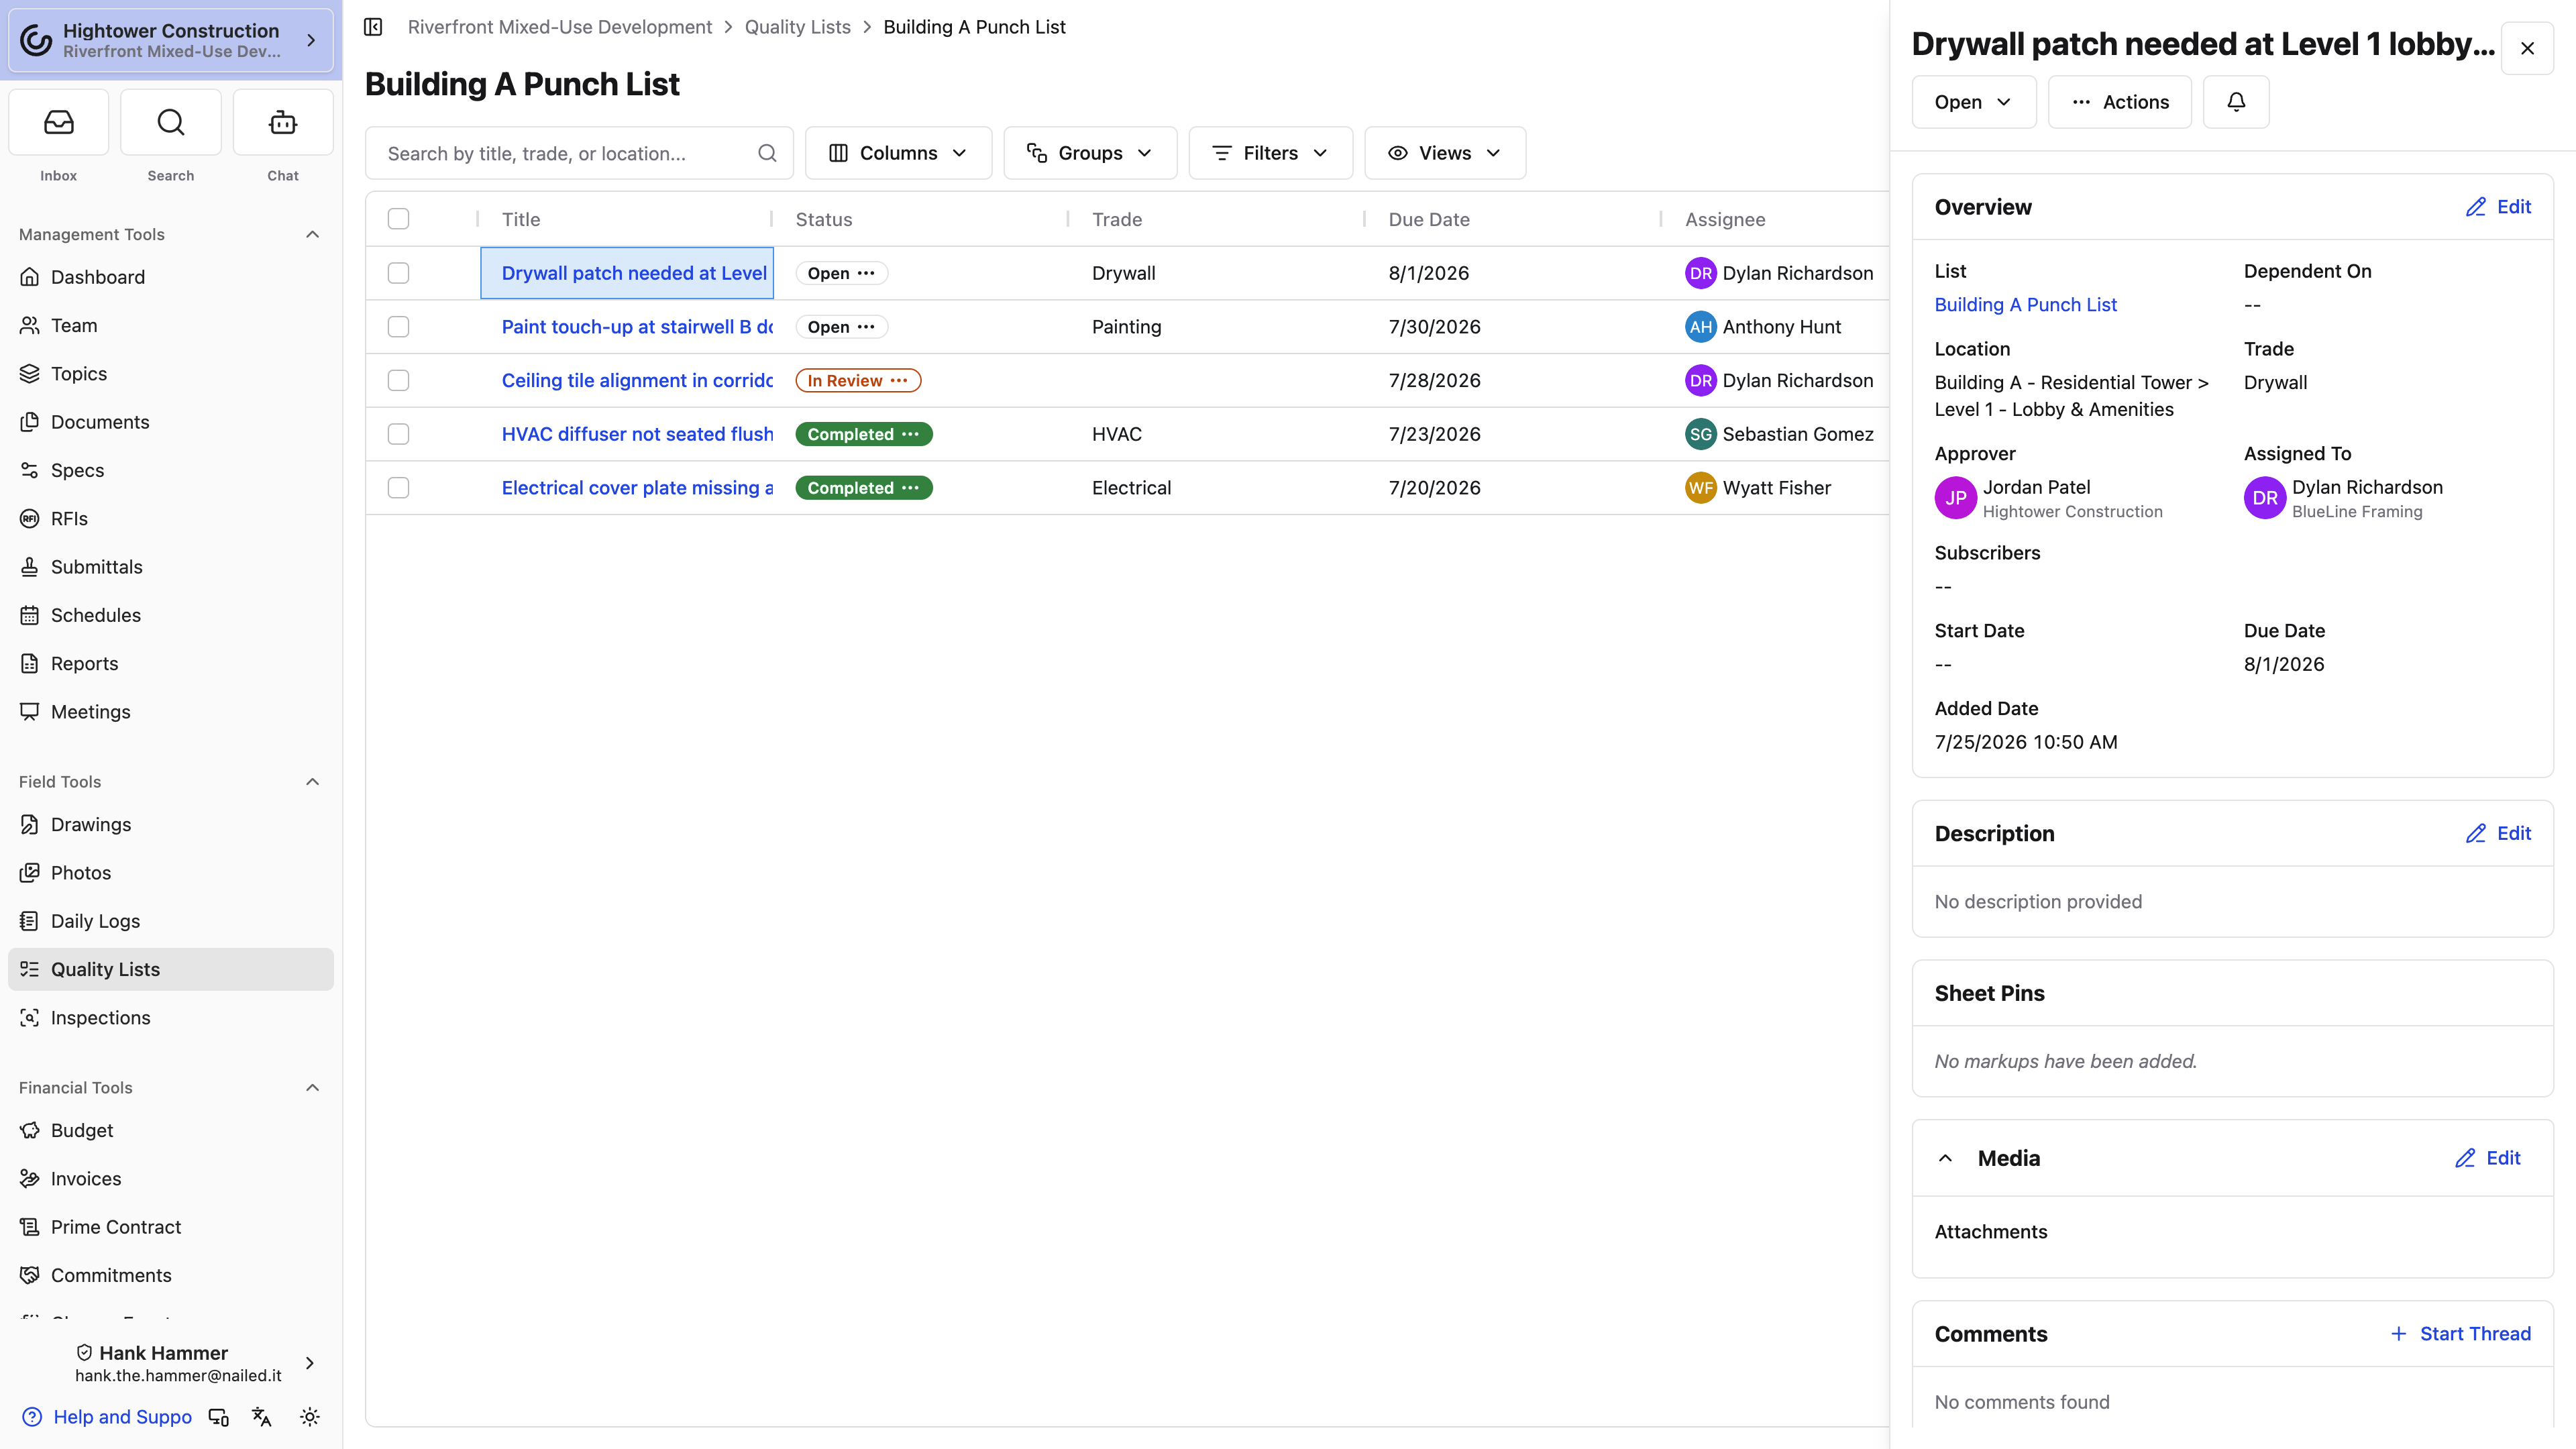
A list is a collection of work you found on a walk, and a list item is one piece of that work. Assignment, review, and reporting are all things that happen to an item between the moment you spot it and the moment someone signs off on it.
List → list item → location and evidence → assignee → In Review → approver → Completed
The list is also what sets the type, and the type changes what we call the items — Punch Item, Observation, Incident, or To-Do. Choose it before people start adding work.
Everyone attached to an item has a distinct job. The assignee does the work, the approver decides whether it's acceptable, and subscribers just follow along. Items can also carry drawings, comments, attachments, trades, dates, and follow-up work, so the whole story stays in one place.
Two vocabularies describe the same thing here, and knowing where each one shows up will save you a search. The tool is called Lists. Configuration, exports, and Inbox say "punch" instead. If you're looking for one of these and can't find it, search for the word in the right-hand column:
| Where you are | What it's called there |
|---|---|
| Project navigation and the list index | Lists |
| Project Settings > Roles and Permissions | Punch Lists, with actions like View punch lists and Move punch list items to review |
| The PDF export dialog | Export Punch List PDF |
| A Closeout package's section list | Punch List |
| The Inbox Type filter | Punch List |
This holds no matter which list type you're working in. An Observations list's permissions still read "punch list items," and its PDF still comes out of a dialog titled Export Punch List PDF.
Reach a list from the project sidebar
If you live in one or two lists all day, you don't have to go through the index every time. Use Lists in the project navigation to reach your lists. In a sidebar layout, expand Lists for shortcuts to open lists.
Select the chevron next to the Lists label under Field Tools to expand it — the notification badge stays on the right, like the other tools. Underneath you'll find:
- Up to four open lists, oldest first, each with its list-type icon and that list's notification count.
- View all, with the total in parentheses, which opens the Lists index. It also shows the notification count for lists that aren't in the shortcuts.
The badge on Lists itself is the project total. The shortcuts show open lists only, so an archived list never appears there — use View all to reach it. The count beside View all is every list on the project, archived ones included, which is why it's often higher than the number of shortcuts above it.
Constructable remembers whether you left the section expanded or collapsed, and it starts collapsed until you open it.
Note: You can also open Lists and choose a list from the index.
Why isn't the list I want in the shortcuts?
Either it's archived, or four older open lists are ahead of it. The shortcuts are the four oldest open lists, not the four you visit most, so use View all for anything else.
Expand it once and your daily list is one click from anywhere in the project.
Permissions, visibility, and platform availability
If you can see a list but not its items, or you can move your own work to review but can't mark anything complete, that's permissions working as configured. Under Punch Lists in Project Settings, four separate actions control this, and having some but not others is completely normal.
- View punch lists shows you the lists themselves.
- View punch list items shows you the work inside them. This is separate from the one above, which is why an empty-looking list is usually a permission rather than an empty list.
- Add new punch list items, make changes to existing punch list items covers creating items, editing any field, and setting any status including Completed.
- Move punch list items to review lets an assignee hand their own work off for inspection without granting them the ability to approve it.
Three of those four also carry a scope dropdown that decides how much you see, and that's where most of the confusion lives:
- Level of punch list access is either All Punch Lists or Only punch lists with an item assigned to me or anyone at my company, or where I'm the approver or a subscriber.
- Level of punch item access is either All Punch Items or Only punch items assigned to me or anyone at my company, or where I'm the approver or a subscriber.
- Level of move to review access is either All Punch Items or Only punch items assigned to me or anyone at my company.
By default, admins, managers, and employees get all four actions at the All scope. Subcontractors, consultants, and owners get the two view actions and move-to-review, all at the restricted scope, and none of the write action — so they see work assigned to them or anyone at their company, can send that work for review, and can't approve it.
Configure custom field definitions is a separate Admin-only permission. It opens Custom Fields on a list; it does not by itself let you add items. Filling in those fields on an item still uses Add new punch list items, make changes to existing punch list items. Incident forms are a different page and use Manage incident settings, including incident types — see Configure incident settings and forms.
Those are just the defaults, though. Your project may be set up differently, so if what you're seeing doesn't match this, check with your Admin before assuming something is broken.
Note: Being a subscriber changes what you can see and what you're notified about. It doesn't make you the assignee or the approver.
Day-to-day item work goes anywhere you do — the app and web both handle creating items, adding photos, and moving work through review. Use list settings and export actions to configure lists and prepare reports.
- The app gives you a compact item list, detail pages, a floating Add Item button, and a header ⋯ menu with Add Item and Export all to PDF.
- The Actions menu provides Bulk Actions, Download as PDF, Download as CSV, and Manage Templates.
- Open List Settings to find Manage Templates and Custom Fields.
- Find New List and Download Location QR Codes in the Lists header or its ⋯ menu, depending on your layout.
- In compact layouts, check the header actions and ⋯ menu for list setup and reporting controls.
- Allow camera access when scanning a location QR code.
Troubleshooting Lists
Most Lists problems come down to one of three things: an active filter, an archived list, or a permission you don't have. Find your symptom below and work through the checks in order.
A list or item is missing
Nine times out of ten it's a filter, not a deletion. Work through these in order:
- Clear the item status, location, and any other filters.
- Expand Archived — someone may have archived the list.
- If your access is restricted, confirm you're an assignee, approver, or subscriber on the item — or that someone at your company is the assignee.
- Ask an Admin to check both list-view and item-view permissions, since those are separate.
Add Item is missing
The list has to be open, and your role needs Add new punch list items, make changes to existing punch list items. Archived lists won't take new work until someone unarchives them.
I can't move an item to In Review
Check that the item is assigned to you or someone at your company, and that your role has Move punch list items to review. If its scope is set to Only punch items assigned to me or anyone at my company, an item assigned to a different company won't move no matter what you do. Anyone with full edit access can change statuses regardless of assignment.
I can't mark an item Completed
Completing an item needs Add new punch list items, make changes to existing punch list items. Move-to-review on its own lets you hand work off for inspection, but it isn't an approval permission — that separation is deliberate.
Templates are missing
Open the list, choose Manage Templates, and confirm your role has Add new punch list items, make changes to existing punch list items.
Restricted item access still includes the list's templates when you can add items, so the picker is there for people who create work even if they can't see every item on the list. View-only restricted roles don't get those template rows.
Custom Fields is missing
Open Custom Fields from List Settings. Your role needs Configure custom field definitions; Admin has that permission by default.
Assignee, Trade, or Due date is missing on one list
That list hides the field. Open List Settings → Custom Fields, select the field, and turn on Show on this list. Values entered before it was hidden come straight back.
A drawing marker or attachment is missing
You need access to both the list item and the drawing or photo it points at. Missing one hides the connection.
Note: A drawing pin is context for an item, not the item itself. Deleting the pin doesn't necessarily delete the item behind it.
Set up and capture
Understand Lists and list types
Every list has a type, and the type decides what your team sees on screen and in reports. Picking the right one up front saves you explaining later why the safety log calls everything a punch item.
- Punch List tracks deficient or incomplete work through correction and approval.
- Observations records what someone noticed in the field, which may or may not turn into assigned work.
- Incidents groups safety-adjacent list items that still go through assignee and approver review. That is not the project's safety log — Incidents under Field Tools is. See How to use Incidents.
- To-Do List tracks general project tasks that don't fit the other three.
Underneath, all four list types are the same machine — same assignment, statuses, attachments, and reporting. The difference is the vocabulary everyone reads.
You don't have to create any of these to get started. Every new project arrives with one of each already made — Punch List, Observations, Incidents, and To-Do List — so you can add your first item immediately and rename or archive whatever your team doesn't use.
Note: Choose the type before you start adding items, so nobody has to mentally translate "punch item" into "observation" while they work.
Get this right and your reports read like the work they describe.
Can I change a list's type after I've added items?
Yes. Edit the list and choose a different type. The item label updates to match, and the items themselves are untouched.
Do the four types behave differently?
No. They share the same statuses, permissions, notifications, and export behavior. The type is about clarity, not capability.
Create and manage a list
Make a separate list whenever the work belongs to its own phase, walk, area, or owner. It keeps assignments legible and means you can report on one walk without filtering around three others. Choose New List from the Lists header or its actions menu.
- Open Lists.
- Select New List in the upper-right corner. In the app, open the ⋯ menu in the header and choose New List.
- Enter a clear name in List title, a required Prefix (for example
PL), and choose the list type. - Select Create List, then open the list.
The prefix is unique on the project and stored in uppercase. Constructable fills one in from the title as you type; change it if two lists would otherwise share the same letters. Item numbers on this list then display as the prefix plus a padded number — PL #001 — so a punch walk can call items without naming the whole title.
Be specific with names. Level 2 Owner Walk - 2026-07-24 will still make sense in October; Punch List 3 won't. If two walks need their own reports or need to be archived at different times, give them their own lists instead of building one oversized one.
Once the list exists, the ⋯ button on its row is where you find Edit List, Archive List or Unarchive List, and Delete List. That menu also carries Manage Templates and Custom Fields. Inside an open list, those same setup actions sit under List Settings.
Each list on the index carries a progress ring showing how much of it is finished — completed items over active ones, with drafts and templates left out of the math.
Note: The ring counts the items you can see. If your role is limited to items where you're the approver, assignee, or subscriber, your ring reflects your slice of the list, and a project manager looking at the same list will see a different percentage. Neither number is wrong; they're answering different questions. Use a manager's view when you're reporting overall closeout progress.
Pro Tip: Resist the urge to make one list per project. A list you can hand to a single trade or close out in a single walk is a list that actually gets closed out.
Named and scoped this way, a list is something you can hand to one trade and finish.
Create and use list item templates
If you find yourself typing the same item over and over — the same fire-caulking check, the same pre-drywall look — turn it into a template. You'll type it once and keep the wording consistent across everyone who uses it. Open Manage Templates from the list actions or List Settings.
- Open Lists.
- Select the ⋯ button on the list's row and choose Manage Templates. Inside an open list, it's under List Settings.
- Add a template with whatever's reusable: title, description, trade, dates, assignee, or approver.
- Head back to the list.
- Choose the template when you add an item or a follow-up, then fill in the location and job-specific evidence.
Note: Templates are starting points, not finished items. Give each new item a quick read before you save so last quarter's assignee or an expired due date doesn't quietly ride along.
If your punch item access is restricted, you still see the templates on lists you can open as long as you can add items. A view-only restricted role does not.
Build them once at a desk and your crews get consistent items from a phone all season.
Configure custom fields on a list
Standard list fields cover assignee, trade, location, and due date. When a walk needs something those don't capture — a deficiency code, a weather condition, which shift found it — add custom fields on that list. They show up on every item, on the create form, in the grid, and on the PDF. The same page also lets you hide the standard fields a list doesn't use.
Open Custom Fields from List Settings to configure the layout.
- Open the list.
- Select List Settings, then Custom Fields. From the Lists index, the same action is on the row's ⋯ menu.
- Select Add Field or Add Section. An empty list opens with Capture the details your team needs, plus Fields and Sections cards. A view-only role sees No custom fields have been added to this list yet.
- Select a field or section in the outline to edit it. Empty inspector copy reads Select a field or section to edit it.
- Enter a Name. Choose a Type: Text, Rich Text, Number, Date, Date and Time, Checkbox, Single Select, Multi Select, User, Company, or Attachment.
- Turn on Required when an item shouldn't save without a value.
- For Single Select or Multi Select, add Options. Add option adds another; each option can be removed.
- For User or Company, set Choose from to People on the project team / Companies on the project team or Everyone in the directory / All companies in the directory, and turn on Allow multiple when more than one value is allowed.
- On a section, enter a Title and turn on Has many entries when people should fill the section out more than once on each item.
- Drag Reorder field or Reorder section when the order on the item should change. Remove field or Remove section deletes that piece from the list.
You need Configure custom field definitions to build or change the layout. Admin has it by default. Filling in the values still uses Add new punch list items, make changes to existing punch list items. Editing a value writes to the item's activity.
A project created from a template copies each list's custom field layout onto the new project. It does not copy values onto items.
Hide built-in fields a list doesn't use
The outline also lists the fields every list has. Six of them can be hidden on one list: Assignee, Trade, Location, Start date, Due date, and Description. A to-do list that never uses trades, or an observations list with no assignee, reads better without the empty boxes.
- Select the built-in field in the outline.
- Turn off Show on this list. On desktop you can also hover the field in the outline and select the eye icon.
Title, Number, Status, and Approver show a lock — every item needs them, so they can't be hidden.
A hidden field disappears from that list's create form, item pages, grid, PDF export, and from the project List Report and All Lists. Nothing is deleted: values already entered are kept and come back if you show the field again.
Hiding a field also turns off what depends on it. With Due date hidden, the inspector warns Overdue flags are off while it's hidden., and items on that list stop getting due-date reminders. With Assignee hidden, nobody receives assignee notifications or reminders for that list's items, and the items drop off the assignee's ball-in-court list on the Dashboard.
Once the fields exist, anyone who can edit an item can fill them in — on desktop, mobile web, or native — the same way they fill title and trade.
Create a list item
The person who fixes this probably isn't standing where you're standing. Give them enough detail to find the condition, understand what finished looks like, and prove it when they get there.
- Open the list.
- Select Add Item. In the app, it's the floating button in the lower corner, and it's also in the header's ⋯ menu.
- Enter a specific title and description.
- Choose a location and trade where they apply.
- Set start and due dates.
- Choose an assignee and an approver.
- Add subscribers who should follow the item.
- Fill in any custom fields this list requires, including fields inside sections. A required custom field that's empty blocks save. A section with Has many entries can be filled more than once; empty copy on the item reads No entries.
- Attach photos, or pull in project photos you've already uploaded.
- Save.
If the description, location, trade, a date, or the assignee isn't on the form, that list hides it — skip the step. See Configure custom fields on a list.
Saving an item with an assignee emails that person right away rather than waiting for their digest, unless the assignee is you — see Send reminders and manage notifications.
You stay on as a subscriber automatically, since you created it — no need to add yourself. Anyone you @mention in the description is subscribed automatically too, so you don't have to mention someone and then remember to add them to the subscriber list.
Each item has a Number on its Overview. The list's Prefix plus that number is how the item shows up in grids, search, and exports.
If this item can't start until something else finishes, use Add Follow Up on the parent item to create the follow-on work. Follow-up items always live on the same list as their parent, so start from the parent rather than creating the item somewhere else and trying to link it afterward. The new item's start date is the parent's due date, and its due date is one week after that. You'll still pick a template — Select Template — the same way you do for a regular item. The linked parent shows as Follows on the child, and the parent lists its Follow-up items.
Pro Tip: Write the title the way you'd say it out loud on the radio. "Missing fire caulk at Level 2 north corridor penetrations" beats "Caulk issue" when someone is scanning forty items on a phone.
Let the description fill in the rest
Typing a full description and then re-entering the same facts into the title, location, and trade fields is busywork. Write Full Item Description the way you'd describe the condition to a foreman, then select Autofill from Description.
We read what you wrote and populate the location and the trade, and where the trade points clearly at one subcontractor we'll suggest the assignee too. The title only gets filled in if you left it empty, so if you already typed one it stays exactly as you wrote it. Everything stays editable — check it before you save, particularly the location, since a description that says "second floor east" can't tell which of two east rooms you meant.
Autofill needs a connection. In a basement or a dead zone the button is greyed out, and in some builds it loses its label and looks like a blank space next to Full Item Description. Nothing is broken — write the item out by hand, or save it and revisit once you're back on signal.
This is why it pays to dictate a rich description on your phone rather than typing a terse one. The more you say, the less you have to fill in.
Add evidence, comments, and drawing locations
Keep the evidence and the conversation on the item itself. The moment part of the story moves to text messages, the item stops being a record anyone can trust.
- Attach photos, videos, and files.
- Pull in existing project photos when the evidence is already in Photos.
- Use comments for updates, questions, and review context.
- Place or connect a List Item pin in the drawing viewer. That's the pin tool's name in the viewer toolbar; the record it creates is an item on one of your lists.
- Check Sheet Pins on the item to jump to the sheets it's associated with. The list grid's Sheet column shows the same sheets, so you can see where each item is pinned without opening it.
Write descriptions that hold up away from the drawing. A pin tells someone where the issue is, but the item still has to say what's wrong and what outcome you need — plenty of people will read it from a phone in a stairwell, not from the viewer.
For the drawing-viewer side of this workflow, see Working with Submittals and list items on drawings.
Keep it all on the item and the next person inherits the whole story instead of half of it.
Send reminders and manage notifications
Use the item's actions menu when an Open item needs follow-up or when you want to change the updates you receive.
- Send Reminder Notification appears on an Open item when you have permission to edit list items. The reminder targets the current assignee.
- This Item's Notification Settings controls your notifications for that item. It does not change the assignee, approver, subscribers, or their access.
- On web, notification settings are a primary item action. In the native layout, both the reminder and notification settings are in the item's actions menu.
If Send Reminder Notification is missing, confirm the item is still Open and that you have Add new punch list items, make changes to existing punch list items.
You often won't need the reminder, because the item already emails whoever has the ball — the person whose turn it is — the moment it lands with them, instead of holding it for their digest:
- A new item emails its assignee.
- Changing the assignee on an Open item emails the new assignee. Changing the approver on an item that's In Review or Rejected emails the new approver.
- Moving an item back to Open emails the assignee. Moving it to In Review or Rejected emails the approver. Completed emails no one right away.
Nobody is emailed for a change they made themselves, and drafts never send these emails. Everything else about the item follows your usual digest and Channels settings in My Account.
Assign, review, and report
Assign, follow, and filter list items
A hundred-item list is useless to everyone and urgent to no one. Roles and filters are how each person carves out the handful of items that are actually theirs.
Seven fields do most of the sorting:
- Assignee owns the corrective work.
- Approver decides whether the result is accepted.
- Subscribers follow the conversation without owning anything.
- Trade groups items by responsible scope.
- Location groups work by where it is.
- Sheet shows which drawing sheets the item is pinned to.
- Due Date drives what happens first.
If the list has custom fields, those names become extra columns on the grid. If the list hides a built-in field such as Trade or Due date, its column and filter leave the grid.
The Sheet column shows the first sheet number, plus a count like +2 when the item is pinned to more sheets. Select the sheet number to open the drawing viewer at that pin. Group by Sheet and an item pinned to three sheets appears under all three, so the group counts can add up to more than the number of items — that's each pin being counted, not a duplicate.
Stack filters for status, assignee, trade, location, sheet, and dates to find the items you need. Select items and use Bulk Actions to edit them with write access, or use the export actions for PDF and CSV reports. In compact layouts, check the header actions or ⋯ menu.
Location options come from the Locations block in Project Settings, where they're arranged in tiers — Tier 1 might be a building, Tier 2 a floor, Tier 3 a room. Trade options come from your organization's trades, which an Admin manages in the Trades panel under Organization Settings. If the choice you need isn't in either list, that's a settings change rather than something you can type in on the item.
Change many items at once
Select the items you want, open Actions, and pick a bulk edit under Bulk Actions:
- Edit Due Date...
- Edit Assignee...
- Edit Approvers...
- Edit Status...
- Edit Trade...
- Edit Subscribers...
This is how you reassign a whole trade's work when a sub changes, or push a set of due dates after a schedule slip.
The Edit Assignee... picker lists people from the companies on this project, not only people already on the Project Team. Inactive users, bidders, and super users stay out of that list.
Note: With nothing selected, a bulk action applies to every item currently showing — the labels change to Edit All Due Dates and so on to warn you. That's genuinely useful when you've filtered down to exactly the right set, and genuinely destructive when you haven't. Read the action label before you confirm: if it says "All," check your filters.
Pro Tip: Filter to your own name plus Open before a walk. That's your list for the morning, and it's usually a lot shorter than it looks from the full grid.
Filtered down this way, a hundred-item list becomes the six things you can actually close today.
Move a list item through its statuses
An item's status is how everyone else knows whose turn it is. Keeping it current is the difference between a list that closes itself out and one that stalls with each side waiting on the other.
Open → In Review → Completed
- Open: Work is active, or it's been sent back for another pass.
- In Review: The assignee says it's ready to inspect.
- Completed: The approver accepted the result.
- Rejected: The review didn't accept it. Reopen it when more work is needed.
Leave the item Open while the correction is underway. Once the work is done, add a photo or two and a comment explaining what changed, then move it to In Review — that's the signal to the approver that it's their turn.
The approver walks the condition, checks it against the evidence, and marks the item Completed if it's accepted or Rejected if it isn't. Rejected work goes back to Open for another cycle. Nothing is lost, and the comment history shows why it came back.
Note: Completing an item isn't the same as photographing it. Save Completed for work that's genuinely been accepted through your project's review process, or your closeout reports will say things your walk won't back up.
Who can do what here depends on access. Anyone with Add new punch list items, make changes to existing punch list items can move items between any of the active statuses. Someone with only Move punch list items to review can hand off work assigned to them or anyone at their company, and no more. Status is also completely separate from whether the list is archived.
Kept current, the status column tells the whole team whose turn it is without anyone having to ask.
Why can't I mark my own item Completed?
Because move-to-review and approval are deliberately different permissions. You can tell the approver the work is ready; they decide whether it passed.
What happens to a rejected item?
It returns to Open for another correction cycle. All of its comments, photos, and history stay attached, so the next pass has the full context of why it came back.
Does archiving a list change its items' statuses?
No. Archiving is about where the list appears, not about the state of the work inside it.
Export a list
Export when you need to hand a list to someone who doesn't log in — a distribution for the trades, a record of a walk, or a package for turnover.
- Open the list.
- Apply filters first if the report should only cover part of the list.
- Open Actions and choose Download as PDF under Download As.
- In the Export Punch List PDF dialog, decide whether to include item photos.
- Generate and download the PDF.
You'll get titles, due dates, statuses, assignees, trades, the sheets each item is pinned to, custom fields (including section entries), non-image attachments, and optionally the photos. Built-in fields the list hides are left out. Since the export follows whatever filters are active, take one look at the list on screen before you generate — that's your table of contents.
Note: Before you send an export outside Constructable, scan it for items that were restricted inside the platform. The PDF has no permissions once it leaves.
Under Download As you'll also find Download as CSV, which is the one you want when the list is headed for a spreadsheet. It carries the grid's columns — title, status, trade, location tiers, due date, assignee, approver, description — and no photos. Use the PDF when the pictures are the point and the CSV when the sorting is.
Either way, someone who will never log in gets the same list you're looking at.
Report across every list on the project
An export covers one list. When the question spans all of them — everything still open, everything assigned to one sub, everything overdue in one area — use List Report instead. On desktop, Open List Report in the Lists header takes you straight there; it's also under Management Tools → Reports. It puts every list item on the project in one grid you can group by List, List Type, Trade, Assignee, Status, Due Date, or location, and it leaves out drafts and templates. All Lists in Global Reports does the same thing across every project. Both reports work on the Field package, too — they don't need Project Management. See Use the List Report.
Post QR codes at the locations themselves
Download Location QR Codes produces a printable PDF with one code per page, each captioned Scan to open items and actions for this location. Tape them up at the door and anyone with the app can scan straight into that location's items instead of hunting through a list on a phone. The button is on the Lists header on desktop, and in the header's ⋯ menu in the app.
When you add an item from that location menu — or after scanning a code — Save closes the sheet and opens that list filtered to the location, the same view as View items at this location. In the app, the item you just saved is highlighted in green for a few seconds so you can confirm it landed. To log the next one at the same spot, select Add Item there and pick a template; the scanned location is filled in unless the template carries a location of its own.
Note: This exports codes for every location in the project, not just the ones used in the list you're looking at. Print the pages you need.
Why does my export have fewer items than the list?
Exports respect your active filters. Clear them and export again if you meant to include everything.
Can I export from my phone?
Yes. Open the actions or ⋯ menu and choose Export all to PDF, Export selected to PDF, or Download as CSV. Apply filters and select items first when you need a specific group.
Archive or delete lists and items
Archiving and deleting sound similar and aren't. Archiving tidies a finished list away and keeps every bit of it. Deleting destroys it. Almost always, you want to archive.
All four of these live on the ⋯ button on the list's row.
- Archive List pulls the list out of the open group and stops new-item work, while keeping it available under Archived.
- Unarchive List brings it back into active use, exactly as it was.
- Delete List deletes the list and every item in it. The confirmation says so, and there's no undo.
- Delete Item deletes a single item, along with its comments, photos, and history. Also no undo.
Archiving is the natural end of a list's life. The walk is done, the record survives, and your Lists page stops showing you work from three phases ago. An archived list also drops out of the sidebar shortcuts, which is half the point.
Note: Before deleting an item, look at what's hanging off it — comments, attachments, drawing pins, and anything marked as follow-up work. If other items follow this one, the confirmation asks whether to Delete All Follow-up Items or Remove Follow-up Links. Read that choice before you confirm.
Can I get an archived list back?
Yes. Open Archived and unarchive it. Everything comes back as it was.
Should I delete a list once the project closes out?
Usually not. Archive it instead — closeout is exactly when you want the record to still exist, and a Closeout package pulls its Punch List section from lists that are still there.